background image

Summary of Contents for 917.28646

Page 1: ...rom previously built engines Before start the you engine read and understand this Owner s Manual IMPORTANT Read and follow all Safety Rules and Instructions before operating this equipment For answers to your questions about this product Call 1 800 659 5917 Sears Craftsman Help Line 5 am 5 pm Mon Sat SEARS ROEBUCK AND CO HOFFMAN ESTATES IL 60t79 U A Visit our Craftsman website www sear com craftsm...

Page 2: ...use of operator abuse including but not limited to damage caused by towing objects beyond the capability of the riding equipment impacting objects that bend the frame or crankshaft or over speeding the engine Repairs necessary because of operator negligence including but not limited to electrical and mechanical damage caused by improper storage failure to use the proper grade and amount of engine ...

Page 3: ...e Be sure the area is clear of bystand ers before operating Stop machine if anyone enters the area Never carry passengers Do not mow in reverse unless abso lutely necessary Always look down and behind before and while backing_ Never direct discharged material toward anyone Avoid discharging material against a wall or obstruction Material may ricochet back toward the operator Stop the blades when c...

Page 4: ... in the watchful care of a respon sible adult other than the operator Be alert and turn machine off if a child enters the area Before and while backing look behind and down for small children Never carry children even with the blades shut off They may fall off and be seriously injured or interfere with safe machine operation_ Children who have been given rides in the past may suddenly appear in th...

Page 5: ...or wear gloves and use extra caution when servicing them Check brake operation frequently Ad just and service as required Maintain or replace safety and instruc tion labels as necessary Be sure the area is clear of bystand ers before operating Stop machine if anyone enters the area Never carry passengers Do not mow in reverse unless abso lutely necessary Always took down and behind before and whil...

Page 6: ...al laws apply on federal lands A spark at rester for the muffler is available through your nearest Sears service center See REPAIR PARTS manual REPAIR PROTECTION AGREEMENTS Congratulations on making a smart pur chase Your new Craftsman product is designed and manufactured for years of dependable operation But like all products it may require repair from time to time That s when having a Repair Pro...

Page 7: ...knut 3 8 16 5 Large Retainer Springs 7 16 2 Small Retainer Springs 5 16 5 t 3 16 O D Washers Mower 1 314O D Washers 1 Front Link _y _ t Anti Swar Bar _ _ 2 Rear Lift Link Assemblies 1 Oil Drain Tube For Future Use 2 Keys Mowerl _t_ Sheet _ llnstalll S_ 7 ...

Page 8: ...t 3_ Remove mower and packing materials 4 Check for any additional loose aprts or cartons and remove CHECK BATTERY 1 Lift hood to raised position NOTE If this battery is put into service after month and year indicated on label L label is located between terminals charge battery for minimum of one hour at 6 0 amp See BATTERY in Maintenance section of this manual for charging instructions NOTE You m...

Page 9: ...arts bag assemble front wheel to mower as shown Tighten securely CAUTION Lift lever is spring loaded Have a tight grip on lift lever lower it slowly and engage in lowest position 2 Turn steering wheel to the left as far as it will go and position mower on right side of tractor with deflector shield to the right i 3 Remove plastic tie securing belt bring belt forward and check belt for proper routi...

Page 10: ...SIDESUSPENSION ARMS A TO CHASSIS Positionhole in armoverpin B on outsideof tractor chassis and secure with washer and retainerspring_ 7_ Repeat on opposite side of tractor ATTACH REAR LIFT LINKS C Insert rod end of link assembly into hole in tractor lift shaft suspension arm L and pivot link down to mower Lift rear corner of mower and position slot in link assembly over pin on rear mower bracket D...

Page 11: ... CAUTION Belttension rod is spring loaded Have a tight grip on rod and engage slowly 16 Raise attachment lift lever to highest posi tion 17 If necessary adjust gauge wheels before operating mower as shown in the Opera tion section of this manual 02937 1 ...

Page 12: ... and tightened securely All tires are properly inflated For shipping purposes the tires were overinflated at the factory Besure mowerdeckis properlyleveledside to side front to rearfor best cutting results Tires must be properly inflated for leveling Check mower and drive belts Be sure they are routed properly around pulleys and inside all belt keepers z Checkwiring Seethat all connectionsare stil...

Page 13: ...uld result in serious injury or death_ The safety alert symbol is used to identify safety inform ation about hazards which can result tn death serious injury and or property damage DANGER Indicates a hazard which if not avotded will result In death or serious Injury WARNING indicatesa hazard whtch If not avoided could result In death or serious Injury CAUTION indicates a hazard which ifnot avoided...

Page 14: ...ENT CLUTCH LEVER Used to engage the mower blades or other attachments mounted to your tractor F IGNITION SWITCH Used for starting and stopping the engine G REVERSE OPERATION SYSTEM ROS ON POSITION Allows opera tion of mower or other powered attach ment while in reverse H LIGHT SWITCH Turns the head lights on and off J CRUISE CONTROL LEVER Used to set forward movement of tractor at desired speed wi...

Page 15: ...VE To stop ground drive depress brake pedal all the way down ENGINE Move throttle control D between half and full speed fast position NOTE Failure to move throttle control between half and full speed fast posF tion before stopping may cause engine to backfire Turn ignition key F to STOP position and remove key Always remove key when leaving tractor to prevent unau thorized use Never use choke N to...

Page 16: ...orward drive pedal K depressed to desired speed pull cruise control lever J up and hold while lifting your foot off the pedal then release the lever To disengage the cruise control depress the brake pedal or tap on forward drive pedal TO ADJUST MOWER CUTTING HEIGHT The position of the attachment lift lever A determines the cutting height Put attachment lift lever in desired cut ting height slot Sl...

Page 17: ...blades by engaging at tachment clutch control TO STOP MOWER BLADES disengage attachment clutch control CAUTION Do not operate the mower without either the entire grass catcher on mowers so equipped or the deflector shield S in place REVERSE OPERATION SYSTEM ROS Your tractor is equipped with a Reverse Operation System ROS Any attempt by the operator to travel in the reverse direc tion with the atta...

Page 18: ...se when towing Too heavy of a load while on a slope is dangerous Tires can lose traction with the ground and cause you to lose control of your tractor SERVICE REMINDER HOUR METER Service reminder shows the total number of hours the engine has run and flashes to indicate that the engine or mower needs servicing When service is required the service reminder will flash for two hours To service engine...

Page 19: ...eral attempts push choke control in wait a few minutes and try again If engine still does not start pull the choke con trol out and retry WARM WEATHER STARTING 50 F and above 7 When engine starts slowly push choke control in until the engine begins to run smoothly If the engine starts to run roughly pull the choke control out slightly for a few seconds and then continue to push the control in slow...

Page 20: ...le control to half l 2 speed Disengage parking brake 8 Drive tractor forward for approximately five feet then backwards for five feet Repeat this driving procedure three times Your transmission is now purged and now ready for normal operation MOWING TIPS Tire chains cannot be used when the mower housing is attached to tractor Mower should be properly leveled for best mowing performance See TO LEVE...

Page 21: ...perator abuse or negligence To receive full value from the warranty operator must maintain tractor as instructed in this manual Some adjustments will need to be made periodically to properly maintain your tractor At least once a season check to see if you should make any of the adjustments described in the Service and Adjustments section of this manual At least once a year you should replace the s...

Page 22: ... running and the attachment clutch is engaged any at tempt by the operator to leave the seat should shut off the engine The attachment clutch should never op erate unless the operator is in the seat CHECK REVERSE OPERATION ROS SYSTEM When the engine is running with the ignition switch in the engine ON posi tion and the attachment clutch engaged any attempt by the operator to drive in reverse shoul...

Page 23: ...pressure sprayer to clean cooling fins TRANSAXLE PUMP FLUID The transaxle was sealed at the factory and fluid maintenance is not required for the life of the transaxle_ Should the trans axle ever leak or require servicing contact your nearest Sears or other qualified service center_ V BELTS Check V belts for deterioration and wear after 100 hours of operation and replace if necessary The belts are...

Page 24: ... months or every 25 hours of operation whichever occurs first Service paper cartridge more often under dusty conditions Replace the paper cartridge annually or after every 100 hours of operation TO SERVICE CARTRIDGE Replace a dirty bent or damaged car tridge Handle new cartridge carefully do not use if the rubber sea is dam aged NOTE Do not wash the paper cartridge or use pressurized air as this w...

Page 25: ... fuel flow to carbu retor replacement is required 1 With engine cool remove filter and plug fuel line sections 2 Place new fuel filter in position in fuel line with arrow pointing towards carbu retor 3 Be sure there are no fuel line leaks and clamps are properly positioned 4 Immediately wipe up any spilled gaso line amp CLEANING Clean engine battery seat finish etc_ of all foreign matter Keep fini...

Page 26: ...nnect front link E from mower remove retainer spring and washer 6 Go to either side of mower and discon nect mower suspension arm A from chassis and rear lift link C from rear mower bracket D remove retainer springs and washers 7 Go to other side of mower and discon nect the suspension arm and rear lift link CAUTION After rear lift links are disconnected the attachment lift lever will be spring lo...

Page 27: ...osition_ Position any blade so the tip is pointing straight forward Measure distance B to the ground at front and rear tip of the blade NOTE Each full turn of adjustment nut will change mower height about 3 16 4 Test your adjustment by mowing some uncut grass and visually checking the appearance Readjust if necessary until you are satisfied with the results PRECISION SIDE TO SIDE ADJUSTMENT 1 With...

Page 28: ...mission dis engaged position Pull freewheel con trol out and into the slot and release so it is held in the disengaged position The rear wheels must lock and skid when you try to manually push the tractor forward tf the rear wheels rotate then the brake needs to be serviced Contact a Sears or other qualified service center FRONT WHEEL TOE IN CAMBER Your new tractor front wheel toe in and camber is...

Page 29: ...grooves 3 Reassemble RH and LH mandrel covers Securely tighten all screws 4 Engage belt tension rod on locking bracket _ CAUTION Belt tension rod is spring loaded Have a tight grip on rod and en gage slowly 5 Raise attachment lift lever to highest position Belt Routing L R Mandrel Cover Belt Tension Rod Disengaged Position X Locking Bracket Electric Clutch Pulley R H Mandrel Cover R R_ Mandrel Idl...

Page 30: ...ure belt is inside the belt keeper 4 install belt on centerspan idler E 5 Install belt through stationary idler C and clutching idler D 6 Reinstall anti rotation link B on right side of tractor Tighten securely 7 Reconnect clutch harness A 8 Make sure belt is in all pulley grooves and inside all belt guides and keepers 9 Install mower See TO INSTALL MOWER in this section of manual TO START ENGINE ...

Page 31: ...urely Slide terminal cover C over terminal 5 Connect BLACK grounding cable to negative battery terminal with re maining hex bolt and keps nut Tighten securely 6 Close hood 2 Negative Black Cable Red Cable TO REPLACE HEADLIGHT BULB 1 Raise hood 2 Remove bulb holder from the hole in the backside of the grill 3 Replace bulb in holder and install bulb holder securely back into the hole in the backside...

Page 32: ...oo tight NOTE The carburetor on this engine is low emission It is equipped with an idle fuel adjusting needle with a limiter cap which allows some adjustment within the limits allowed by the cap Do not attempt to remove the limiter cap The Iimiter cap cannot be removed without breaking the adjusting needle 1 Be sure you have a clean air filter and the throttle control cable is adjusted properly se...

Page 33: ...tem parts such as carburetor fuel hose or tank during storage Also alcohol blended fuels called gasohol or using ethanol or methanol can attract moisture which leads to separation and formation of acids during storage Acidic gas can dam age the fuel system of an engine while in storage Empty the fuel tank by starting the en gine and letting it run until the fuel lines and carburetor are empty Neve...

Page 34: ...wiring 7 Faulty ignition switch 8 Faulty solenoid or starter 9 Faulty operator presence switch es 1 Weak or dead battery 2 Corroded battery terminals 3 Loose or damaged wiring 4 Faulty solenoid or starter 1 Cutting too much grass too fast 2 Throttle in CHOKE position 3 Build up of grass leaves and trash under mower Dirty air filter Low oil level dirty oil 9 Check all wiring 1o See To Adjust Carbur...

Page 35: ... and trash under mower Bent blade mandrel Clogged mower deck vent from build up of grass leaves and trash around mandrets 6 Clean and regap or change spark plug 7 Replace fuel filter 8 Empty fue tank and refill tank with fresh clean gasoline 9 Empty fuel tank and carbure tor refill tank with fresh gas oline and replace fuet filter 10 Connect and tighten spark plug wirer 11 Clean engine air screen ...

Page 36: ...ewheel control in disengaged position 2 Motion drive belt worn damaged or broken 3 Air trapped in transmission during shipment or servicing Engine throttle control not set between half and full speed fast position before stopping engine CORRECTION 1 Remove obstruction Replace mower drive belt 3o Replace idler pulley 4 Contact a Sears or other qualified service center 3 install belt on engine pulle...

Page 37: ...reater than 15 degrees Make turns gradually to prevent tipping or loss of control Exercise extreme caution when changing direction on slopes 1 Fold this page along dotted line indicated above 2 Hold page before you so that its left edge is vertically parallel to a tree trunk or other upright structure 3 Sight across the fold in the direction of hill slope you want to measure 4 Compare the angle of...

Page 38: ... del motor_ Las reparaciones que sea preciso hacer debido a la negligencia del operador entre las que se incluyen de manera no taxativa los dafios el_ctricos y mec nicos por guardar la unidad de manera incorrecta la no utilizaci6n del grado y la calidad apropiados de aceite para motor el no mantener el piso libre de restos y escombros que puedan entrar en combusti6n o el no mantener el equipo de a...

Page 39: ...ado hacia nadie Evitar descargar materiat contra paredes u obstrucciones El material podria rebotar hacia el operador Parar tas cucHlas cuando se pasan superficies de grava 39 No hacer funcionar la m quina sin el captador de hierba entera la protecci6n de descarga u otros dispositivos de seguridad en su lugar y en buenas condiciones Ralentizar antes de girar Nunca dejar una m_quina encendida sin v...

Page 40: ...ancho dise _ado para remolcar Enganchar el equipo o remolcar s61oen et punto dispuesto el efectoo Seguir las recomendaciones del productor con respecto a los t mites del equipo per remolcar y el remolque en pendientes Nunca permitir qua nit_os u otras personas est6n dentro del equipo per remolcar En pendientes el peso de equipo remolcado puede causer 18p_rdida de tracci6n y la p rdida de control V...

Page 41: ...levar pasajeros No cortar marcha atr s al no ser absolu tamente necesado_ Mirar siempre abajo y delante mientras se precede atr s Nunca llevar niSos incluso si hay las cuchillas apagadas Podrian caer y herirse sedamente o interferir con el funcionamiento seguro de la m quina os niSos qua se han Ilevado precedentemente pueden aparecer de pronto en el rea de corte per otro paseo y ser atropellades o...

Page 42: ... cercano tiene disponibte amortiguadores de chispas para el silenciador_ Vea la secci6n de Partes de Repuesto en el manual Ingles del duefio ACUERDOS DE PROTECCION PARA LA REPARACION Congratulaciones per su buena compra Su nuevo producto Craftsman est diser_ado y fabricado pare funcionar de mode fiable per muchos aries Pero come redes los productos puede necesitar alguna reparaci6n de tanto entant...

Page 43: ... Tuerca de Seguridad 3 8 16 Segadora 5 Resorte de Retenci6n COJ I 3 40 D Arandeta Antioscilacl6n 2 Resorte de Retenci6n 5 1 3 16 OoD Arandela _ _ 1 Montaje de la pieza __ de union ieantera _45_ 2 Rear Lift Link Assemblies 2 Llaves Hoja de pendiente 1 Tubo de desag_ie 43 ...

Page 44: ... y los materiales del embalage 4 Revise si hay partes sueltas adicionales o cartSn y remu_valas VERIFIQUE LA BATERIA 1 Levante el asiento a la posiciSn elevada AVlSO Siesta bateria esta utilizada despu_s del rues y aSo indicado sobre la etiqueta L la etiqueta que se encuentra entre los terminales cargue la bateria por un mlnimo de una hora a 6 I0 amps Vea Bateria en la secciSn de Man tenimento de ...

Page 45: ... fuera de fa plataforma_ g Actuar sobre el freno para parar el tractor y colocar e freno de mano 10 Girar la llave de encendido en la posici6n STOP Continuar con las siguientes instrucciones MONTE RUEDA DELATENTERA DE LA SEGADORA I Utilizando un bul6n curvo una arandela y una tuerca de sujeci6n fije la rueda delantera de Ia cortadora como se ilustra en la figura Aj_lstela bien INSTALE LA SEGADORA ...

Page 46: ...figure g_ 1e 11 Realice el mismo procedimiento en el otro lado del tractor Haga girar el votante pare que las ruedas _ueden bien derechas IJE LA PIEZA DE UNION ANTERIOR E Trabaje por el lado izquierdo del tractor Introdu zca el extremo de la barra de la pieza de union por el orificio anterior de la barra de suspension anterior del tractor F y suj_telo por medio de un resorte de contenci6n G a trav...

Page 47: ...n la barra de sujeci6n L _ CUIDADO La barra de tension de la correa funciona a resorte Suj_tela con fuerza y p6n gala despacio 16 Suba la palanca elevadora a la posici6n de m s arriba 17 Si es necesarie ajuste las rueditas del calibre antes de poner en funcionamiento la cortadora como se itustra en el capJtulo de Manejo de este manual 02937 47 ...

Page 48: ...as en forma adecuada Para fines de envio tas Ilantas se tnfiaron demasiado en la f brica Aseg0rese qua el conjunto segador est_ nivelado en forma adecuada de lado a lado y desde adelante hacia atr s para obtener los mejores resuttados en el torte Las llantas tienen qua estar tnfladas en forma adecuada para la nivetaci6n Revise las correas de impulsi6n y de la segadora AsegOrese que recorran el pas...

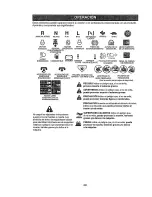
Page 49: ...de la8 reglas de 8egurldad _1_ PEL1GRO indies un peltgro que si no se evita provoca muerte o leslones graves ADVERTENClA Indlca un petlgro que sl no se evlta puede provocar muerte o leslones graves PRECAUCl6N indEcaun peligro que sl no se evita puede provocar leslones Ilgeras o moderadas A No segu r las slgulentes lnstrucctones puede provocar herldas o muerte Los sfmbolos de aviso de segurldadse u...

Page 50: ...LANCA DEL EMBRAGUE DEL AC CESORIO Se usa pare enganchar las cuchillas segadoras o los dem s accesorios montados en su tractor F INTERRUPTOR DE IGNIClON Se usa pare hater arrancer o hacer parar el motor G SISTEMA DE FUNCIONAMIENTO HAC1A ATRAS ROS en poslclbn ON Permite la operaci6n del conjunto segador o otro acceso rio accionado mientras queen rev_s H INTERRUPTOR DE LA LUZ Enciende y apaga las tuc...

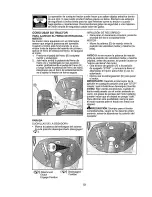
Page 51: ...a la patanca del embrague del acceso rio a ta posici6n desenganchado disengaged i _ i _r _ t Attachment _ Clutch Engage Position _ Disengaged Position IMPULS16N DE RECORRIDO Para parar el mecanismo impuisor presione el pedal def freno completamente MOTOR Mover la palanca D de mando entre la posici6n de velocidad media y m xima r pida AVISO Si no se mueve la palanca de mando entre la posici6n de ve...

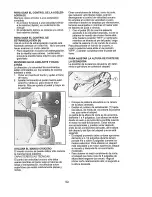
Page 52: ...ero mientras el tractor se desplaza por etevaciones terrenos escarpados o mientras el tractor est6 en labores de poda o virandoo 1 Con el pedal K de marcha adelante apretado ala velocidad deseada mover la palanca de mando de crucero hacia adeF ante haste la posici6n SET y manteneda mientras se levanta el pie del pedal luego soltar la palanca J de mando de crucero Pare desconectar el mando de cruce...

Page 53: ...a con el control de levanta miento del accesorio 3 Haga arrancar las cuchillas de la segadora enganchando el control del embrague del accesorio PARA PARAR LAS CUCHILLAS DE LA SEGA DORA desenganche el control del embrague del accesorio _I PRECAUCl6N No opere la segadora sin ya sea el recogedor de c_sped completo en las segadoras asi equipadas o con la protecci6n contra la descarga S en su lugar FUN...

Page 54: ...Remolque solamente los accesorios recomen dados y especificados por el fabricante det tram tor Use sentido com_n cuado este remolcando Las cargas pesadas cuando este yendo sobre una pendiente son pe ligrosas las Ilantas pu eden perder su traccion con el terreno y pueden ocasionar que pterda el control de su tractor MECANISMO DE AVISO DE SERV1CtO CRONOMETRO El mecanismo de aviso de servicio muestra...

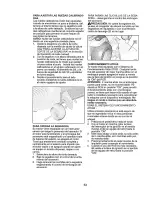
Page 55: ...rrancar un motor caliente el use del control de la estrangu laci6n puede que no sea necesario AVISO Antes de arrancar lea los instruccio nes siguientes para el arranque en clima fr o y temptadoo 6 Inserte la Ilave an ta ignici6n y gire la Ilave en el sentido que glran las manillas del reloj a la posici6n de arranque start y suelte la llave tan pronto come arranque e motor No haga funcionar el arra...

Page 56: ...l motor Despu_s que este corriendo el motor mueva el control de estranguleciSn media 1 2 velocidad Quitar el freno de mano 8 Conduzca su tractor hacia adelante durante aproximadamente cinco pies y entonces hacia marcha atr s cinco pies 50 cm o Repita este proceso tres 3 veces Su transmisiSn esta ahora purgado y dispuesto pare la operaciSn normal CONSEJOS PARA SEGAR No se pueden user las cadenas pa...

Page 57: ...dor Para recibir rode e valor de la garantia el operador tiene que mantener la segadora segSn los instruccionesdescritas en este manual Hay algunos ajustes que se tienen que hacer en forma periSdica para poder mantener su tractor adecuadamente AI menos una vez coda estaciSn comprobar sles necesario efectuar los adjustes descfitos en las secciones de Servicio y Ajustes de este manual Una vez alaho ...

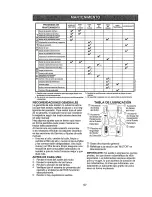
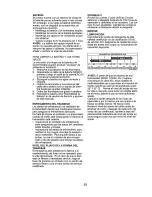
Page 58: ...amiento primero apagar el motor Cuando el motor esta en marcha y el embra gue del accesorio est conectado cualquier tentative del operador de abandoner el asiento apagar el motor El embrague del accesorto no tendria que funcionar nunce si el operador no est en su asiento VF_RIFI_Z StSTEMA FUNCIONAMIENTO ATRAS ROS Cuando el motor est _ en marcha con el in terruptor de Itave en posici6n de motor ON ...

Page 59: ...r est_n intactas y limpias Inspecctone las aletas de enfriamiento pare verificar si hay mugre recortes de c_sped u otros materiales Para impedir daSos alas juntas no use un rociador de aire compre sado o de alte presl6n pare limplar las aletas de enfriamiento NIVEL DEL FLUIDO DE LA BOMBA DEL TRANSEJE El transeje ha side sellado en la f brica y el mantenimiento del fluido no es necesario pare la vi...

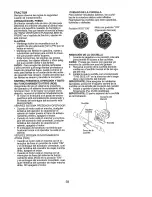
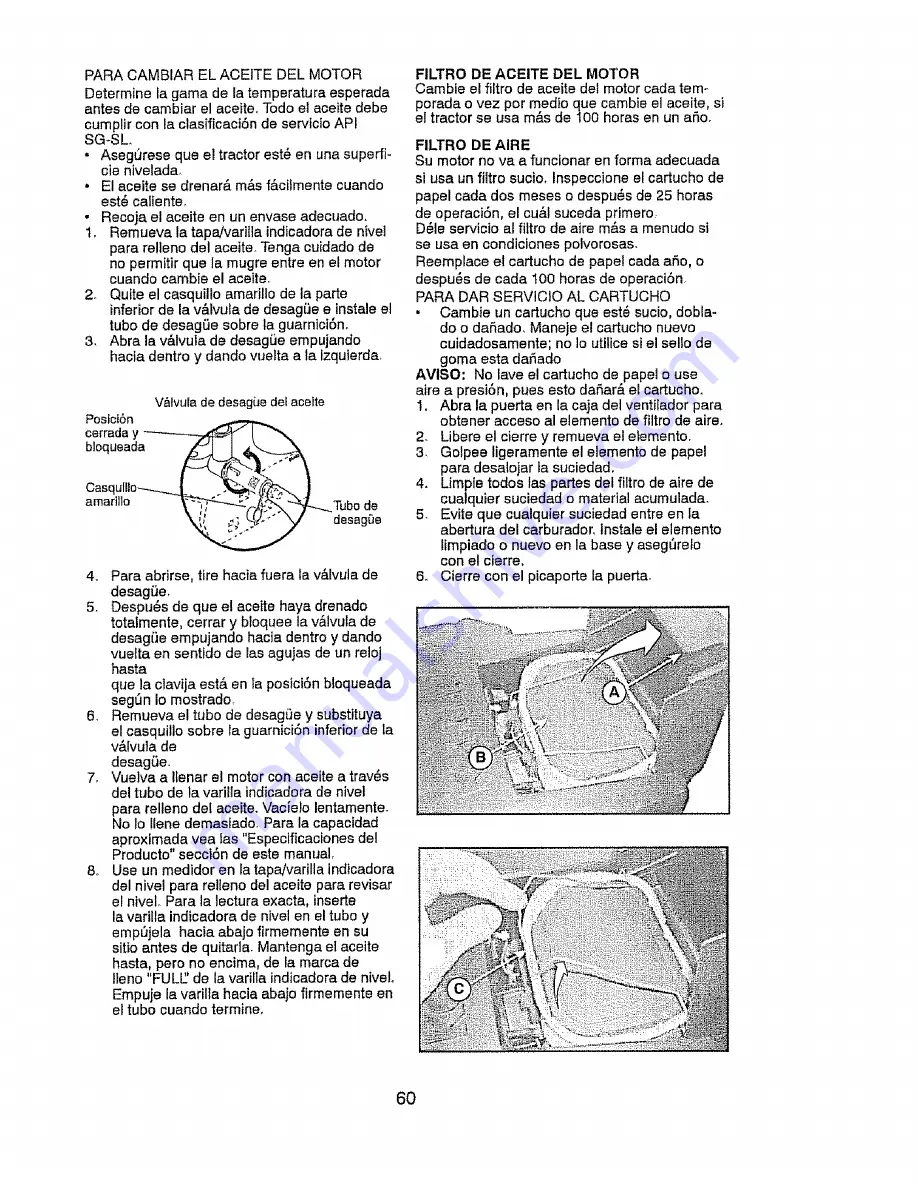
Page 60: ...edidor en la tapa varilla indicadora del nivel para relteno del aceite para revisar el niveL Para la lectura exacta inserte la varilla indicadora de n_velen el tube y empDjela hacia abajo firmemente en su sitio antes de quitada Mantenga el aceite basra pete no encirna de la marca de llano FULE de la varilla indicadora de nive o Empuje la varilla hacta abajo firmemente en el tube cuando termine_ FI...

Page 61: ...e siega o despu6s de cada 100 horas de operaci6n to que suceda pdmero El tipo de bujla y el ajuste de la abertura aparecen en ES PECIFICACIONES DEL PRODUCTO secci6n de este manual FILTRO DE COMBUSTIBLE EN LINEA El filtro de combustible debe cambiarse una vez cada temporada Si el filtro de combustible se tapona obstruyendo el flujo del combustible hacia el carburador es necesario cambiario 1 Con el...

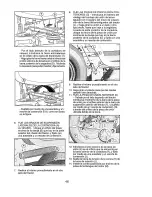
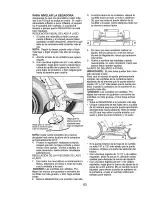
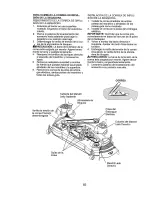
Page 62: ...la pieza de uniSn anterior E de la cortadora retire el resorte de contenci6n y la arandela 6 Per uno de los lados de la cortadora desco necte el brazo de suspensi6n de la cortadora A del chasis y la pieza de uni6n posterior C de la barra posterior de la cortadora D retire los resortes de contenci6n y las arandelas 7 Por el otro tado _F_T_ _ 67a desconecte el brazo de suspensi6n y Ia pteza de uni6n...

Page 63: ...s de la cortadora deben ajustarse de tal manera que la punta anterior quede 1 8 a 1 2 m s abajo que la punta pos terior cuando ta cortadora se encuentre en su posici6n m s alta CUIDADO Las cuchillas son afiladas_ Pro t_jase las manos con guantes o envuelva tas cuchiltas con tela gruesa o bien haga ambas cosas Suba la SEGADORA a la posici6n m s alta Ubique cualquiera de las hojas de la cuchilla de ...

Page 64: ...te el tractor manualmente Si las ruedas traseras giran es necesario ajustar et freno o sustituir las zapataso IMPRESION INCLINACION DE LAS RUE DAS DELANTERAS La imprestSne inclinaci6n de fas ruedas del anteras de su nuevo tractor vienen asi de f_ bri ca y son normales La impresiSn y la tnclinaciSn de las ruedas delanteras no son reguiables En caso que se produzca algdn dafio que afecte la impresio...

Page 65: ...o ambas pofeas del mandrino y todas las poleas guia INSTALACION DE LA CORREA DE IMPUL SION DE LA SEGADORA t Instalar la correa atrededor de ambas poleas del mandrino y alrededor de las poleas gu a como mostrado 2 lnstalar la correa en la polea del embrague el_ctrico IMPORTANTE Controlar que la correa gire correctamente en todas las ranuras de la polea del cortac6spedo 3 Volver a montar las tapas d...

Page 66: ...Jate la correa hacia la parte de adelante de tractor y p sela alrededor del embrague el_ctrico y per la polea del motor G 3 Jate la correa hacia la parte de atr s del tractor_ Con mucho cuidado h_ gala descender pas ndola alrededor de la polea de entrada del eje F _ Cercl6rese de que est_ dentro del dispositivo de protecci6n o guardacorrea 4 Coloque la correa en el pi56n central E 5 Pase la correa...

Page 67: ...Primero conecte el cable de la bateria ROJO B con el terminal positivo con el perno hexagonal y la tuerca seg_n se muestra Apri6telos en forma segura Deslize fa cubierta termlnal C sobre el terminal 5 Conecte el cable de conexi6n a tierra NEGRO al terminal negativo con el perno hexagonal y la tuerca que queden Apri_teios en forma segura 6 Sierre el capo Pos_tlvo Cable rojo _ Negative Cable negro l...

Page 68: ...te del combustible en vacio con un capu chon imitador e cua permite ajustes limitados No intente remover el capuch6n limitador EI capuchon limitadoroEl capuch6n limitador No puede set removido sin qua se rompa la aguja de ajuste 1 Asegt_rese que tenga un filtro de aire limpio y qua et cable de control de la aceleraciSn est_ ajustado en forma adecuada vea Io anterior 2 Haga arrancar el motor y perm...

Page 69: ...l combustibles mezclados con alcohol conocido cemo gasehol o que tienen etanol o metanol pueden atraer humedad to _ue conduce ala separaci6n y ala formaci6n e acudos durante elalmacenamiento La gasolina acidica puede dafter el sistema de combustible de un motor durante et periodo de almacenamiento Vaciar el dep6sito del carburante poniendo en marcha el motor y dej ndolo funcionar haste que et carb...

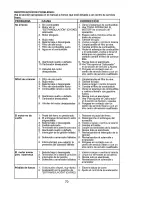
Page 70: ... EL MOTOR en la secci6n de operaci6n 3 Espere varios minutos antes de tratar de arrancaro 4 Cambie Ia bujiao 5_ Vue va a cargar o cambie la bateria_ 6 Limpie cambie el filtro de aire 7 Cambie el filtro de combustible 8 Vaciar el estanque de combustible y el carburador vuelva a Ilenar el estanque con gasolina nueva cambie cambie el filtro de combus tible 9 Revise todo el alambrado 10 Vea Para ajust...

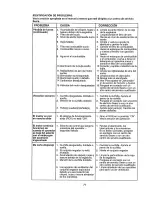
Page 71: ... CORRECCION 3 Limpie la parle inferior de la caja de la segadora 4 Limpte cambie el filtro de airs 5 Revise e nivel de aceite cambie el aceite 6 Limpie y vuelva a ajustar la abertura e cambie la bujfa 7 Cambie el fiitro de combustible 8 Vaciar el estanque de combustible y vuelva a Ilenarlo con gasolina nuevao 9 Vaciar el estanque de combustible y e earburador vuelva a tlenar el estanque con gasoli...

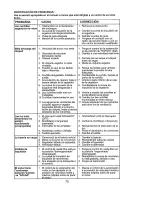
Page 72: ... de rueda libre est en la posici6n desenganchado disengaged 2 La correa de imputsi6nde impulsi6n de movimiento 3 Aire atrapado en la transporte o el servicio El control de la aceleraci6n de motor no fue ajustado en la posici6n de velocidad media y m_xima r pida antes de parar el motor 2 Cambie la correa de impulsi6n de la segadora 3 Cambie la polea de guia 4 Pongase en contacts con un centre de se...

Page 73: ...73 ...

Page 74: ...74 ...

Page 75: ...cortar pendientes mayores de 15 grados Hags los I vtrajes graduatmente pars evitar votcarse o is pe rdida de control I Tenga mucho cuidado cuando cambie de direcci6n en tas pendientes I 1 Ptegar esta pagfna a Io largo de Is tines punteada arriba indicada 2 Tener ta pagina ante de si m_smos de modo que su borde izquierdo sea vertical paralelo al tronco del arbol u otra estructura vertical 3 Mirar a...

Page 76: ... lawn equipment and electronics call or go on fine for the nearest Sears Parts and Repair Center 1 800 488 1222 Anytime day or night USA only www sears com To purchase a protection agreement UoSA or maintenance agreement Canada on a product serviced by Sears 1 800 827 6655 u SA 1 800 361 6665 Canada Para pedir servicio de reparacl6n a domicilio y para ordenar piezas 1 888 SU HOGAR 1 888 784_427 Au...

Reviews: