background image

Summary of Contents for 917.299691

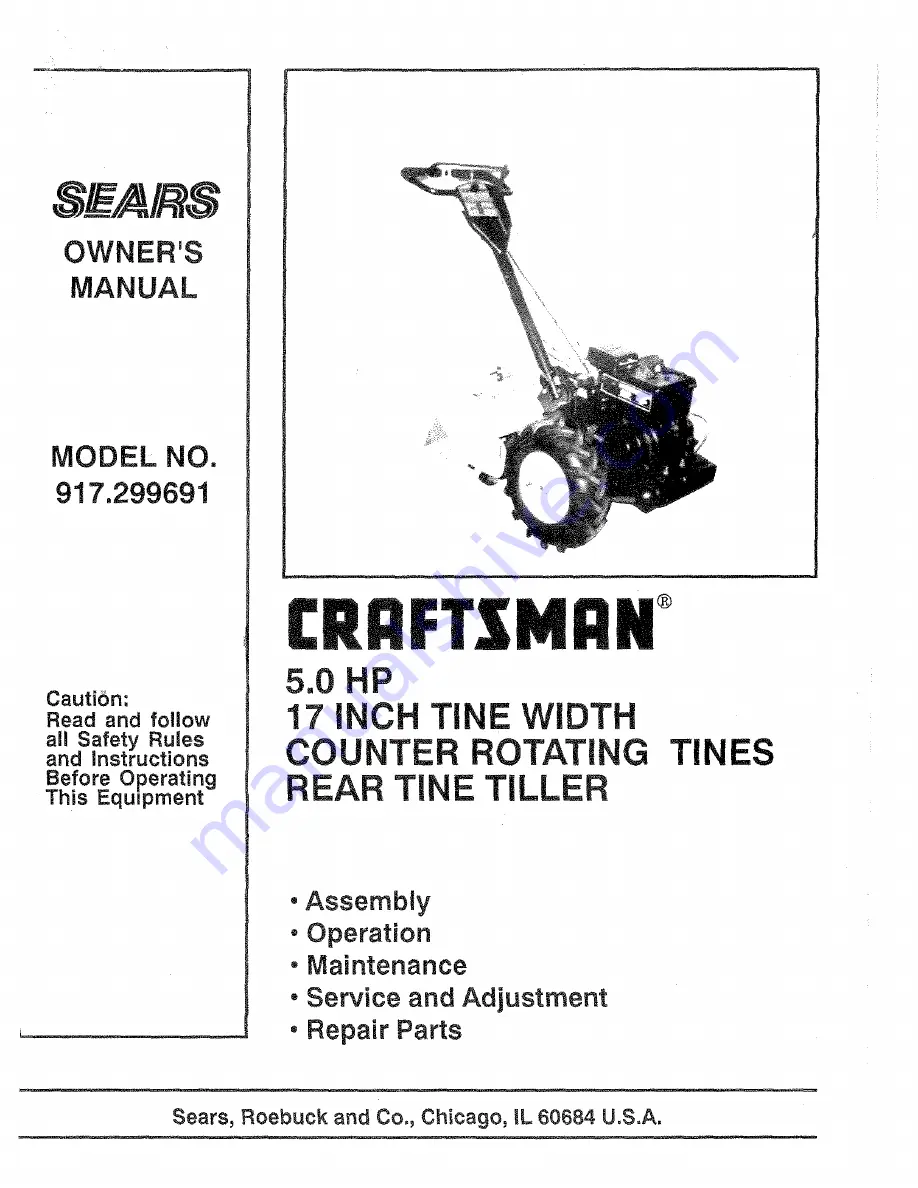
Page 1: ...and follow all Safety Rules and Instructions Before Operating This Equipment 5 0 HP 17 INC TINE WIDTH COUNTER ROTATING EAR TI TILLER TINES Assembly Operation Maintenance Service and Adjustment Repair Parts Sears Roebuck and Co Chicago IL 60684 U S A ...

Page 2: ...clogging the tines and when making any repair adjustments and inspections Take all possible precautions when leaving the machine unattended Disengage the power take off lower the attachment shift into neutral stop the engine and remove the key Before cleaning repairing or inspecting shut off the engine and make certain al moving parts have stopped Disconnect the spark plug wire and keep the wire a...

Page 3: ...ting and maintenance instructions in the owner s manuaf Sears will repair free of charge any defect in material or workmanship This Warranty does not cover Expendable items which become worn during normal use such as tines spark plugs air cleaners and belts Repairs r_ecessary because of operator abuse or negligence including bent crankshafts and the failure to maintain the equipment according to t...

Page 4: ...System 14 Finish 15 Maintenance Schedule 13 Muffler 15 Oil Change 14 Spark Plug 15 Transmission 15 Muffler Maintenance 15 Spark Arrester 3 31 O Oil Level 11 Type 11 14 Operation Cultivating 12 Fit Fuel Tank 11 Start Engine 12 Stopping Tines Engine 10 Tilling 10 12 Tilling Hints 12 Tine Operation 10 Transporting Tiller 11 Winter Operation 14 R Repair Parts Tiller Engine 21 31 Rules for Safe Operati...

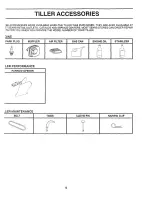
Page 5: ...LE AT _T SEARS RETAIL OUTLETS CATALOG AND SERVICE CENTERS MOST SEARS STORES CAN ORDER REPAIR TS FOR YOU WHEN YOU PROVIDE THE MODEL NUMBER OF YOUR TILLER 31NE PARK PLUG m i MUFFLER AIR FILTER ENGINE OIL i 1 STABILIZER LER PERFORMANCE FURROW OPENER LER MAINTENANCE BELT TINES CLEVIS PIN HAIRPIN CLIP m 5 ...

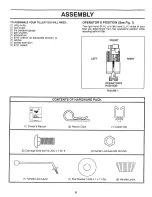
Page 6: ...TOR S POSITION See Fig 1 The right hand R H and left hand LH sides of your titler are determined from the operator s position while standing behind tiNer LEFT FRONT OPERATOR S POSITION RIGHT FIGURE 1 lill ii i ii CONTENTS OF HARDWARE PACK t Owner s Manual 2 Hairpin Clips 1 Cabte Clip 2 Carriage Bolts 3 8 16 UNC x 1 Gr 5 2 Center Locknuts 3 8 16 UNC 1 Handle Lock Lever 1 Flat Washer 13 32 x 1 x t 1...

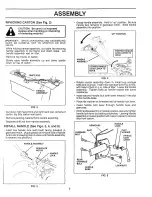
Page 7: ... until handle assembly is lowered into position _ HANDLEASSEMBLY NOTCH HANDLE LOCK Grasp handle assembly Hold in up position Be sure handle lock remains in gearcase notch Slide handle assembly into position UP POSITION HANDLE ASSEMBLY TIGHTEN HANDLE LOCK LEVER TO HOLD LOOSEN LOCK LEVER TO MOVE FIG 4 Rotate handle assembly down to install two carriage bolts and tocknuts Insert rear carriage bolt Fi...

Page 8: ...position See Fig 7 Tilt filler forward by lifting handle Separate cardboard cover from leveling shield Rotate tiller handle to the right and putl tiller out of carton SHIFT LEVER HAIRPIN CLIP SHIFT ROD FIG 8 CHECK TIRE PRESSURE The tires on your unit were overinflated at the factory for shipping purposes Correct and equal tire pressure is important for best tilling performance Reduce tire pressure...

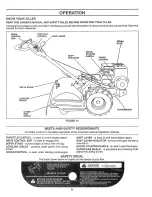
Page 9: ... National Standards institute THROTTLE CONTROL is used to control engine speed DRIVE CONTROL BAR is used to engage tiller DEPTH STAKE controls depth at which tiller witi dig LEVELING SHIELD protects small plants from being buried CHOKE CONTROL is used when starting a cold engine SHIFT LEVER is used to shift transmission gears SNDFTLEVER iNDICATOR shows which gear the tiller is currently in RECOIL ...

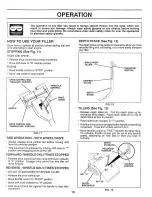
Page 10: ...TOPPED Release drive control bar and move shift lever indicator to F position Engage drive control bar and tiller wiit move forward REVERSE WHEELS ONLY TINES STOPPED DO NOT STAND DIRECTLY BEHIND TELLER o Release the drive control bar Move throttle control to SLOW position Move shift lever indicator to R position Hold drive control bar against the handle to start tiller movement DEPTH STAKE See Fig...

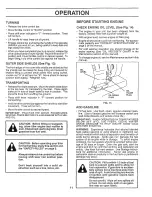
Page 11: ...ere BEFORE STARTING ENGINE CHECK ENGINE OiL LEVEL See Fig 14 The engine in your unit has been shipped from the factory already filled with summer weight oil With engine level remove engine oil filler plug o Engine oil should be to point of overflowing For approxi mate capacity see PRODUCT SPECIFICATIONS on page 3 of this manual For cold weather ope ration you should change oil for easier starting ...

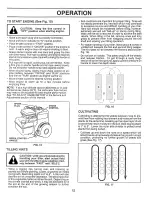
Page 12: ... during tilling Wait until the soil is less wet in order to achieve the best results When tilling in the fall remove vines and long grass to prevent them from wrapping around the tine shaft and slowing your tilling operation For easier handling of your tiller leave about 8 inches of untilled soil between the first and second tilling passes The third pass will be between the first and second See Fi...

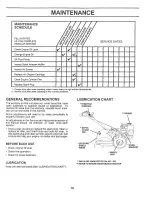
Page 13: ...e from the warranty operator must main tain unit as instructed in this manual Some adjustments will need to be made periodiealty to properly maintain your unit All adjustments in the Service and Adjustments section of this manual should be checked at least once each season Once a year you should replace the spark plug clean or replace air filter and check tines and belts for wear A new spark plug ...

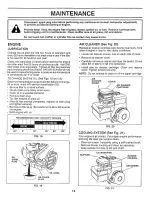
Page 14: ...ssification SG Be sure tiller is on level surface Oit will drain more freety when warm Catch oil in a suitable container Remove drain plug Tip tiller forward to drain oil After oil has drained compfeteiy replace oil drain plug and tighten securely Remove oil filler plug Be careful not to allow dirt to enter the engine Refill engine with oil RECOMMENDED SAE VISCOSITY GRADES 20 0o 32 60 80 I00 FIG 1...

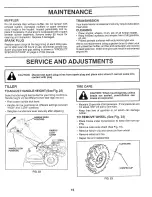
Page 15: ...an your unit unless the muffler air filter and carburetor are covered to keep water out Water inengine can result in ashortened engine life SERVICE AN ADJUSTMENTS CAUTION Disconnect spark plug wires from spark plug and place wire where it cannot come into contact with pEug TILLER TO ADJUST HANDLE HEIGHT See Fig 22 Select hand e height best suited for your tilting conditions Handte height will be d...

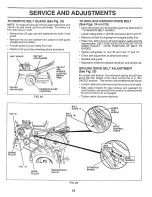
Page 16: ...pping from engine pufley first Place new belt in groove of transmission pulley and into engine pulley BELT MUST BE IN GROOVE ON TOP OF iDLER PULLEY NOTE POSITION OF BELT TO GUIDES Tighten belt guides A and B and nuts C and D Check belt adjustment as described below Replace belt guard Repositien wheel and replace clevis pin and hafrpin clip GROUND DRIVE BELT ADJUSTMENT See Fig 25 For proper belt te...

Page 17: ...maintain the superb tilling performance of this ma chine the tines should be checked for sharpness wear and bending particufarfy the tines which are next to the transmission If the gap between the tines exceeds 3 1 2 inches they should be replaced or straightened as necessary v TINE TRANSMISSION 3 1 2 MAX FIG 27 Newtines should be assembled as shown below Sharp ened tine edges will rotate rearward...

Page 18: ... off turn needle valve in clockwise closing it finger tight and then turn out counterclockwise 1 1 2 turns FINAL SETTING Start engine and altow to warm for five minutes Make final adjustments with engine running and gear shift control lever in NEUTRAL position With throttle control lever in SLOW position turn needle valve in clockwise until engine begins to die then turn out counterclockwise until...

Page 19: ...ne will cause problems If possible store your unit indoors and cover it to give protection from dust and dirt Cover your unit with a suitable protective cover that does not retain moisture Do not use plastic Plastic cannot breathe which allows condensation to form and will cause your unit to rust IMPORTANT NEVER COVER TILLER WHILE ENGINE AND EXHAUST AREAS ARE STILL WARM FUEL SYSTEM IMPORTANT IT IS...

Page 20: ...t _ Clogged Fuel Tank _ Poor compression _ Set Depth Stake and Wheels for shallower tilling Remove and inspect replace if dirty Clean Air Screen Replace Spark Plug and adjust gap Drain and refill Gas Tank and Carburetor Make necessary adjustments Remove and clean Major Engine overhaul ENGBNE OVERHEATS Low oil levet or dirty oil _e Dirty Air Screen _ Dirty Engine _ Partially Plugged Muffler _ r Imp...

Page 21: ...t Handle Grip Clip Hairpin Bolt Shoulder Rod Shift Nut Centerlock 3 8 16 Lock Handle STD533710 Bolt Carriage 3 8 16 x 1 Gr 5 19131611 Washer 13 32xl xll Ga KEY PART NO NO DESCRIPTION 20 109228X 21 121213X 22 121145X 23 86777 24 9484R 25 73970500 26 110675X 27 STD541025 28 STD551125 29 STD541462 30 127012X 127812 120431X 121859X 127795 Lever Lock Handle Handle Assemble Clip Plastic Cable Screw Hex ...

Page 22: ...her Lock 1 4 Nut Hex 1 4 20 Screw Set Hex 5 16 18 x 3 8 Spacer Split 0 327 x 0 42 x 2 68 Washer 11 32 x 11 16 x 16 Ga Sheave Transmission Nut Hex 5 16 t8 Spacer Split 0 327 x 0 42 x 1 75 Key Square 3 16 x 1 1 8 Guard Pinch Point Spacer Split 0 327 x 0 42 x 2 09 Nut Cap 5 t6 18 Tire Rim Tire Valve Rivet Drifled Clip Hairpin Guard Belt Belt V 16 23 KEY NO 3O 31 32 33 34 35 36 37 38 39 40 PART DESCRI...

Page 23: ... 16 18 x 1 1 2 4 102173X Counterweight R H 5 STD551137 Washer Lock 3 8 6 STD541037 Nut He 3 8 16 7 STD624003 Clip Hairpin 8 126875X Rivet DriNed KEY NO 9 PART DESCRiPTiON NO 5015J Tire 124366X Rim 795R Valve Tire 123081X Decal Engine 127520 Decal U S A 110719X Decal Operation and Lubrication STANDARD HARDWARE PURCHASE LOCALLY NOTE All component dimensions given in U SJnches linch 25 4 mm 23 ...

Page 24: ... Shaft Reduction 1st Washer Thrust Spacer 1 01 x 1 75 x 0 760 Cup Formed Ring Spiral Seal Ring Rubber Seal Oil Gearcase R H w Bearing Includes Key No 8 Shaft Tine Chain Roller 50 50 Pitch Screw 1 4 20 x 1 2 Nut Hex 5 16 18 Grease Plastiiube 1 DESCRiPTiON Transmission Assembly _ncludes Key Noso2 52 earcase L H w Bearing GlnCludesKey No 4 asket Gearcase Bearing Needle Washer Thrust 5 8 x 1 10 x 1 32...

Page 25: ...rriage 5 16 18 x 1 14 1243l IX Bracket Shield Tine 15 104101X417 Shield Side Outer R H t6 STD541025 Nut Hex 1 4 20 t7 STD551t25 Washer Lock 1 4 t8 73970500 Locknut Hex Flange KEY PART DESCRIPTION NO NO 19 10270tX Grip 20 STD541037 Nut Hex 3 8 16 21 102156X Stake Depth 22 74930632 Bolt Hex 3 8 16 x 2 23 4440J Hinge 24 STD532505 Bolt Carriage 1 4 20 x 1 2 Gr 5 25 6712J Cap Vinyl 26 109227X Pad idler...

Page 26: ...ine L H Outer Bolt Hex 3 8 24 x 1 Washer Lock 3 8 Nut Hex 3 8 24 Pin Clevis Assembly Hub apd Plate L H KEY PART DESCRIPTION NO NO 7 6554J Tine L H Inner 8 6555J Tine R H Inner 9 4460J Tine R H Outer 10 STD624008 Clip Hairpin 11 102382X Assembly Hub and Plate R H STANDARD HARDWARE PURCHASE LOCALLY NOTE All component dimensions given in U S inches 1 inch 25 4 mm 26 ...

Page 27: ... Pulley Starter 0nc Key No 4 Screw Starter Housing Mounting Anchor Spring Spacer Housing Blower Screw Blower Housing Mounting Screw Sem Screen Starter Pulley Clutch Assembly 0nc Key No s 17 2O Washer Clutch Retainer KEY PART NO NO 18 63770 19 298799 20 394897 21 220865 22 297229 23 93414 24 223886 25 397358 26 221798 27 398808 28 395990 29 299819 30 297565 3I 222443 32 93705 33 222698 REQUIRES DES...

Page 28: ...roup Choke Inc Key No s 21 and 22 Washer Choke Shaft Felt Washer Choke Shaft Spring Needle Va ve Plug Welch Fuel Pipe and Cfip Plug Welch Cap Spring Spring Fuel Pump Diaphragm Diaphragm 48 49 50 KEY PART NO NO 31 210959 32 93265 33 93141 34 93543 35 490589 36 223813 37 490507 38 262279 39 220982 40 93357 41 280715 42 490649 43 262359 44 262470 45 93572 46 262282 47 491577 48 93491 49 222962 50 223...

Page 29: ...606 5 297603 6 66768 7 270080 8 93490 9 221511 t0 93032 11 91249 DESCRIPTION Washer Lock Stud Cover Assembly Crankcase Inc Key No s 5 6 and 7 Seat Oil Bushing Crankcase Cover Plug Oil Filler Gasket Crankcase 015 thick Screw Cylinder Shield Mtg Sere Shield Cylinder Screw Crankcase Cover Mt g Plug Pipe 1 4 Std Square Head REQUIRES SPECIAL TOOLS TO iNSTALL INCLUDED IN GASKET SET NO 397145 29 ...

Page 30: ...REPAIR PARTS 5 HP 17 CRT TILLER MODEL NUMBER 917 299691 ENGINE BRIGGS STRATTON MODEL NUMBER 130202 TYPE NUMBER 3129 0t ENGINE INTERNAL PARTS 4O 39 36 j 35 5 I _17 19 20 18 25 30 L_ 33 31 34 30 ...

Page 31: ... Breather Tube 26 93394 Screw Breather Mounting 27 262280 Link Governor 28 490374 Lever Assembly Governor Inc Key No s 29 and 30 34 93448 35 212733 36 260642 37 222450 38 231077 39 391737 40 221551 41 299430 42 92296 43 221876 44 221890 45 397103 46 261696 48 298909 49 26026 50 298904 5 298982 52 395990 DESCRIPTION Nut Hex No t0 24 Bolt Governor Lever Cotter Hairpin Retainer E Ring Bushing Governo...

Page 32: ...in may be ordered from _n_ Searsl Roebuck and Co Service Center and most Retail Steres WHEN ORDERING REPAIR P_RTS ALWAYS GIVE THE FOLLOW ING iNFORMATION PRODUCT REAR TINE TILLER MODEL NUMBER 917 29969I ENGINE MODEL NUMBER 130202 TYPE NUMBER 3129o01 PART NUMBER PART DESCRIPTION Your Sears merchandise has added vaiue when you consider Sears has service units nationwide staffed with Sears trained tec...

Reviews: