background image

Summary of Contents for 917.353730

Page 1: ...Msintenance Repair Parts I RR FTSIVinN o 33 CHAIN SAW OR CHAIN SAW MODEL NO S 917 353730 917 353731 IMPORTANT I AND INSTRUCTIONS _ CAREFULLY I MODEL NOS 917 353770 917 353771 Sears Roebuck and Co_ Chicago Illo 60684 U S A_ ...

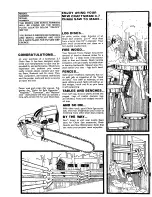
Page 2: ... Saw prolects Cut 4 thtck slices from a log at least 10 in diame_ter Treat with wood preservative and place on a fi_m bed of crushed rock FIRE WOOD Your National Forest Ra_qger may permit removal of dead or downed timber for a _odest fee a clear forest is lesssuscep t ble tO fires and disease_Quick burning evergreens will split easily to kindle slow er burning hardwoods_ Measure _i0ur fire place b...

Page 3: ... Wipe your Saw clean of any spilled oil or fuel and move away from the fueling area before starting your Saw Never run the Saw without the muffler or muffler screen 5 RESPECT YOUR SAW Do not start or run Saw indoors to avoid Carbon Monoxide poisoning from exhaust gases When starting Saw pick an area clear of loose gravel or flammable debris hold Saw firmly to the ground without letting the Guide B...

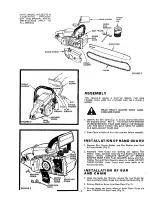
Page 4: ... NEED TO ASSEM BLE AND ADJUST YOUR SAW 2o Soak Chain in light oil for a few minutes before assembly 2 INSTALLATION OF HAND GUARD 1 Remove Nut Spring Washer and Flat Washer from Stud in Front Handle Fig 2L 2_ Assemble Hand Guard over Bushing and against Flat Washer Next assemble remaining Flat Washer and Spring Washer NOTE CONCAVE SURFACE OF SPRING WASHER MUST FACE FLAT WASHER Secure with Nut Tight...

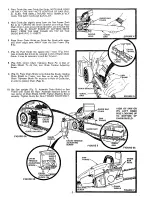
Page 5: ... 8o Fig 6 B o Center Chain Tightener Block Pin in Slot of Chain Shield To do this turn Chain Tension Adjusting Screw go Fig 6 Place Chain Shield onto Guide Bar Studs Holding Chain Shield to Frame turn Saw on its side Fig 6 C _ Chain Tightener Block Pin must be in Hole of Guide Bar in order to tension Chain Page 4 10 Set Saw upright Fig 7 Assemble Chain Shield to Saw Frame with Guide Bar Nuts_ Asse...

Page 6: ... any good multi grade automotive type oil if used in temperatures below 0 F thin oil with a small amount of kerosene approximately 6 ounces per quark of oil Tighten Cap securely NOTE THIS TANK IS FOR BAR AND CHAIN LUBRICATION ONLY MIX FUEL AND FILL FUEL TANK MIX SAW FUEL IN AN AREA WITH ADE QUATE VENTILATION AND AWAY FROM HEAT OR FLAME t Mix fuel Prepare only enough to last for one or two days cut...

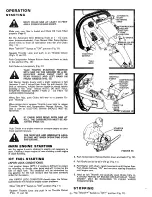
Page 7: ... BE MOVING FIGURE 11 IF CHAIN DOES MOVE WITH SAW AT IDLE THE CARBURETOR MUST BE AD JUSTED PAGE 12 Push Choke in as engine warms or as engine begins to labor from overrich mixture THE MUFFLER AND IMMEDIATE AREA BECOME HOT WHEN OPERATING YOUR SAW ENGINE _ ARM ENGINE STARTING nce the engine is warm choking is usually not necessary to start Choking a warm engine or over choking a cold engine ill cause...

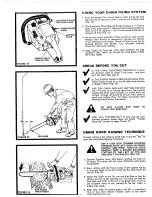
Page 8: ...Nose approximately six inches from test surface Enough oil should be thrown from chain to mark test surface Fig 15 Open Automatic Oiter Metering Knob farther if necessary DO NOT ALLOW BAR NOSE TO TOUCH TEST SURFACE q_ ARE ALL SYSTEMS GO if your Saw i_n t per forming Rroperly please check our handy Trouble Shooting section on pages 16 and 17 USING GOOD SAWING TECHNIQUE Practice cutting a few limbs ...

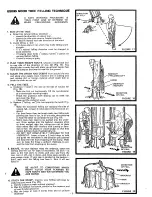
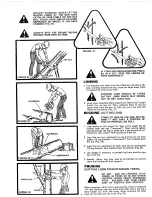
Page 9: ... inches above the horizontal un dercut For trees larger than bar length make two felling cuts pivoting bar nose in last in on one side then pivoting in from the other to complete the cut Fig 19 Some trees may need to be pushed into the under cut Drive wedges into the backcut stopping often to drive wedges tight but taking care not to place them where they will interfere with cutting or direc tion ...

Page 10: ...HILL OF POSSIBLE LOG ROLL Logs resting on the ground for their entire length can be I II bucked from the top overbuck Stop cutting before passing through the log it takes only a few seconds of cut ting dirt to ruin a chain Roll log over to finish cut Logs that are only suppo r ted on one end can be cut from below 1 3 log diameter under buck then finished _rom the top Fig 23 Logs that are supported...

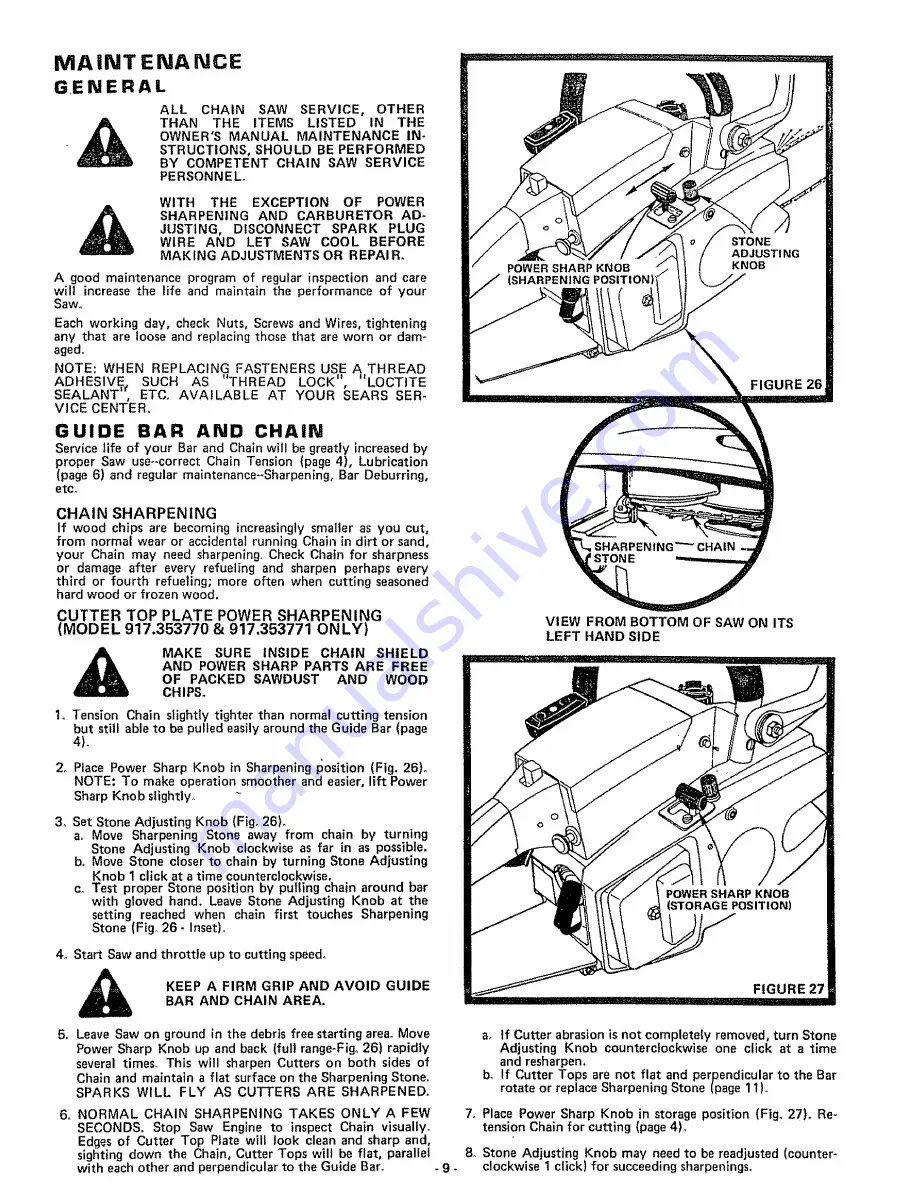
Page 11: ...ace Power Sharp Knob in Sharpening I_OSition Fig 26 NOTE To make operation smoother and easier lift Power Sharp Knob slightly_ 3o Set Stone Adjusting Knob Fig 26 ao Move Sharpening Stone away from chain by turning Stone Adjusting Knob clockwise as far in as possible b Move Stone closer to chain by turning Stone Adjusting Knob 1 click at a time counterclockwise c Test proper Stone position by pulli...

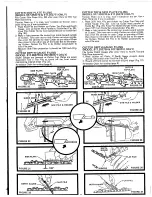
Page 12: ...Re tension Chain for cutting page 4 CUTTER TOP SIDE PLATE FILING MODEL 917 353730 917 353731 ONLY Tension Chain so it is snug won t wobble on the bar Use a chain filing vise if one is available 1_ Place 3 16 inch File and Holder on Cutter Top Plate and Depth Gauge Fig 33 Line up Guide Mark parallel to Guide Bar Fig_ 34 Keep File Holder Handle firmly angled down 10 from Guide Bar perpendicular Fig ...

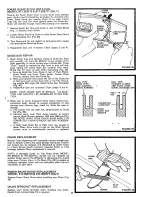
Page 13: ...CIAL LO KICK TYPE AND CAN ONLY BE ASSEMBLED IN ONE POSI TIONo 2o When new or newly sharpened Chain makes slanted cuts sometimes badly enough to prevent completion of cuts through large diameter logs check for Guide Bar wear or damage ao File uneven Rail top wear flat perpendicular to Guide Bar Fig 39 b Hammer worn open Rails closer together to restore correct Chain Groove between 052 and 060 inch ...

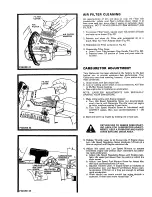
Page 14: ...NGINE 1o Make initial setting with Engine stopped a Turn Idle Speed Regulating Screw out counterclock wise then in until Carburetor Throttle Lever just begins to move continue moving 2 more turns b Turn Low Speed Mixture Screw in clockwise until LIGHTLY seated then turn counterclockwise 1 1 8 turns 2 Start and warm up Engine by making one or two cuts RETURN SAW TO DEBRIS FREE START ING AREA FOR CA...

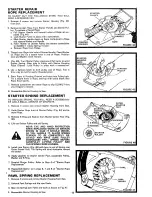
Page 15: ...pe Knot Cavity 7 Remove screwdriver and allow Rope to slip SLOWLY thru your fingers to rewind 8 Reassemble Starter Housing to Saw STARTER SPRING REPLACEMENT TO REPLACE SPRING YOU WILL NEED A SCREWDRIV ER AND A SMALL AMOUNT OF GRAPHtTE_ t Remove 4 screws and remove Starter Housing from Saw 2_ Untie Starter Rope knot at Starter Pulley Fig 44 and re move Rope 3 Remove E Ring and Washer from Starter C...

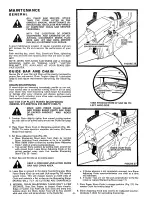
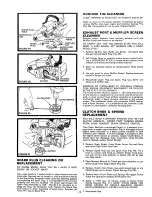
Page 16: ...SERVICE CENTER Your Chain Saw has a centrifugal Clutch It is designed to en gage chain as engine speed increases_ Slip or disengage chain as engine speed decreases in a heavy cutting situation or with Throttle Lever released If Clutch slippage is excessive so that full engine power cannot be utilized replace Clutch Shoes If Clutch does not disengage chain movement when Throttle Lever is released r...

Page 17: ...pe until resistance is felt closing intake and exhaust ports 4 Remove and clean the Bar and Chain use gloves when handling chain 5 Store the Chain in a container with oil covering chain 6 Apply a heavy film of oil over the entire Bar including the groove for the chaim Wrap bar in heavy paper cloth or plas_ tic 7 Clean the outside surfaces of the saw 8 Cover the saw with a protective cloth or plast...

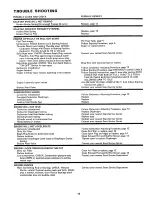
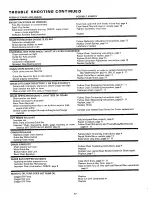
Page 18: ...ken Reed Valve CARBURETOR FLOODS Carburetor misadjusted Follow Carburetor Adjusting Procedure page 12 Damaged Carburetor Diaphragm Replace Leaking Gasket Replace Leaking Inlet Needle Seat Replace _ _ _ _ _ _ _ _ ENGINE WILL NOT IDLE Carburetor misadjusted Carburetcr Diaphragm leaking Carburetor Inlet Seat Gasket leaking Crankshaft seals leaking Cylinder scored or compression low Reeds leaking or b...

Page 19: ...HAIN OPERATES ROUGHLY CHATTERS OR GRABS Chain tension too loose Cutters not properly sharpened Worn Chain Sprocket Chain rivet bearing wear due to use in dirt or sand or inad_ equate chain oiling Several cutters damaged through striking buried foreign material W I I CUT TENDS TO SLANT Improper use Bent wor_ or burred Guide Bar Improper Chain sharpening depth gauge lowering or stone rotation 917 35...

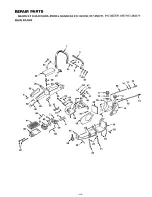
Page 20: ...REPAIR PARTS SEARS 3 7 CttAIN SAWS _MODEL NUMBERS 917 353730 917 353731 917o353770 AND 917 353771 MAIN FRAME 43 22 27 44 5 64 47 12 10 11 13_ 40 37 63 56 49 60 18 _ 21 23 ...

Page 21: ...olt Hex Hd 1 4 20 x 2 5 8 Gr_ 5 II tl 24 g052H E Ring 58 5255R 25 876J Pin 59 t 6J 26 676A20 Rear Mount Assembly 60 27 9567R Rubber Mount 61 28 643A54 Top Cover Assembly 29 9099H Grommet 62 1392J 30 6J Choke Control 63 4J 31 _ Roll Pin 64 8_ 32 Oil Pump Lever 65 33 Throttle Lever 66 507 34 676A21 Rear Handle Assembly Inc Key No s_ 9557R 29 33 35 38 and 39 77_J 35 765J Pin 36 9889R Rear Handle Grip...

Page 22: ...REPAIR PARTS SEARS 3 7 CHAIN SAWS MODEL NUMBERS 917 353730 917 353731 917o353770 AND 917 35377 1 CUTTING AND SHARPENING 29 36 25 8 22 16 12 17 15 20 18 2 1 ...

Page 23: ...771 ONLY 34 SearsCatalog No 3636 I Guide Bar 18 Sears Catalog No Chain Guide Outer 35 Chain Guide Inner Stone Assembly 917 353770 36 9t7o353771 ONLY Set Screw Allen Hd_ Cup Point I 4 20 x 1 4 917 353770 917 353771 ONLY Spring 917_353770 917_353771 ONLY 690J Detent Pin 917_353770 917_353771 ONLY Detent Pin Arctuate Arm g17o353770 and 917 353771 ON LY Set Screw Allen Hd Cup Point No 6 32 x 1 4 Stone...

Page 24: ...REPAIR PARTS SEARS 3 7 SAWS MODEL NUMBERS 917 353730 917 353731 917 353770 AND 917 353771 ENGINE CLUTCH AND MUFFLER Y 5 _L_ __ _ 52 42 35 23 26 31 17 A B C D E 16 D 15 14 13 22 ...

Page 25: ... 45 4058R 18 9973R Crankshaft 46 3178P 19 79J Gasket 20 643A48 Bearing Carrier Assembly Inc Key NoSs 47 21 and 22 48 21 8999H Keystone Bearing 49 22 8998H Oil Seal 50 23 632A137 Centrifugal Clutch tnc Key No s 24 25 and 26 51 24 8473H 1 Clutch Spring 52 25 632A183 Clutch Shoes Set of 4 632A133 Clutch Hub and Washer Assembly 642A35 Clutch Drum and Bearing Inc Key No 28 Needle Bearing Rimmed Sprocke...

Page 26: ...k Plug Champion CJ 6 Switch Plate Ignition Switch Solid State ignition Group Inc Key No 11 Flywheel P _embly inc Key No_s 8 and 12 KEY PART NO NO 6 9072H 7 9070H 8 o43A14 9 9087H 10 8989H 11 9262H 12 9404H DESCRIPTION Torsion Spring Huglock Nut Starter Pawls and Posts with Springs Inc Key No 6 Woodruff Key Slotted Fil Hd Machine Screw No 8 32 x 3 4 High Tension Lead Flywheel ...

Page 27: ...PTION NO NO NO NO 1 2 3 4 5 9052H E Ring 6 9826R Handie Starter STD551012 Washer t 4 x 9 16 x 16 Gao 7 9862_J_L Starter Housing 1219J Pulley Starter S _ Starter Assembly Inco Key No so 91 t7H Spring Starter 1 thru 7 9143H Rope Starter 156 Diameter x 9 Machine Screw Pan Hd Phillips 42 Long No 10 _24 x 3 4 Gr 5 STANDARD HARDWARE _PURCHASE LOCALLY 25 ...

Page 28: ...rew Lockwasher 26 013219 4 27 010280 11 9094H tGasket 28 013518 12 013652 Fuel Pump Diaphragm 29 004119 13 013218 1 Fuel Pump Gasket 30 010280 14 013167 Fuel Pump Cover 31 GS 1HS t5 011441 Fuel Pump Cover Ret Screw 32 RK 3HS Lockwasher 4 33 DG 1HS 16 013621 Idle Mixture Screw 26 Idle Mixture Screw Spring Inlet Control Lever inlet Fulcrum Pin Inlet Fulcrum Pin Ret Screw Inlet Needle Inlet Screen In...

Page 29: ...etering Lever 3I Lever Metering 32 Pin Metering Lever 33 Screw Metering Lever Pin 34 Kit Check Valve Repair Main Nozzle 35 Gasket Metering Diaphragm 36 Diaphragm Assembly Metering 37 27 325_500 21 112 96 543 9544 88 23 98 160 112_165 96 265 92 524 350 500 98 26t 98 163 16 33 102 56 30 808 3444 _ _ 21 116 Kit Kwik Inco Key No s 5 9 11 13 17 24 26 30 32 34 Cover Metering Diaphragm Screw Fuel Pump Co...

Page 30: ... ON LY 5 32 Diameter 917 353770 917 353771 ONLY Chain Saw Case Snap On Chain Guard Craftsman Chain Saw Oil Chain Bar Lubricant MAINTENANCE KIT NOT INCLUDED WITH CHAIN SAW 4 10 11 AVAILABLE THROUGH VICE CENTER YOUR 8 NEAREST SEARS SER KEY PART NO NO 2 4 6 2155R 2160R 780J 4001R 1338R DESCRIPTION File Holder and File 3 16 Diameter 917 353730 917 353731 ON LY 5 32 Diameter 917 353770 917 353771 ON LY...

Page 31: ...SERVICE N OTES 29 Printed in UoS A ...

Page 32: ...ARTS ALWAYS GIVE THE FOLLQWING INFORMATION THE PART NUMBER THE PART DESCRIPTION THE MODEL NUMBER THE I_AME OF MERCHANDISE If the parts you need are not stocked ocafly your order will be electronically transmi1_ted to a Sears Repair Parts Distribu tion Center for expedited handling m SEARS SERVICE Yogr Sears merchandise takes on added value when you dis cover that Sears has over 2 000 Service Units...

Reviews: