background image

Summary of Contents for 917.375010

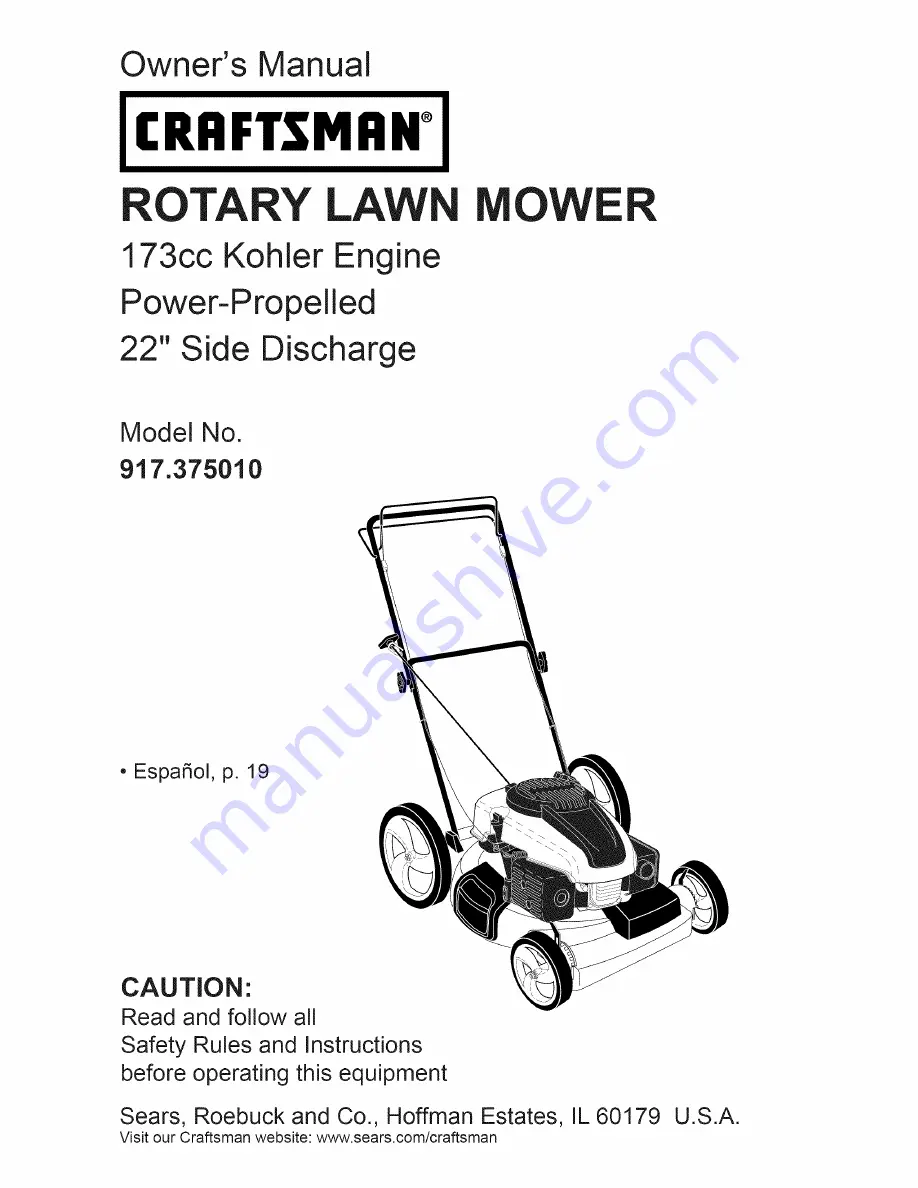
Page 1: ...e Power Propelled 22 Side Discharge Model No 917 375010 EspaSol p 19 CAUTION Read and follow all Safety Rules and Instructions before operating this equipment Sears Roebuck and Co Hoffman Estates IL 60179 Visit our Craftsman website www sears com craftsman U S A ...

Page 2: ...f its purchase date Normal deterioration and wear of the exterior finishes or product label replacement This warranty applies for only 90 days ifthis product is used for commercial or rental purposes This warranty applies only while this product is within the United States This warranty gives you specific legal rights and you may also have other rights which vary from state to state Sears Roebuck ...

Page 3: ...h anism or drive clutch on mowers so equipped before starting the engine If the equipment should start to vibrate abnormally stop the engine motor and check immediately for the cause Vibra tion is generally a warning of trouble Always wear safety goggles or safety glasses with side shields when operating mower Ii SLOPE OPERATION Slopes are a major factor related to slip fa l accidents which can re...

Page 4: ...omponents are subject to wear damage and deterioration which could expose moving parts or allow objects to be thrown Frequently check components and replace with manufacturer s recommended parts when necessary Mower blades are sharp and can cut Wrap the blade s or wear gloves and use extra caution when servicing them Do not change the engine governor set ting or overspeed the engine Maintain or re...

Page 5: ...hat it takes for you to schedule service You can call anytime day or night or schedule a service ap pointment online Sears has over 12 000 professional repair specialists who have access to over 4 5 million quality parts and accessories That s the kind of professionalism you can count on to help prolong the life of your new purchase for years to come Purchase your Repair Protection Agreement today...

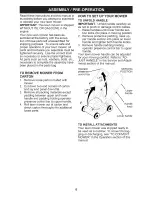
Page 6: ...adding between upper and lower handle and padding holding operator presence control bar to upper handle 4 Roll lawn mower out of carton and check carton thoroughly for additional loose parts NOW TO SET UP YOUR MOWER TO UNFOLD HANDLE IMPORTANT Unfold handle carefully so as not to pinch or damage control cables 1 Raise handles until lower handle sec tion locks into place in mowing position 2 Remove ...

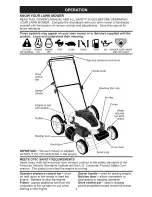
Page 7: ...cap with di Primer Wheel adjuster on each wheel Mulcher door Housing Drive cover IMPORTANT This lawn mower is shipped Spark plug WITHOUT OIL OR GASOLINE in the engine MEETS CPSC SAFETY REQUIREMENTS Sears rotary walk behind power lawn mowers conform to the safety standards of the American National Standards Institute and the U S Consumer Product Safety Com mission The blade turns when the engine is...

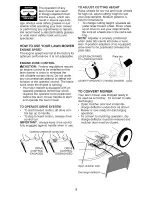
Page 8: ...rward motion lift drive con trol bar up to handle To stop forward motion release drive control bar IMPORTANT Always keep drive control fully engaged against handle when in use Operator presence control bar TO ADJUST CUTTING HEIGHT Raise wheels for low cut and lower wheels for high cut adjust cutting height to suit your requirements Medium position is best for most lawns To change cutting height sq...

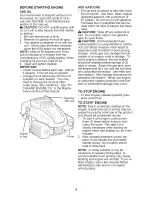
Page 9: ...il or fuel Do not store spill or use gasoline near an open flame ii CAUTION Alcohol blended fuels called gasohol or using ethanol or metha nol can attract moisture which leads to separation and formation of acids during storage Acidic gas can damage the fuel system of an engine while in storage To avoid engine problems the fuel system should be emptied before storage of 30 days or longer Empty the...

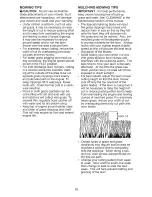
Page 10: ...ce keep mower housing free of built up grass and trash See CLEANING in the Maintenance section of this manual The special mulching blade will recut the grass clippings many times and reduce them in size so that as they fall onto the lawn they will disperse into the grass and not be noticed Also the mulched grass will biodegrade quickly to provide nutrients for the lawn Always mulch with your highe...

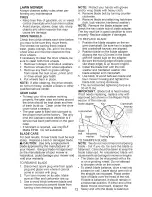
Page 11: ... items that have been subjected to operator abuse or negligence To receive full value from the warranty operator must maintain unit as instructed in this manual LUBRICATION CHART _ Wheel adjuster on each wheel Some adjustments wil need to be made periodically to properly maintain your unit At least once a season check to see if you should make any of the adjustments described in the Service and Ad...

Page 12: ...lter and carburetor are up 3 Use a wood block between blade and mower housing to prevent blade from turning when removing blade bolt NOTE Protect your hands with gloves and or wrap blade with heavy cloth 4 Remove blade bolt by turning counter clockwise 5 Remove blade and attaching hardware bolt lock washer hardened washer NOTE Remove the blade adapter and check the key inside hub of blade adapter ...

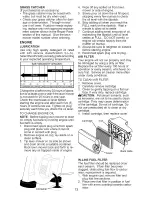
Page 13: ...forth to re move any oil trapped inside of engine 4 Wipe off any spilled oi from lawn mower or side of engine 5 Slowly pour oil down the oil fill spout stopping every few ounces to check the oil level with the dipstick 6 Stop adding oil when you reach the FULL mark on the dipstick Wait a minute to allow oil to settle 7 Continue adding small amounts of oil rechecking the dipstick until oil level se...

Page 14: ... build up of trash or grass on underside of drive cover I WARNING To avoid serious injury before performing any service or adjustments 1 Release control bar and stop engine 2 Make sure the blade and all moving parts have completely stopped 3 Disconnect spark plug wire from spark plug and place wire where it cannot come in contact with plug LAWN MOWER TO ADJUST CUTTING HEIGHT See TO ADJUST CUTTING ...

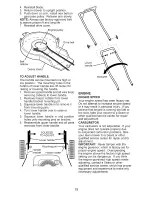
Page 15: ...all parts removed from lower handle SQUEEZE 1 TO ADJUST _ _ Lower handle I_hJ _ Mounting pin I_11 Handle I_ I bracket Hairpin cotter I__B_j ROTATE ENGINE ENGINE SPEED Your engine speed has been factory set Do not attempt to increase engine speed or it may result in personal injury If you believe that engine is running too fast or too slow take your mower to a Sears or other qualified service cente...

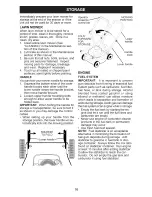
Page 16: ...le from the storage position the lower handle will au tomatically lock into the mowing position SQUEEZE TO FOLD Lower handle Operator MOWING POSITION control bar FOLD FORWARD FOR STORAGE zzs Upper handle Handle knob Lower handle ENGINE FUEL SYSTEM IMPORTANT It is important to prevent gum deposits from forming in essential fuel system parts such as carburetor fuel filter fuel hose or tank during st...

Page 17: ...tore the lawn mower with gasoline in the tank inside a building where fumes may reach an open flame or spark Allow the engine to cool before storing in any enclosure TROUBLESHOOTING See appropriate section in manual unless directed to a Sears Parts Repair Center PROBLEM CAUSE CORRECTION Does not start 1 Dirty air filter 2 Out of fue 3 Stale fuel 4 Water in fuel 5 Spark plug wire is disconnected 6 ...

Page 18: ...Grass catcher too ful 4 Handle height position not right for you CORRECTION 1 Raise cutting height 2 Raise cutting height 3 Clean replace air filter 4 Clean underside of mower housing 5 Check oi level 6 Cut at slower walking speed 1 Replace blade Tighten blade bolt 2 Set all wheels at same height 3 Clean underside of mower housing 1 Replace blade Tighten blade bolt 2 Contact a Sears or other quali...

Page 19: ...s 30 dias posteriores a su fecha de compra El deterioro y desgaste normales de las terminaciones exteriores o la sustituci6n de las etiqu etas del producto La presente garantia sera aplicable pot s61o 90 dias en caso que este producto sea utilizado para fines comerciales o de alquiler La presente garantia s61o sera aplicable mientras el producto se encuentre dentro de los Estados Unidos La present...

Page 20: ... poner en marcha el motor Si el equipo empezara a vibrar de una manera anormal pare el motor y revise de inmediato para averiguar la causa General mente la vibraci6n suele indicar que existe alguna averia Siempre use gafas de seguridad o anteojos con protecci6n lateral cuando opere la sega dora II OPERACION SOBRE LAS CUESTAS Los accidentes ocurren con mas frecuencia en las cuestas Estos accidentes...

Page 21: ...las ruedas mientras el motor esta en marcha Los componentes del receptor de la hierba van sujetos a desgaste da_os y deterioro que pueden exponer las partes en mov imiento o permitir que objetos sean dispara dos Controlar frecuentemente y cuando sea necesario sustituir con partes aconsejadas pot el fabricante Las cuchillas de la segadora estan afiladas y pueden cortar Cubrir las hojas o Ilevar gua...

Page 22: ...a con una Ilamada telef6nica para programar el servi cio Puede Ilamar cuando quiera dia y noche o fijar en linea una cita para obtener el servicio Sears tiene mas de 12 000 especialistas profesionales en la reparaci6n que tienen acceso a mas de 4 5 millones de partes y accesorios de calidad Este es el tipo de profesionalidad con que puede contar para ayudar a alargar la vida del producto que acaba...

Page 23: ...e los control que exige la presencia del operador junto con el mango superior 4 Haga rodar la segadora hacia afuera de la caja de cart6n y revisela cuidadosamente para verificar si todavia quedan partes sueltas adicionales COMO PREPARAR SU SEGADORA PARA DESDOBLAR EL MANGO IMPORTANTE Despliegue el mango con mucho cuidado para no pellizcar o dafiar los cables de control 1 Levante los mangos hasta qu...

Page 24: ...ador de la rueda en cada rueda Puerta de la acolchadora Caja IMPORTANTE Cubierta de la impulsi6n Este cortacesped viene SIN Bujia ACEITE O GASOLINA en motor CUMPLE CON LOS REQUISITOS DE SEGURIDAD DE LA CPSC Las segadoras a motor que se conducen desde la parte de atras rotatorias Sears cumplen con los estandares de seguridad del American National Standards Institute y de la U S Consumer Product Saf...

Page 25: ...de la impulsion en contra del mango Barra con control que la presencia det operador CONTROL CONTROL DELA DELA IMPULSION IMPULSION ENGRANCHAR DESENGANCHADO PARA AJUSTAR LA ALTURA DE CORTE Levante las ruedas para el corte bajo y baje las ruedas para el corte alto ajuste la altura de corte para que se acomode a sus requisitos La posici6n del medio es la mejor para la mayoria de los cespedes Para camb...

Page 26: ...No almacene derrame o use gasolina cerca de una llama expuesta APRECAUCI DN Los combustibles mezclados con alcohol conocidos como gasohol o el uso de etanol o metanol pueden atraer la humedad la que conduce a la separaci6n y formaci6n de acidos durante el almacenamiento La gasolina acidica puede dafiar el sistema del combustible de un motor durante el almacenamiento Para evitar los problemas con e...

Page 27: ...IMPORTANTE Para obtener el mejor rendimiento mantenga la caja de la segadora sin acumulacion de cesped y basura Vea LIMPIEZA en la seccion de Mantenimento de este manual La cuchilla acolchadora especial va a volver a cortar los recortes de cesped muchas veces y los reduce en tamafio de modo que si se caen en el cesped se van a dispesar entre este y no se van a notar Tambien el cesped acolchado se ...

Page 28: ... de esta segadora no cubre los artfculos que han estado sujetos al abuso o a la negligencia del operador Para recibir todo el valor de la garantia el operador tiene que mantener la segadora segQn las instrucciones descritas en este manual Hay algunos ajustes que se tienen que hacer en forma peri6dica para poder mantener su unidad adecuadamente AI menos una vez cada estaci6n comprobar si es necesar...

Page 29: ... con guantes y o envuelva la cuchilla con una tela gruesa 4 Remueva el perno de la cuchilla girandolo en el sentido contrario en que giran las manillas del reloj 5 Remueva la cuchilla y los articulos de fer reteria adjuntadores el perno la arandela de seguridad y la arandela endurecida AVlSO Remueva el adaptador de la cuchilla y revise el cubo interior de la ranura del adaptador de la cuchilla La ...

Page 30: ...ar aceite despacio en el conducto del aceite parandose a intervalos regulates para controlar el nivel del aceite con la varilla 6 Parar de afiadir aceite cuando se alcanza la serial de Ileno FULL en la varilla Esperar un minuto para dejar que el aceite se arregle 7 ContinQe agregando cantidades pequeas de aceite y vuelva a inspeccionar la varilla medidora settles del nivel de aciete en Ileno FULL ...

Page 31: ...si6n _ADVERTENCIA Para evitar lesi6nes serias antes de dar calquier servico o de hacer ajustes 1 Suelte la barra de control y pare el motor 2 AsegQrese que la cuchilla y que todas las partes movibles se hayan detenido comple tamente 3 Desconecte el alambre de la bujia y p6n galo en donde no pueda entrar en contacto con esta PARA REMOVER CORREA DE IMPULSI6N 1 Remueva la cubierta de la impulsi6n 2 R...

Page 32: ...s removidas del mango inferior APRIETE PARA AJUSTE Mango inferior GIRAR MOTOR VELOCIDAD DEL MOTOR La velocidad del motor ha sido ajustada en la fabrica No trate de aumentar la velocidad del motor pues se pueden producir lesiones personales Si cree que el motor esta funcio nando demasiado rapido o demasiado lento Ileve su segadora a mas con su centro de servicio Sears o con un otto centro de servic...

Page 33: ...ngo inferior Barra de control POSICION que exige PARA presencia det SEGAR operador _ DOBLAR HACIA ADELANTE Mango PARA ALMACENAR superior Manitla det mango Mango inferior MOTOR SISTEMA DE COMBUSTIBLE IMPORTANTE Es importante evitar que se formen depositos de coma en partes fundamentales del sistemade combustible tales como el carburador el filtro del combustible la mangura del combustible o en el e...

Page 34: ...entro de un edificio en donde los gases pueden alcanzar una llama expuesta o una chispa Permita que se enfrie el motor antes de almacenarla en alg0n recinto cerrado SOLUClON DE PROBLEMAS Vea la secci6n apropiada en el manual amenos que est_ dirigido a un centro de servico Sears CAUSA CORRECCION PROBLEMA No arranca 1 Filtro de aire sucio 2 Sin combustible 3 Combustible rancio 4 Agua en el combustib...

Page 35: ...asera de la caja cuchilla de la segadora arrastrandose en el cesped Recogedor de cesped demasiado Ileno Posici6n de la altura del mango no adecuada para usted CORRECCION 1 Eleve la altura de corte 2 Eleve la altura de corte 3 Limpie cambie el filtro de aire 4 Limpie la parte inferior de la caja de la segadora 5 Revise el nivel del aceite 6 Corte a una velocidad de recorrido mas lenta 1 Cambie la c...

Page 36: ...19 6 38 7 25 CRAFTSMAN ROTARY LAWN MOWER MODEL NUMBER 8 917 375010 64 27 5 16 72 57 40 30 54 67 35 2933 28 42 _ 6O 1 61 72 10 43 52 31 12 44 30 28 29 I I I 46 62 47 48 50 25 ...

Page 37: ...ION Knob Selector 56 Spring Selector Mulcher Door Spacer Bracket Wheel Adjuster Bracket Housing Deflector Discharge Support Bracket LH Support Bracket RH Screw Hex Head Threaded Rolled 3 8 16 x 1 1 8 Spring Torsion Locknut Hex 67 Lawn Mower Housing 72 Includes Key Number 46 Rod Hinge Blade Adapter I Pulley Blade 22 Washer Hardened Washer Lock Helical Screw Hex Head Grade 8 3 8 24 x 1 3t8 Decal Dan...

Page 38: ...O3 O0 CRAFTSMAN ROTARY LAWN MOWER MODEL NUMBER 917o375010 t1 f l 16 12 18 14 2 9 11 ...

Page 39: ...8 Locknut Hex 36 415226 11 194231X427 Wheel Tire Assembly 38 73800400 12 12000058 E Ring 40 137090 13 403849 Pinion 41 408861 14 189403 Dust Cover Pawl Drive Washer Selector Knob Drive Cover Kit Wheel Adjuster LH Includes Knob and Bearing Gear Case Assembly Complete Locknut Hex 1 4 20 Spring Kit Wheel Adjuster RH Includes Knob and Bearing NOTE All component dimensions given in U S inches 1 inch 25...

Page 40: ...HLER 4 CYCLE ENGINE MODEL NUMBER PH XT173 0031EA 88 76 79 8O 71 __ _ 10 11 28 Valve Seal also included in Gasket Set 55 Intake Exhaust Valves available separately 47 54 48 83 34 33 43 91 33 35 36 79 40 40 ...

Page 41: ...racket Fuel Tank Lower Key Numbers 45 and 46 Nut Flywheel Governor Gear Assembly Cup Drive and Dowel Pin Flywheel Aluminum 45 Seal Oil PTO Kit Breather Filter Includes 46 Gasket Oil Pan Key Number 12 Breather 47 Kit Valve Train Includes Key Cover Spring Breather Filter Numbers 52 and 53 Valve and Breather Reed Spring Retainers Valve Stem Gasket Breather Cover Seal Rocker Arm Studs Lever Governor V...

Page 42: ...tch Contact Brake Spacer Brake Bracket Flange Screw Brake Lever Screw and Nylon Flatwasher Kit Dipstick and Tube Includes Key Numbers 71 and 72 O Ring Oil Fill Tube O Ring Dipstick Decal Warning 74 14 096 31 S 77 14 332 04 S 78 1402701 S 79 M 641060 S 80 14 112 07 S 81 14 072 12 S 82 1407213 S 83 14 079 01 S 84 14 089 07 S 85 25 086 165 S 86 25 086 166 S 88 25 086 167 S 89 14 096 08 S 90 25 086 14...

Page 43: ...SERVICE NOTES 43 ...

Page 44: ... HOME Anytime day or night 1 800 469 4663 U S A and Canada www sears com www sears ca Our Home For repair of carry in products like vacuums lawn equipment and electronics call or go on line for the nearest Sears Parts and Repair Center 1 800 488 1222 Anytime day or night U S A only www sears com To purchase a protection agreement U S A or maintenance agreement Canada on a product serviced by Sears...

Reviews: