background image

Summary of Contents for 917.377812

Page 1: ...Horsepower 21 Multi Cut Power Propelled Model No 917 377812 CAUTION Read and follow all Safety Rules and Instructions before operating this equipment Sears Roebuck and Co Hoffman Estates IL 60179 U S A Visit our Craftsman website www sears com craftsman ...

Page 2: ...United States This warranty applies only while this product is used in the United States This Warranty gives you specific legal rights and you may also have other rights which vary from state to state SEARS ROEBUCKAND CO D 817 WA HOFFMAN ESTATES ILLINOIS 60179 IMPORTANT This cutting machine is capable of amputating hands and feet and throwing objects Failure to observe the following safety instruc...

Page 3: ...ever operate machine in wet grass Always be sure of your footing keep a firm hold on the handle and walk never run Disengage the self propelled mecha nism or drive clutch on mowers so equipped before starting the engine motor If the equipment should start to vibrate abnormally stop the engine motor and check immediately for the cause Vibration is generally a warning of trouble Always wear safety g...

Page 4: ...ssary before restarting Never attempt to make wheel height adjustments while the engine motor is running Grass catcher components are subject to wear damage and deterioration which could expose moving parts or allow objects to be thrown Frequently check components and replace with manufacturer s recommended pads when necessary Mower blades are sharp and can cut Wrap the blade s or wear gloves and ...

Page 5: ...lding operator presence control bar to upper handle 4 Roll lawn mower out of carton and check carton thorougly for additional loose pads HOWTO SET UPYOUR LAWN MOWER TO UNFOLD HANDLE IMPORTANT Unfold handle carefully so as not to pinch or damage control cables 1 Raise lower handle section to operating position and squeeze the bottom ends of lower handle towards each other until the pin in handle ca...

Page 6: ...ASOLINE in the engine Housing MEETS CPSC SAFETY REQUIREMENTS Sears rotary walk behind power lawn mowers conform to the safety standards of the American National Standards Institute and the U S Consumer Product Safety Commis sion The blade turns when the engine is running Operator presence control bar must be held down to the handle to start the engine Release to stop the engine Primer pumps additi...

Page 7: ...ds are for normal grass cutting or trimming High speeds are for light cutting and for ground transport NOTE Do not move speed control lever unless the engine is running TO OPERATE DRIVE SYSTEM With engine running select ground speed by moving drive speed control lever to desired position To start forward motion pull drive control bar back against handle To stop forward motion release drive control...

Page 8: ...vert to bagging or discharging REAR BAGGING Open rear door and remove mulcher plug Store mulcher plug in a safe place You can now install the grass catcher To convert to mulching or discharging operation install mulcher plug into rear discharge opening of mower Mulcher plug SIDE DISCHARGING Mulcher plug must be installed into rear discharge opening of mower Open mulcher door and install dis charge...

Page 9: ...rechecking the dipstick until it reads full DO NOT overfill or engine will smoke on startup 6 Always be sure to retighten oil dipstick before starting engine Check oil level before each use Add oil if needed Fill to full line on dipstick Change the oil after every 25 hours of operation or each season You may need to change the oil more often under dusty dirty conditions ADD GASOLINE Fill fuel tank...

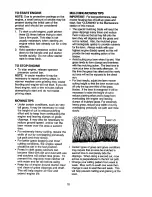
Page 10: ...Keep top of engine around starter clear and clean of grass clippings and chaff This will help engine air flow and extend engine life MULCHING MOWING TIPS IMPORTANT For best performance keep mower housing h ee of built up grass and trash See CLEANING in the Maintenance section of this manual The special mulching blade will recut the grass clippings many times and reduce them insize so that as they ...

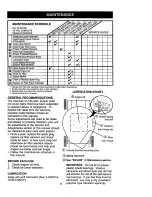
Page 11: ... full value from the warranty operator must maintain mower as instructed in this manual Some adjustments will need to be made periodically to properly maintain your unit All adjustments in the Service and Adjustments section of this manual should be checked at least once each season Once a year replace the spark plug replace air filter element and check blade for wear A new spark plug and clean ne...

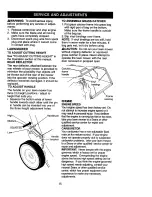
Page 12: ...er and check the key inside hub of blade adapter The key must be in good condi tion to work properly Replace adapter if damaged TO REPLACE BLADE 1 Position the blade adapter on the engine crankshaft Be sure key in adapter and crankshaft keyway are aligned 2 Position blade on the blade adapter aligning the two 2 holes in the blade with the raised lugs on the adapter 3 Be sure the trailing edge of b...

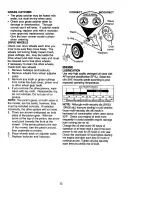
Page 13: ...ctly If installed incorrectly the drive system will not work 5 There are arrows embossed on both sides of the pinion gear With the arrow at the top of the pinion the arrow must point towards the front of the mower If the arrow points to the rear of the mower turn the pinion around then assemble to mower 6 Place wheels back on adjuster axles 7 Replace Iocknuts and hubcaps INCORRECT Wave rWasher Pin...

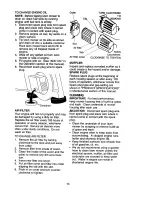
Page 14: ...sert new filter into cover 5 Put air filter cover and filter into collar aligning the tab with the slot 6 Push in on cover and turn counter clockwise to tighten liar Clip_ TURN CLOCKWISE TO Slot Air filter Tab TURN COUNTER Air filter cover CLOCKWISE TO TIGHTEN MUFFLER Inspect and replace corroded muffler as it could create a fire hazard and or damage SPARK PLUG Replace spark plugs at the beginning...

Page 15: ...top 2 Slip vinyl bindings over frame NOTE If vinyl bindings are too stiff hold them in warm water for a few minutes If bag gets wet let it dry before using _I CAUTION Do not run your lawn mower without clipping deflector or approved grass catcher in place Never attempt to operate the lawn mower with the rear door removed or propped open frame handle Frame opening ENGINE ENGINE SPEED Your engine sp...

Page 16: ...transportation be sure to fold the handle as shown or you may damage the control cables Operator p control bar Upper Lower han FOLD BACKWARD Mowing position pin Handle bracket J ENGINE FUEL SYSTEM IMPORTANT It is important to prevent gum deposits from forming in essential fuel system parts such as carburetor fuel filter fuel hose or tank during storage Also alcohol blended fuels called gasohol or ...

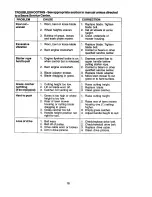
Page 17: ...ing in any enclosure TROUBLESHOOTING See appropriate section in manual unless directed PROBLEM Does not start to a Sears Service Center CAUSE 1 Dirty air filter 2 Out of fuel 3 Stale fuel Loss of power 4 Water in fuel 5 Spark plug wire is disconnected 6 Bad spark plug 7 Loose blade or broken blade adapter 8 Control bar in released position 9 Control bar defective 1 Rear of lawn mower housing or cu...

Page 18: ...to upper handle before pulling starter rope 2 Contact a Sears or other qualified service center 3 Replace blade adapter 4 Move lawn mower to cut grass or to hard surface Grass catcher 1 Cutting height too low 1 Raise cutting height notfilling 2 Lift on blade worn off 2 Replace blade Ifsoequipped 3 Catcher not venting air 3 Clean grass catcher Hard to push 1 Raise cutting height 1 Grass is too high...

Page 19: ...en losEstadosUnidos Esta Garantiale otorgaderechos legalesespecificos y puede que tambidntenga otrosderechosque var_ande estado a estado Sears Roebuck and Co Di817WA Hoftrnan Estates IL 60179 USA IMPORTANTE Esta maquina cortadaora es capaz de amputar las manes y los manos y los pies y de lanzar objetos Si no se obsewan las instrucciones de seguridad siguientes se pueden producir lesiones graves o ...

Page 20: ...anera anormal pare el motor y revise de inmediato para averiguar la causa Generalmente la vibracibn suele indicar que existe alguna averia Siempre use gafas de seguddad o anteojos con protecci6n lateral cuando opera la segadora II OPERACION SOBRE LAS CUESTAS Los accidentes ocurren con m s frecuencia en las cuestas Estos accidentes ocurren debido a resbaladas o cal das las cuales pueden resultar en...

Page 21: ...s componentes del receptor de la hierba van sujetos a desgaste dafios y deterioro que pueden exponer las partes en movimiento o permitir que objetos sean disparados Controlar frecuentemente y cuando sea necesario sustituir con partes aconsejadas por el fabricante Las cuchillas de la segadora estdn afiladas y pueden cortar Cubrir las hojas o Ilevar guantes y utilizar precauciones especlales cuando ...

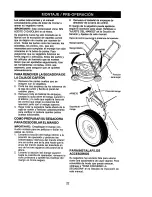
Page 22: ...la segadora 2 Corte las dos esquinas de los extremos de la caja de cart6n y tienda el panel del extremo piano 3 Remueva todo el material de empaque APRIETE excepto la curia entre el mango superior y _1inferior y la curia que sujeta la barra de los control que exige la presencia del operador junto con el mango superior 4 Haga rodar la segadora hacia afuera de la caja de cart6n y revfsela cuidadosam...

Page 23: ...a CUMPLE CON LOS REQUISlTOS DE SEGURIDAD DE LA CPSC Las segadorasa motor que se conducondesde la parte de atrds rotatorias Sears cumplencon los estdndaresde seguridaddel AmericanNationalStandardsIns_tutey de la U S ConsumerProduct SafetyCommission La cuchilla giracuandoel motorestd funcionando Barra de control que exige la presencia del Cebador bombea combustible adicionaldesdeel operador tieneque...

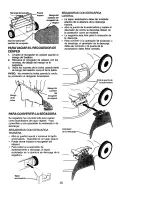
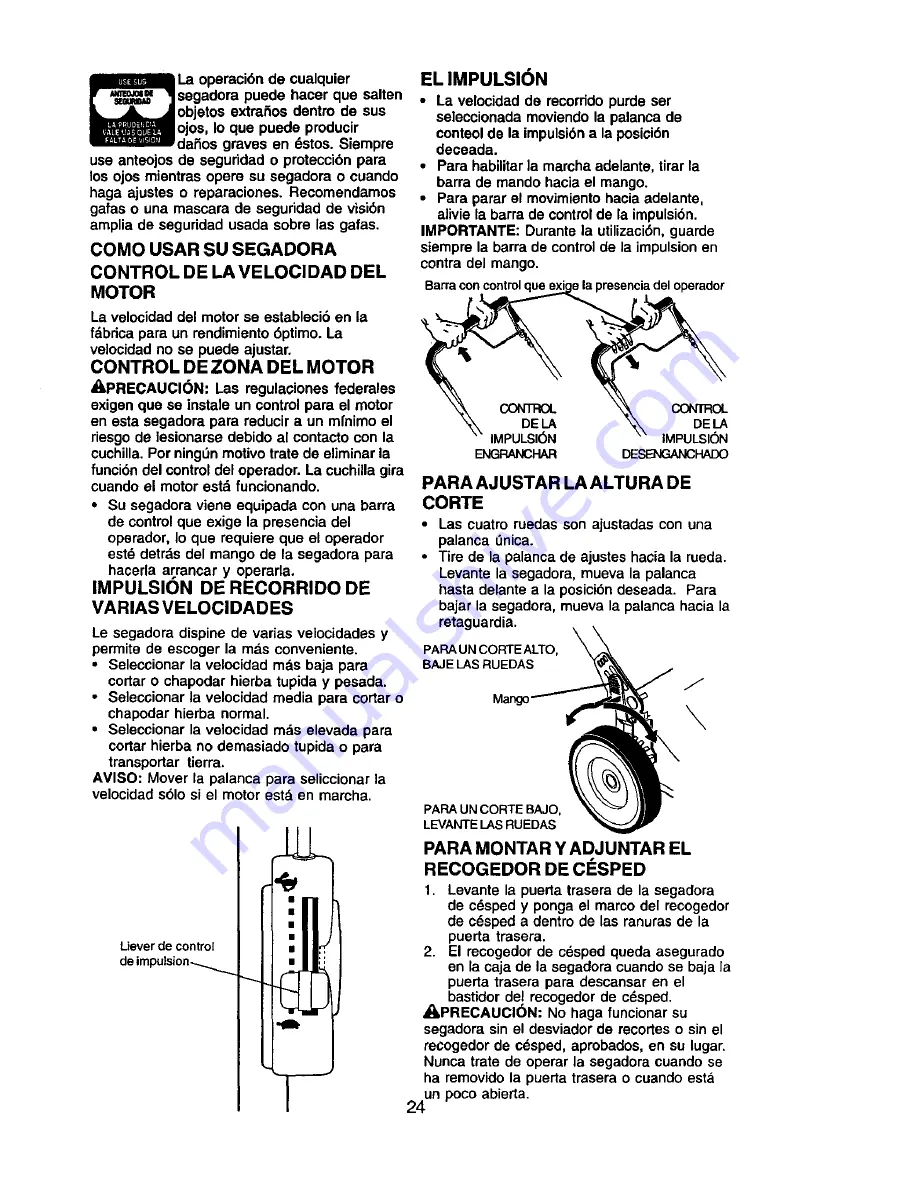
Page 24: ...levada para cortar hierba no demasiado tupida o para transportar tierra AVISO Mover la palanca para seliccionar la velocidad s61osi el motor estd en marcha Liever de control EL IMPULSI6N La velocidad de recorrido purde ser seleccionada moviendo la palanca de conteol de la impulsi6na la posici6n deceada Para habilitar la marcha adelante tirar la barra de mando hacia el mango Para parar el movimient...

Page 25: ...a una operaci6n de ensacado o de descarga SEGADORAS CON DESCARGA TRASERA Abra la puerta trasera y remueva la tap6n acolchadora Guardela en un lugar seguro Puede ahora instalar el recogedor del cesped Para volver a la operaci6n de acolchamiento o descarga el tap6n acolchador en la abertura de descarga de la segadora _A Tap_ acolchadora SEGADORAS CON DESCARGA LATERAL La tap6n acolchadora debe ser in...

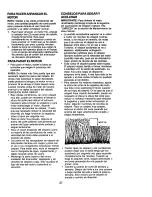
Page 26: ...brellene el motor con aceite o fumar_ cuando Io vaUa a arrancar 6 Asegfirese de apretar la vanlla medidora del aceite antes de arrancar el motor Revise el nivel del aceite antes de cada uso Agregue aceite si es necesario Llene hasta la Ifnea de Iteno en la varilla medidora de nivel Cambie el aceite despu6s de 25 horas de operaci6n o una vez por temporada Puede necesitar cambiar el aceite m s a men...

Page 27: ...te y d_jelo secarse antes de usado Mantenga la parte superior del motor alrededor del arrancador despejada y sin recortes de c_sped y paja Esto ayudard el flujo del aire del motor y extendera su duraci6n CONSEJOS PARA SEGAR Y ACOLCHAR IMPORTANTE Para obtener el mejor rendimlento mantenga la caja de la segadora sin acumulac6n de c_sped y basura Vea LIMPIEZA en la secci6n de Mantenimento de este man...

Page 28: ... segOn las instrucciones descritas en este manual Hay algunos ajustes que se tienen que hacer en forma peri6dica para poder mantener su unidad adecuadamente Todos los ajustes en la secci6n de Servicio y Ajustes de este manual tienen que ser revisados pot Io menos un vez pot cada temporada Una vez al arlo cambie la bujfa limpie o cambie el elemento del filtro de aire y revise si la cuchilla estd de...

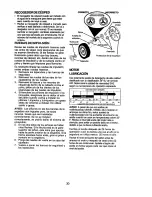
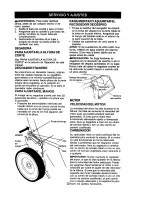
Page 29: ...r de la cuchilla y revise el cubo interior de la ranura del adaptador de la cuchilla La ranura tiene que estar en buenas condiciones para que funcione en forma adecuada Carnbie el adaptador si estd daSado PARA CAMBIAR LA CUCHILLA t Ponga el adaptador de la cuchilla en el cigueSal del motor Aseg_rese que la ranura del adaptador y que el chavetero del cigueSal est_n alineados 2 Ponga la cuchnla en e...

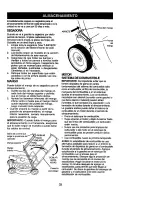
Page 30: ...dora son inguales pero de todas naneras tienen que ser instaladas correctamente Se no se instalan correctamente se podrfa daSar el sistema de encendido 5 En los dos lados de los piSones se hallan unas flechas Si la flecha estd en la parte superior del piSon 6sta teine pue apuntar hacia la padre anterior de la segadora Si la flecha apuntara hacia atrds girar el pihon y nontarlo en la segadora 6 Pon...

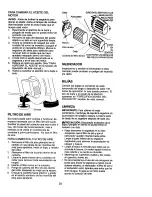
Page 31: ...dndolo en el sentido en que gffela de las manillas del reloj para apretarla hasta el tope y retffelo del collar 2 Remueva el filtro de la parte interior de la cubierta 3 Limpie la parte interior de la cubierta y el collar pare remover toda acumulacibn de mugre 4 Inserte el filtro nuevo en la cubierta 5 Ponga la cubierta del filtro de aire dentro del collar alineando la oreja con la ranura 6 Empuje...

Page 32: ...o sobre el bastidor AVISO Si los sujetadores de vinilo estdn muy duros m6talos en agua caliente por algunos minutos Si se moja la bolsa dGjelaque se seque antes de usada _PRECAUCl6N No haga funcionar su segadora sin el desviador de recortes o sin el recogedor de c6sped aprobados en su lugar Nunca trate de operar la segadora cuando se ha removido la puerta trasera o cuando estd un poco abierta Mang...

Page 33: ...ar los cables de control exig operador ue _DOBLAR Mango DOBLAR HAClA AmAS Posici6n para segar J del mango MOTOR SISTEMA DE COMBUSTIBLE IMPORTANTE Es importanteevitarque se formen depasitos de goma en partes fundamentales del s Btema de combustible tales como el carbureder el filtro del combustible la manguera del combustible o en el estanque durante el almacenamiento Los combustibles mezclados con...

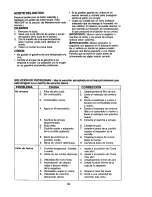
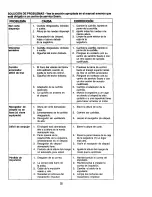
Page 34: ...n algdn recinto cerrado SOLUCI N DE PROBLEMAS Vea la secci6n apropiada en el manual amenos que est6 dirigido a un centro de servico Sears PROBLEMA CAUSA No arranca 1 Filtro de aire sucio 2 Sin combustible 3 Combustible rancio 4 Agua en el combustible 5 Alambre de la bujia desconectado 6 Bujfa mala 7 Cuchilla suelta o adaptador de la cuchilla quebrado i 8 Barra de control en la posici6n suelta 9 Ba...

Page 35: ...sted 1 Desgaste de la correa 2 La correa estd fuera de la polea 3 Cable de la impulsiSn usado o roto 4 Suciedad en pifiones del mecanismo impulsor CORRECCI _N 1 Cambie la cuchilla Apdete el perno de la cuchilla 2 Ajuste todas las ruedas a la misma altura 3 Limpie la parte infedor de la caja de la segadora 1 2 Cambie la cuchilla Apdete el perno de la cuchilla P6ngase en contacto con su centro de se...

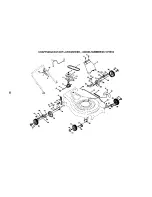
Page 36: ...10 CRAFTSMAN ROTARY LAWN MOWER MODEL NUMBER 917 377812 18 22 28 41 12 24 56 I ...

Page 37: ...ex LockwasherIns 5 16 18 UNC 51 169980 Spacer Cotter Hairpin 52 170047 WaveWasher EngineZone control 53 173041 BeltCover Bottom Bracket Upstop 54 750097 Screw Screw Hex Washer Head Tapping10 2 55 166383X479 Cable Support Bracket Kit Door Rear 56 63601 Nut Seal Door 57 166391X004 Bracket Assy Plug Mulcher 58 57808 Screw Kit Housing 59 166042 V Groove PuUey Handle Bracket Asm Left 60 166050 IdlerArm...

Page 38: ...C RAFTSMAN ROTARY LAWN MOWER MODEL NUMBER 917 377812 23 43 24 33 32 34 ...

Page 39: ...t 34 150182 Screw Hex Wash Head 10 24 X 668 35 160785X004 Pivot Rod Cover 36 160786X004 TransmissionAsm 37 161463 Pin SpringThrust 38 163409 WasherHardened 39 700279 RodConnecting 40 172323 SpringExtension 41 150182 Spring Selector 42 83928 Knob Selector Spring 43 19572216 E Ring7 8 44 144929 BearingSupport 45 751152 Bearing Ball RetainerDrive Asm Stmp Screw Hex Head Tapping 1 4 20 x 75 DESCRIPTIO...

Page 40: ...CRAFTSMAN 4 CYCLE ENGINE MODEL NUMBER 143 026710 400 182 185j 370C 40 ...

Page 41: ...LM 150 31672 Valve Spring 151 31673 Valve Spring Cap 151A 40017 Intake Valve Seal 169 36783 Valve Cover Gasket 172 36784 Valve Cover I_ _ PART NO NO DESCRIPTION 174 30200 Screw 10 24 x 9 16 178 29752 Nut LockWasher 1 4 28 182 6201 Screw 1 4 28 x 7 8 184 26756 CarburetorTo Intake Pipe Gasket 185 37466 Intake Pipe 186 36253 GovernorLink 189 650839 Screw I 4 20 x 27 64 191 36559A S E Brake Bracket In...

Page 42: ...rts List Throttle Shaft Lever Assembly Throttle Return Spring Dust Seal Washer Dust Seal Throttle Shutter Shutter Screw Fuel Fitting Throttle Crack Idle Speed Screw Tension Spring Idle Restrictor Screw Idle Restrictor Screw Cap FloatBowl Float Shaft Float Plastic FloatBowlO Ring Inlet Needle Seat Clip Includes Key Number 31 SpringClip PrimerBulb Red RetainerRing Main Nozzle Tube Bowl Vent Tube Ext...

Page 43: ...arter HousingAssembly 40dogres Grommet 590535 Starter Rope 98 x 9 64 diameter 590701 Starter Handle NOTE Aircomponent dimensionsgivenin U S inches 1 inch 25 4 mm K_ Y PART NO NO DESCRIPTION 590739 RewindStarter 3 590740 Retainer 6 590616 Starter Dog 7 590617 DogSpring 8 590618A Pulley Rewind SpringAssembly It 590638 Starter Housing Assembly 40degree Grommet 12 590535 Starter Rope 98 x 9 64 diamete...

Page 44: ... m 11 p m 7 daysaweek 1 800 366 7278 U SJ_ only www sear com_rtsdkect To purchaseor inquire abouta Sears ServiceAgreement or Sears Maintenance Agreement 1 800 827 6655 u s _ 1 800 361 6665 Canada 7 am 5 p m CST Mor_ Sat 9 a m 8 p m EST M F 4 p m Sat Para pedirse_icio de reparaci6na dorniciio y paraondenarpiezas 1 888 SU HOGARsM 14_7844427 AuCanadapourserviceen frar_aJs 1 800 LE FOYER Mc I_7 WWW Se...

Reviews: