30
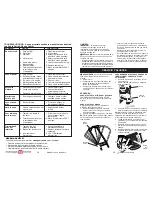
8. Remueva la correa de la polea del cabezal
de la recortadora.
9. Observe la posición del cable de control
y del resorte de llamada del piñon loco.
A continuación remueva el conjunto del
piñon loco del chasis y remueva la correa
y el piñon loco de la recortadora.
10. Remueva la correa del conjunto del piñon
loco al remover el fijador de correa inferior
y las poleas del piñon.
11. Monte la nueva correa, las poleas del piñon
loco y el fijador de correa inferior al soporte
del piñon. Apriete los pernos de la polea
con seguridad.
AVISO:
Asegúrese que la correa esté en el
interior del fijador de la correa superior sobre el
conjunto del piñón.
12. Instale la correa y el conjunto del piñon
loco en la recortadora, vuelva a conectar
un resorte del piñon loco y monte el piñon
loco al chasis. Apriete con seguridad.
13. Instale la correa alrededor de la polea del
cabezal de la recortadora y de la polea del
motor.
AVISO:
Asegúrese que la correa esté en el
interior del fijador de la correa.
14. Substituya el blindaje y apriete los cuatro
(4) tornillos con seguridad.
15. Substituya la cubierta del chasis y apriete
el tornillo con seguridad.
Utilice siempre las piezas de recambio Crafts-
man para asegurar un ajuste adecuado y una
vida larga.
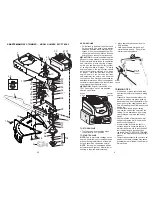
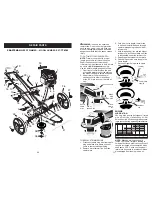
Correa
Conjunto del piñón loco
Polea del motor
Polea del cabezal de la recoriadora
Fijador de la correa superior
Chasis
Engranaje
plano
Ecrou
Espaciador
Fijador
de correa
inferior
Conjunto del piñón loco
Espaciador
Boulon
Guía “V”
Engranaje
plano
Cable de control
Resorte
del piñón
MOTOR
VELOCIDAD DEL MOTOR
La velocidad del motor ha sido ajustada en
la fábrica. No trate de aumentar la velocidad
del motor pues se pueden producir lesiones
personales. Si cree que el motor está funcio-
nando demasiado rápido o demasiado lento,
llleve su unidad a un centro de servicio Sears o
a un otro centro de servicio cualificado para la
reparación y/o el ajuste.
CARBURADOR
Su carburador no es ajustable. Si su motor no
está funcionando en forma adecuada debido a
problemas que se sospecha vienen del carbu-
rador, lleve su unidad a un centro de servicio
Sears o a un otro centro de servicio cualificado
para la reparación y/o el ajuste.
IMPORTANTE:
Nunca manipulee el regulador
del motor, el que ha sido ajustado en la fabrica
para la velocidad del motor adecuada. Puede
ser peligroso hacer funcionar el motor a una
velocidad por sobre el ajuste de alta velocidad
de la fabrica. Si cree que la velocidad alta
regulada del motor necesita ajuste, leve
su unidad a un centro de servicio Sears o
a un otro centro de servicio cualificado, el
que cuenta con el equipo adecuado y la
experiencia para hacer los ajustes necesarios.
15
STORAGE
Immediately prepare your trimmer for stor-
age at the end of the season or if the unit
will not be used for 30 days or more.
TRIMMER
When trimmer is to be stored for a period
of time, clean it thor oughly, remove all dirt,
grease, leaves, etc. Store in a clean, dry area.
1. Clean entire trimmer (See “CLEANING” in
the Maintenance section of this manual).
2. Lubricate as shown in the Main te-
nance section of this manual.
3. Be sure that all nuts, bolts, screws, and
pins are securely fas tened. Inspect
moving parts for damage, breakage and
wear. Replace if necessary.
4. Touch up all rusted or chipped paint
surfaces; sand lightly before painting.
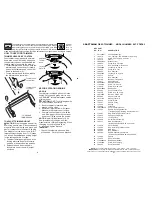
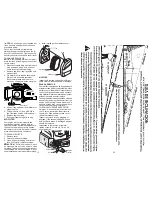
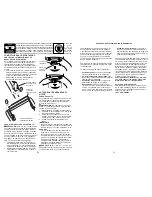
HANDLE
You can fold your trimmer handle for storage.
• Loosen handle knob enough to allow
upper handle to be folded forward.
IMPORTANT:
When folding the handle
for storage or transportation, be sure to
fold the handle as shown or you may
damage the control cables.
ENGINE
FUEL SYS TEM
IMPORTANT
: It is important to prevent
gum deposits from forming in essential
fuel system parts such as carburetor, fuel
filter, fuel hose or tank during storage.
Also, alcohol blended fuels (called
gasohol or using ethanol or methanol)
can attract moisture which leads to
separation and formation of acids during
storage. Acidic gas can damage the fuel
system of an engine while in storage.
• Empty the fuel tank by starting the en-
gine and letting it run until the fuel lines
and car bu re tor are empty.
• Never use engine or carburetor cleaner
prod ucts in the fuel tank or per ma nent
damage may occur.
• Use fresh fuel next season.
NOTE:
Fuel stabilizer is an acceptable
al ter na tive in minimizing the formation
of fuel gum deposits during stor age.
Add stabilizer to gasoline in fuel tank or
storage con tain er. Always follow the mix
ratio found on stabilizer container. Run
engine at least 10 min utes after adding
stabilizer to allow the stabilizer to reach
the car bu re tor. Do not drain the gas tank
and carburetor if using fuel stabilizer.
CYLINDER
1. Remove spark plug.
2. Pour one ounce (29 ml) of oil through
spark plug hole into cylinder.
3. Pull starter handle slowly a few times
to dis trib ute oil.
4. Replace with new spark plug.
OTHER
• Do not store gasoline from one season
to another.
• Replace your gasoline can if your can
starts to rust. Rust and/or dirt in your
gasoline will cause problems.
• If possible, store your unit indoors and
cover it to protect it from dust and dirt.
• Cover your unit with a suitable protec-
tive cover that does not retain moisture.
Do not use plastic. Plastic cannot
breathe, which allows con den sa tion to
form and will cause your unit to rust.
IMPORTANT
: Never cover trimmer while
en gine and exhaust areas are still warm.
CAUTION:
Never store the trimmer
with gaso line in the tank inside a build ing
where fumes may reach an open flame
or spark. Allow the engine to cool before
storing in any en clo sure.
Upper
handle
Handle knob


