background image

Summary of Contents for 919.176850

Page 1: ...label on the rear of the air tank 3 The Manufacturers Number ASME Code Compressors only is located on the metal data plate which is welded onto the backside of the air tank This data plate is painted the same color as the tank 4 The Motor Manufacturers name which is located on the motor label or specification plate 5 The Motor Mfg number also located on the motor label or specifi cation plate Reta...

Page 2: ...AND BREAK IN PROCEDURES 8 Location of Air Compressor 8 Extension Cords 8 Lubrication and Oil 8 Grounding Instructions 9 Break in Procedures 9 OPERATING PROCEDURES 9 MAINTENANCE 10 Air Filter Inspection and Replacement 10 Oil Checking and Changing 10 Air Tank Draining Water 10 Check Valve Replacement 10 Safety Valve Inspection 10 Motor 10 Belt Replacement 11 To Adjust Belt Tension 11 Pulley and Fly...

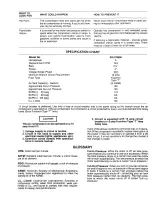
Page 3: ...s headed by these symbols URGENT SAFETY INFORMATION A HAZARD THAT WILL CAUSE SERIOUS INJURY OR LOSS OF LIFE IMPORTANT SAFETY INFORMATION A HAZARD THAT MIGHT CAUSE SERIOUS INJURY OR LOSS OF LIFE Information for preventing damage to equipment NOTE Information that you should pay special atten tion to WARNING HAZARDS CAN OCCUR IF EQUIPMENT IS NOT USED PROPERLY PLEASE READ THE FOLLOWING CHART WHAT TO ...

Page 4: ...ith the specified voltage and adequate fuse protection Always unplug the unit and release air pressure from the tank and any accessories before doing repair or maintenance Never operate the compressor with the belt guard removed Never directly inhale the compressed air produced by this unit Read labels and safety data for all materials you spray Follow al safety precautions Use a mask or respirato...

Page 5: ...it if 1 Voltage supply to circuit is normal 2 Circuit is not used to supply any other electrical needs lights appliances etc 3 Extension cords comply with specifica tions in owners manual 4 Circuit is equipped with 15 amp circuit breaker or 15 amp Fuestron Type T time delay fuse If any of the above conditions cannot be met or if opera tion of the compressor repeatedly causes interruption of the po...

Page 6: ... or through the Sears General catalog or Power Tool catalog DESCRIPTION OF OPERATION V eVE Air Compressor Pump To compress air the pistons move up and down in the cylinders On the downstroke air is drawn in through the air intake filter and then through the air intake valves The exhaust valve remains closed On the upstroke of the piston air is compressed The intake valves close and compressed air ...

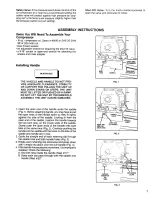
Page 7: ...LIFT THE UNIT BY THE MANIFOLD ASSEMBLY THE UNIT CAN BE DAMAGED 1 Insert the open end of the handle under the saddle Fig 1 Before attaching handle you may have to pull the open ends of the handle apart so they fit tightly against the side of the saddle Looking in from the open end of the saddle position the handle towards the two bent tabs on the inside wails of the saddle Slowly push the open ends...

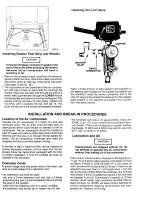
Page 8: ...he fan bladed fly wheel The air compressor crankcase and head are 3esigned with fins to provide proper cooling If humidity is high a Sears air filter can be installed to remove excessive moisture and oil vapor from the air Closely follow the instructions packaged with the filter Forproper installation it must be installed as close as oossible to the accessory Extension Cords Foavoid voltage drop a...

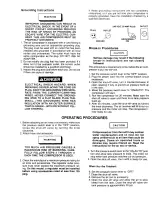
Page 9: ...t branch circuit receptacle 3 Open the shut off valve turn it counterclockwise to open opening it fully to prevent air pressure build up in the tank 4 Move the pressure switch lever to ON AUTO ThE compressor will start 5 Run the compressor for 30 minutes Make sure the shut off valve is open and there is no tank pressur build up 6 After 30 minutes close the shut off valve by turnin the knob clockwi...

Page 10: ...k oil level in the crankcase daily Remove the oil fill plug Key no 77 pg 15 The oil level should be even with the top of the fill hole and must not be allowed to be lower than 3 8 from the top 6 threads at any time It is recommended that the oil be changed after every 100 hours of operation To drain the oil remove the oil drain plug and collect the oil in a suitable container Be sure to replace th...

Page 11: ...outside of the flywheel and measure the distance from it to the nearest groove Alignment is achieved when the other end of the straight edge is within 1 32 of the measured dimension at the pulley groves STORAGE Before You Store The Air Compressor 1 Review the Maintenance section on the preceding pages and perform maintenance as necessary Drain th e water from the air tank 2 Set the OFF AUTO switch...

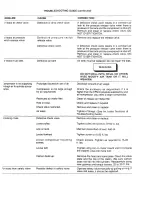
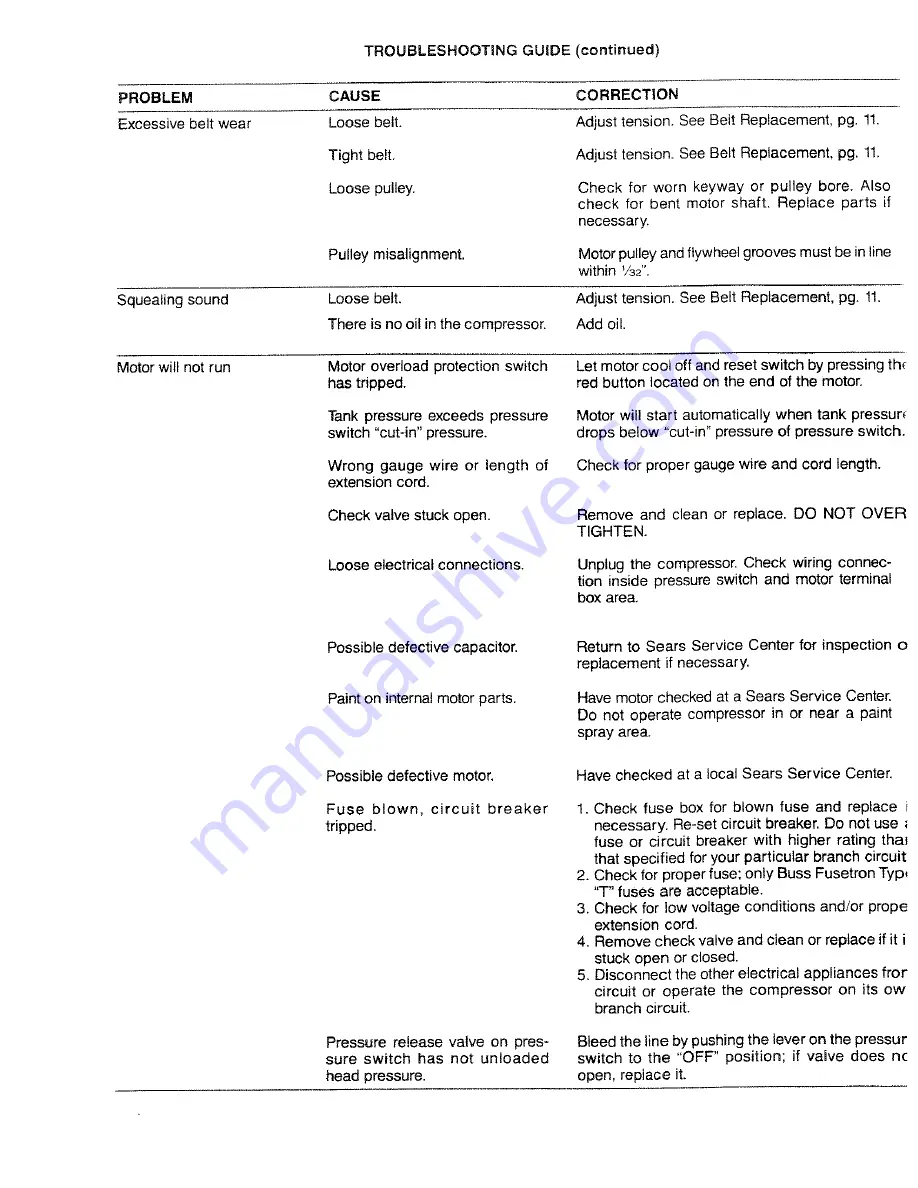
Page 12: ...f air usage Compressor is not large enough for air requirement Restricted air intake filter Hole in hose Check Valve restricted Air leaks Defective check valve Check the accessory air requirement If it is higher than the CFM or pressure supplied by your air compressor you need a larger compressor Clean or replace air intake filter Check and replace if required Remove and clean or replace Tighten F...

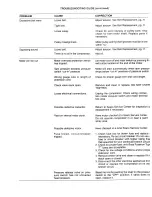
Page 13: ...n or replace DO NOT OVER TIGHTEN Unplug the compressor Check wiring connec tion inside pressure switch and motor terminal box area Possible defective capacitor Paint on internal motor parts Return to Sears Service Center for inspection o replacement if necessary Have motor checked at a Sears Service Center Do not operate compressor in or near a paint spray area Possible defective motor Fuse blown ...

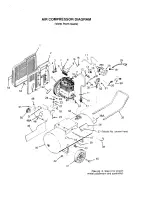
Page 14: ...AIR COMPRESSOR DIAGRAM view from back 54 53 49 51 50 48A 48 46 52 17 27 28A 25 36A 35 37 Model No shown here 40 See pg B Step 2 for proper wheel placement and assembly ...

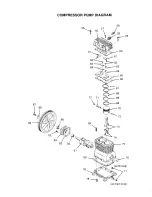
Page 15: ...COMPRESSOR PUMP DIAGRAM 58 87 86 61 60 73 74 75 80 76 oil fill plug oil drainplug ...

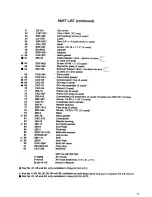
Page 16: ...ead Screw 5 40 1 4 8 used Restrictor plate 2 used Exhaust flapper valve beveled corners 2 used on valve plate FValve plate Valve plate gasket Compression ring 4 used Oil ring 4 used Oil ring expander 2 used Piston 2 used Piston pin 2 used Piston pin plug 4 used Connecting rod assembly 2 used includes two SSF 927 screws Screw 1 4 20 x 1 1 8 4 used Crankcase and cylinder Needle bearing Pipe plug 2 u...

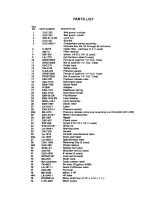
Page 17: ...r pump assembly includes Key No 55 through 89 inclusive Intake filter package of 2 t used Filter retainer Screw 8 32 x 3 8 2 used Hot Surface Label 2 used Ferrule 2 used for 1 2 O D Tube Nut 2 used for 1 2 O D Tube Outlet tube Safety valve Pressure gauge Ferrule 2 used for 1 4 O D Tube Nut 2 used for 1 4 O D Tube Pressure release tube Hold down plate Strain Relief Adapter Eiastomer spring Hold dow...

Reviews: