background image

3

SAFETY INSTRUCTIONS

TRAINING

• 

Read, understand, and follow all instructions on the machine and in the 

manual(s) before attempting to assemble and operate. Failure to do so can 

result in serious injury to the operator and/or bystanders. Keep this manual in a 

safe place for future and regular reference and for ordering replacement parts.

• 

Be familiar with all controls and their proper operation. Know how to stop 

the machine and disengage them quickly.

• 

Never allow children under 14 years of age to operate this machine. Children 14 and 

over should read and understand the instructions and safe operation practices in this 

manual and on the machine and be trained and supervised by an adult. 

• 

Never allow adults to operate this machine without proper instruction. 

• 

Thrown objects can cause serious personal injury. Plan your snow-throwing 

pattern to avoid discharge of material toward roads, bystanders and the like. 

• 

Keep bystanders, pets and children at least 75 feet from the machine while it 

is in operation. Stop machine if anyone enters the area.

• 

Exercise caution to avoid slipping or falling, especially when operating in reverse.

PREPARATION

• 

Thoroughly inspect the area where the equipment is to be used. Remove all 

doormats, newspapers, sleds, boards, wires and other foreign objects, which 

could be tripped over or thrown by the auger/impeller. 

• 

Always wear safety glasses or eye shields during operation and while 

performing an adjustment or repair to protect your eyes. Thrown objects 

which ricochet can cause serious injury to the eyes.

• 

Do not operate without wearing adequate winter outer garments. Do not wear 

jewelry, long scarves or other loose clothing, which could become entangled in 

moving parts. Wear footwear which will improve footing on slippery surfaces. 

• 

Use a grounded three-wire extension cord and receptacle for all machines 

with electric start engines. 

• 

Disengage all control levers before starting the engine. 

• 

Never attempt to make any adjustments while engine is running, except 

where specifically recommended in the operator’s manual.

• 

Let engine and machine adjust to outdoor temperature before starting to 

clear snow. 

Safe Handling of Gasoline:

To avoid personal injury or property damage use extreme care in handling 
gasoline. Gasoline is extremely flammable and the vapors are explosive. 

Serious personal injury can occur when gasoline is spilled on yourself or your 
clothes which can ignite.  Wash your skin and change clothes immediately.

• 

Use only an approved gasoline container.

• 

Extinguish all cigarettes, cigars, pipes and other sources of ignition.

• 

Never fuel machine indoors. 

• 

Never remove gas cap or add fuel while the engine is hot or running. 

• 

Allow engine to cool at least two minutes before refueling.

• 

Never overfill fuel tank. Fill tank to no more than ½ inch below bottom of 

filler neck to provide space for fuel expansion.

• 

Replace gasoline cap and tighten securely.

• 

If gasoline is spilled, wipe it off the engine and equipment. Move machine to 

another area. Wait 5 minutes before starting the engine.

• 

Never store the machine or fuel container inside where there is an open 

flame, spark or pilot light (e.g. furnace, water heater, space heater, clothes 

dryer etc.). 

• 

Allow machine to cool at least 5 minutes before storing.

• 

Never fill containers inside a vehicle or on a truck or trailer bed with a plastic 

liner. Always place containers on the ground away from your vehicle before 

filling.

• 

If possible, remove gas-powered equipment from the truck or trailer and 

refuel it on the ground. If this is not possible, then refuel such equipment 

on a trailer with a portable container, rather than from a gasoline dispenser 

nozzle.

• 

Keep the nozzle in contact with the rim of the fuel tank or container opening 

at all times until fueling is complete. Do not use a nozzle lock-open device.

OPERATION

• 

Do not put hands or feet near rotating parts, in the auger/impeller housing 

or chute assembly. Contact with the rotating parts can amputate hands and 

feet. 

• 

The auger/impeller control lever is a safety device. Never bypass its operation. 

Doing so makes the machine unsafe and may cause personal injury. 

• 

The control levers must operate easily in both directions and automatically 

return to the disengaged position when released. 

• 

Never operate with a missing or damaged chute assembly. Keep all safety 

devices in place and working.

• 

Never run an engine indoors or in a poorly ventilated area. Engine exhaust 

contains carbon monoxide, an odorless and deadly gas. 

 WARNING

This symbol points out important safety instructions which, if not 
followed, could endanger the personal safety and/or property of 
yourself and others. Read and follow all instructions in this manual 
before attempting to operate this machine. Failure to comply with these 
instructions may result in personal injury. When you see this symbol, HEED 
ITS WARNING!

 WARNING

CALIFORNIA PROPOSITION 65

Engine Exhaust, some of its constituents, and certain vehicle components 
contain or emit chemicals known to State of California to cause cancer and 
birth defects or other reproductive harm.

 DANGER

This machine was built to be operated according to the safe operation 
practices in this manual. As with any type of power equipment, 
carelessness or error on the part of the operator can result in serious injury. 
This machine is capable of amputating fingers, hands, toes and feet and 
throwing debris. Failure to observe the following safety instructions could 
result in serious injury or death.

 WARNING

Your Responsibility

—Restrict the use of this power machine to 

persons who read, understand and follow the warnings and instructions in 
this manual and on the machine. 

SAVE THESE INSTRUCTIONS!

Summary of Contents for CMGB21179

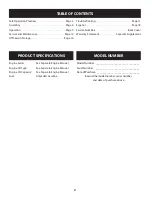
Page 1: ...rm No 769 15931 June 6 2018 INSTRUCTIONMANUAL MANUALDEINSTRUCTIONES SNOW BLOWER ModelNos CMXGBAM1054538 CMXGBAM1054539 CMXGBAM1054540 CMGB21179 IFYOUHAVEQUESTIONSORCOMMENTS CONTACTUS SITIENEDUDASOCOMENTARIOS CONTÁCTENOS 1 888 331 4569 WWW CRAFTSMAN COM NOTE ThisOperator sManualcoversseveralmodels Featuresmayvarybymodel Notallfeaturesinthismanualareapplicabletoallmodelsandthemodeldepictedmaydiffer ...

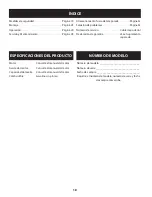
Page 2: ...ice Numbers Back Cover Warranty Statement Seperate Supplement Engine Series See Seperate Engine Manual Engine Oil Type See Seperate Engine Manual Engine Oil Capacity See Seperate Engine Manual Fuel Unleaded Gasoline Model Number _________________________________ Serial Number __________________________________ Date of Purchase ________________________________ Record the model number serial number ...

Page 3: ...re than inch below bottom of filler neck to provide space for fuel expansion Replace gasoline cap and tighten securely If gasoline is spilled wipe it off the engine and equipment Move machine to another area Wait 5 minutes before starting the engine Never store the machine or fuel container inside where there is an open flame spark or pilot light e g furnace water heater space heater clothes dryer...

Page 4: ...rtightnessatfrequentintervalstokeepthe machineinsafeworkingcondition Also visuallyinspectmachineforanydamage Do not change the engine governor setting or over speed the engine The governor controls the maximum safe operating speed of the engine Snow blower shave plates and skid shoes are subject to wear and damage For your safety protection frequently check all components and replace with original...

Page 5: ...g parts in the auger impeller housing or chute assembly Contact with the rotating parts can amputate hands and feet WARNING THROWN OBJECTS This machine may pick up and throw and objects which can cause serious personal injury WARNING GASOLINE IS FLAMMABLE Allow the engine to cool at least two minutes before refueling WARNING CARBON MONOXIDE Never run an engine indoors or in a poorly ventilated are...

Page 6: ...ached to the chute which is shipped under the shroud on the backside of the carton Assembly Positioning the Upper Handle 1 Remove the wing knobs and carriage bolts from the top of the lower handle See Figure 1 It is not necessary to remove the shoulder screw and flange lock nut below the wing knob and carriage bolt Wing Knob Wing Knob Carriage Bolts Figure 1 2 Pivot the upper handle into the opera...

Page 7: ...E85 fuel an oil gasoline mixture dirty gasoline or gasoline over 30 days old without fuel stabilizing additive may result in damage to your engine s carburetor Subsequent damage would not be covered under the manufacturer s warranty Use automotive gasoline unleaded or low leaded to minimize combustion chamber deposits with a minimum of 87 octane Gasoline with up to 10 ethanol E10 or 15 MTBE Methyl...

Page 8: ...Place the snow blower on a flat level surface 2 On some models the oil filler cap dipstick can be accessed on the left side of the shroud See Figure 7 On other models the oil filler cap dipstick can be accessed at the rear of the snow blower See Figure 8 Oil Filler Cap Dipstick Fill between the high and low marks Figure 7 Upper Level Lower Level Figure 8 3 Remove the oil filler cap dipstick and wi...

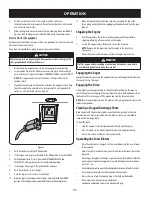
Page 9: ...erences to LEFT RIGHT FRONT and REAR indicate that position on the when facing forward in the operation position Choke Control Model CMXGBAM1054538 CMXGBAM1054539 Model CMXGBAM1054540 CMGSB21179 RUN CHOKE RUN CHOKE CHOKE BELOW Activatingthechokecontrolclosesthechokeplateoncarburetorandaidsinstarting engine ThechokeleverslidesbetweentheRUN andCHOKE positions Primer CMXGBAM1054538 CMXGBAM1054540 CMX...

Page 10: ...on the machine and in this manual before operating Starting The Engine Recoil Starter WARNING Always keep hands and feet clear of moving parts Do not use a pressurized starting fluid Vapors are flammable WARNING To avoid carbon monoxide poisoning make sure the engine is outdoors in a well ventilated area 1 Make certain the auger control is in the disengaged released position 2 Insert ignition key ...

Page 11: ...gine 1 Run the engine for a few minutes without engaging the auger before stopping to help dry off any moisture on the engine 2 To stop the engine remove the key and store it in a safe place NOTE Remove the key to quickly stop the engine in the event of an emergency 3 Wipe all the snow and moisture away from the engine controls area WARNING Muffler engine and surrounding areas become hot and can c...

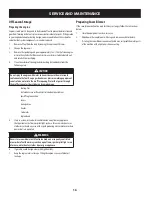
Page 12: ...ce procedures Checking adding and changing oil are also found in this manual Lubrication Lubricate the pivot points on the control handle and the extension spring at the end of the control cable with a light oil once every season and before the snow blower is put into storage at the end of the season Adjustments Shave Plate To check the adjustment of the shave plate place the machine on a level su...

Page 13: ... shown in Figure 2 Control Cable Control Handle Figure 2 2 Test the snow blower to see if there is a noticeable difference If after the adjustment to the control cable the auger still hesitates when rotating see Auger Drive Belt Replacement for instructions on replacing the belt Chute Assembly Refer to the Assembly section for instructions on adjusting the chute assembly Service Auger Drive Belt R...

Page 14: ... rests on the handles 3 Remove the existing rubber paddles by unthreading the hex washer screws which secure them to the auger See Figure 6 NOTE The auger paddles should be replaced one at a time so that the auger paddle still attached can be used as an example for positioning and re installing the new auger 4 Secure the replacement rubber paddles to the auger using the hardware removed earlier A ...

Page 15: ... tabs at the bottom of the panel from the tab slots and then pull back See Figure 7 Figure 7 NOTE The bottom of the panel has tabs that help hold it in place NOTE An oil drain extension kit is available separately Visit a Service Center or call 1 888 331 4569 and ask for kit 753 06684 3 Place a suitable oil collection container under the oil drain plug 4 Remove the oil drain plug see Figure 8 Oil ...

Page 16: ...s through the muffler can enter the cylinder and cause damage Cooling Fins Air Intake Screen or Recoil Starter Flywheel Guard Areas Spark Plug Connection Levers Linkage Area Guards Carburetor Engine Head 5 Store in a clean dry and well ventilated area away from any appliance that operates with a flame or pilot light such as a furnace water heater or clothes dryer Avoid any area with a spark produc...

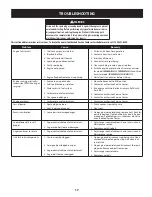
Page 17: ...rburetor out of adjustment 5 Over governed engine 1 Move choke control to RUN position 2 Contact an authorized Service Center 3 Run engine until the fuel tank is empty Refill with fresh fuel 4 Contact an authorized Service Center 5 Contact an authorized Service Center Engine overheats 1 Carburetor out of adjustment 1 Contact an authorized Service Center Loss of power 1 Spark plug wire loose 2 Vent...

Page 18: ...cio Cubierta posterior Declaración de garantía Vea el suplemento seperado Motor Consulte el manual del motor Aceite del motor Consulte el manual del motor Capacidad del aceite Consulte el manual del motor Combustible Gasolina sin plomo Número de modelo______________________________ Número de serie_________________________________ Fecha de compra________________________________ Registre el número d...

Page 19: ...ue el motor se enfríe por lo menos dos minutos antes de volver a cargar combustible Nunca llene en exceso el depósito de combustible Llene el tanque a no más de pulgada por debajo de la base del cuello de llenado dejando espacio para la dilatación del combustible Vuelva a colocar la tapa del combustible y ajústela bien Limpieelcombustiblequesehayaderramadosobreelmotoryelequipo Trasladelamáquinaaot...

Page 20: ...uridad Controle periódicamente que funcionen correctamente Remítase a las secciones de mantenimiento y ajuste de este manual Antes de realizar la limpieza reparar o revisar la máquina desengrane todas las palancas de control y detenga el motor Espere a que la barrena impulsor se detenga por completo Desconecte el cable de la bujía y póngalo haciendo masa contra el motor para evitar que se encienda...

Page 21: ...arla ADVERTENCIA CUCHILLAS GIRATORIAS Mientras la máquina está en funcionamiento mantenga las manos lejos de las aberturas de entrada y de descarga En el interior hay cuchillas giratorias ADVERTENCIA CUCHILLAS GIRATORIAS Mientras la máquina está en funcionamiento mantenga las manos lejos de las aberturas de entrada y de descarga En el interior hay cuchillas giratorias ADVERTENCIA BARRENA GIRATORIA...

Page 22: ...l carro de la parte de arriba de la manija inferior Vea la Figura 1 No es necesario extraer el tornillo con reborde y la tuerca de seguridad con brida que están debajo de la perilla de aletas y el perno de carro Perilla de aletas Perilla de aletas Pernos de carro Figura 1 2 Gire la manija superior a la posición de funcionamiento Asegúrese de no apretar los cables en el proceso Vea la Figura 2 Figu...

Page 23: ...de 87 octanos Se puede usar gasolina con hasta un 10 de etanol E10 o un 15 de MTBE éter metílico terciario butílico Nunca use una mezcla de aceite y gasolina ni gasolina sucia Evite que se introduzca suciedad polvo o agua en el tanque de combustible NO utilice gasolina E15 o E85 Cargue combustible en un área bien ventilada y con el motor apagado No fume ni permita llamas o chispas en el lugar dond...

Page 24: ...entamente aceite hasta que el nivel registrado esté en un punto intermedio entre alto H y bajo L Figura 7 para el modelo 247 116830 NOTA No lo llene en exceso Si se carga demasiado aceite se puede generar humo problemas de arranque o suciedad en la bujía 5 Saque el tapón la varilla de medición de aceite Si el nivel es bajo agregue lentamente aceite hasta que el nivel registrado esté en un punto in...

Page 25: ...resionar el cebador asegúrese de cubrir el agujero de ventilación al empujar las fuerzas de combustible directamente en el carburador del motor para ayudar en el clima frío de partida Manijadelarrancadorderetroceso La manija del arrancador de retroceso se utiliza para encender el motor Tapa de combustible Saque el tapón del combustible para agregar combustible Llave La llave es un dispositivo de s...

Page 26: ...as instrucciones y advertencias que aparecen en la máquina y en este manual antes de hacerla funcionar Encendido del motor ADVERTENCIA Siempre mantenga las manos y los pies alejados de las partes móviles No utilice fluidos comprimidos para arrancar Los vapores son inflamables ADVERTENCIA Para evitar el envenenamiento por monóxido de carbono asegúrese de que el motor esté al aire libre en un área b...

Page 27: ... siempre el extremo que está en el tomacorrientes de tres patas de la pared antes de desenchufar el extremo opuesto que está en la máquina quitanieve Detención del motor 1 Deje el motor encendido durante algunos minutos antes de detenerlo para ayudar a secar toda la humedad del motor 2 Para detener el motor saque la llave y guárdela en un lugar seguro 3 Limpie toda la nieve y la humedad del área d...

Page 28: ...to Motor ConsulteelManualdeloperadordelmotorparatodoslosprocedimientosdemantenimiento delmotor Comprobación añadirycambiarelaceitetambiénseencuentranenestemanual Lubricación Lubrique los puntos de giro de la manija de control y del resorte de extensión del extremo del cable de control con un aceite liviano una vez por temporada y antes de almacenar la máquina quitanieve al final de la temporada Aj...

Page 29: ... se indica en la Figura 15 Cable de control Manija de control Figura 15 2 Pruebe la máquina quitanieve para ver si se logra una diferencia apreciable Si luego de realizado el ajuste del cable de control la barrena sigue titubeando al girar consulte la sección Reemplazo de la correa para obtener las instrucciones para el reemplazo de la correa Montaje del canal Consulte la sección Montaje para ver ...

Page 30: ... Luegoincline lamáquinaquitanievehaciaatráshastaquequedeapoyadasobrelasmanijas 3 Saque las paletas de caucho ya existentes para lo cual desenrosque los tornillos de cabeza hexagonal que las unen a la barrena Vea la Figura 19 NOTA Las paletas de la barrena deben reemplazarse una a la vez de manera que se pueda usar la paleta de la barrena aún conectada como ejemplo para el posicionamiento y la rein...

Page 31: ...las ranuras de la ficha y luego retirarse Vea la Figura 20 Figura 20 NOTA La parte inferior del panel tiene etiquetas que ayudan a mantenerlo en su lugar NOTA Un kit de extensión del drenaje de aceite se encuentra disponible por separado Visite una de servico Sears Center o llamar 1 888 331 4569 y pedir el kit 753 06684 3 Colocar un recipiente de recolección de aceite adecuado debajo del tapón de ...

Page 32: ...ltro de admisión de aire o Áreas de protección del volante arrancador de retroceso Conexión de la bujía Palancas Área de enlace Protecciones Carburador Culata del motor 5 Almacene el motor en un sector limpio seco y bien ventilado lejos de cualquier artefacto que funcione con una llama o luz piloto como hornos calentadores de agua o secadores de ropa Evite cualquier sector con un motor eléctrico q...

Page 33: ...s 3 Introduzca completamente la llave 4 Conecte el cable a la bujía 5 Limpie la bujía ajuste la distancia disruptiva o cambie la bujía 6 Oprima el botón del cebador del motor entre cinco y siete veces para el modelo CMXGBAM1054538 CMXGBAM1054539y tres veces en el modelo CMXGBAM1054540 CMGSB21179 7 Aguarde al menos diez minutos antes de encender el motor El motor funciona de manera errática RPM des...

Page 34: ...icio y Mantenimiento 2 Reemplace la correa de transmisión de la barrena La barrena continúa rotando 1 El cable del control de la barrena necesita un ajuste 1 Ajuste el cable de control de la barrena tal y como se muestra en la sección de Servicio y Mantenimiento La unidad no descarga la nieve 1 El conjunto del canal está tapado 2 Hay un objeto extraño en la barrena 3 El cable del control de la bar...

Page 35: ...NOTES 35 ...

Page 36: ...ProductManufacturedby Productofabricadopor MTDLLC P O BOX361131CLEVELAND OHIO44136 0019 ...

Reviews: