10
ASSEMBLY
2.
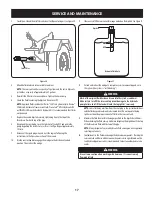
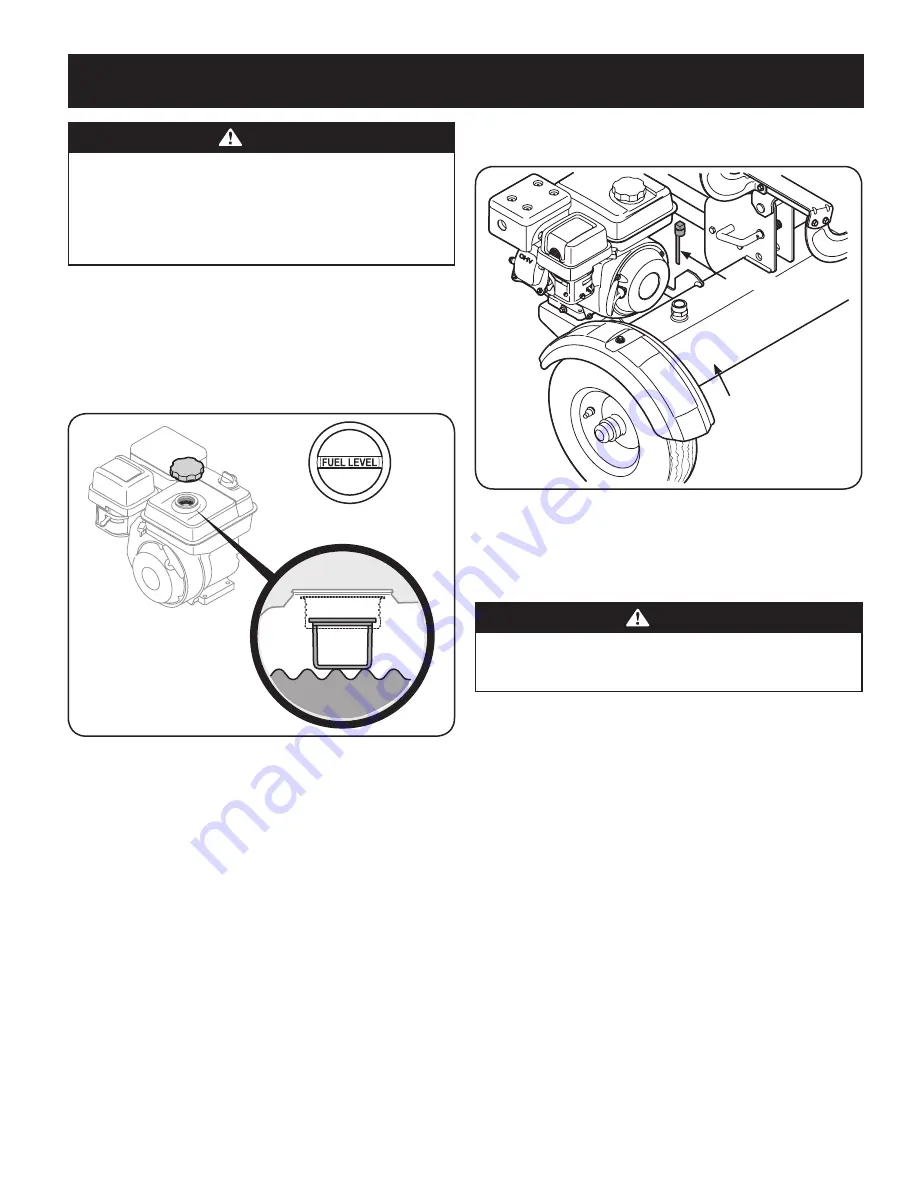
Remove the vented dipstick, which is located in front of the engine on top of
the reservoir tank. See Figure 12.
Reservoir Tank
Vented Dipstick
Figure 12
NOTE:
The log splitter is filled to the proper operating level from the
manufacturer with Shell Tellus® S2 M 32 Hydraulic Fluid. However, you
MUST check the fluid level before operating. If not filled, proceed with the
following steps:
WARNING
Much of the original fluid has been drawn into the cylinder and hoses. If
the reservoir is empty or low, make certain to refill it to prevent damage to
the hydraulic pump.
3.
Check the fluid level using the dipstick. See Figure 12. Do not overfill.
4.
Replace the vented dipstick securely, tightening it until the top of the
threads are flush with top of the pipe.
5.
Disconnect the spark plug and prime the pump by pulling the recoil starter
as far as it will go. Repeat approximately 10 times.
6.
Reconnect the spark plug wire and start the engine following the
instructions in the Operation section.
7.
Use the control handle to engage the wedge to the farthest extended
position. Then retract the wedge.
8.
Refill the tank as specified on the dipstick.
NOTE:
Failure to refill the tank will void the splitter’s warranty.
9.
Extend and retract the wedge 12 complete cycles to remove any air trapped
in the system (the system is “self-bleeding”).
10. Refill the reservoir within the range marked on the dipstick.
NOTE:
Some fluid may overflow from the vent plug as the system builds heat
and the fluid expands and seeks a balanced level.
WARNING
An adult should fuel this engine. NEVER allow children to refuel this engine.
Gasoline (fuel) vapors are highly flammable and can explode. Fuel vapors can
spread and be ignited by a spark or flame many feet away from engine. To prevent
injury or death from fuel fires, DO NOT use leaded fuel, Fuel must be fresh and
clean. NEVER use fuel left over from last season or stored for long periods, NEVER
mix oil with fuel and DO NOT use fuel containing Methanol (Wood Alcohol).
1.
Before refueling, allow the engine to cool for two minutes.
2.
Be sure engine is outdoors and in a well-ventilated area.
3.
Clean area around the fuel fill cap and remove the fuel fill cap.
4.
Using an approved red GASOLINE container, add fuel slowly, being careful to
avoid spilling.
5.
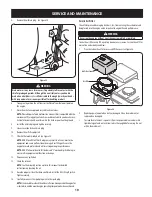
Fill the tank until the fuel reaches the “fuel full” indicator mark. See Figure 11.
Fuel Level Indicator
Top View
Figure 11
6.
Replace the fuel cap and tighten securely. Wipe up spilled fuel before starting
engine. If fuel is spilled DO NOT start engine. Move machine away from area of
spillage. Avoid creating any source of ignition until fuel vapors are gone.
7.
Be sure fuel valve is open.
Preparing the Log Splitter
1.
Lubricate the beam area (where the splitting wedge will slide) with engine
oil. Do not use grease.

