6
ASSEMBLY
WARNING
Never operate the chipper shredder with the chipper chute in the raised
position. Doing so may result in property damage or serious injury to the
operator or bystanders.
Bag
To attach the bag:
1.
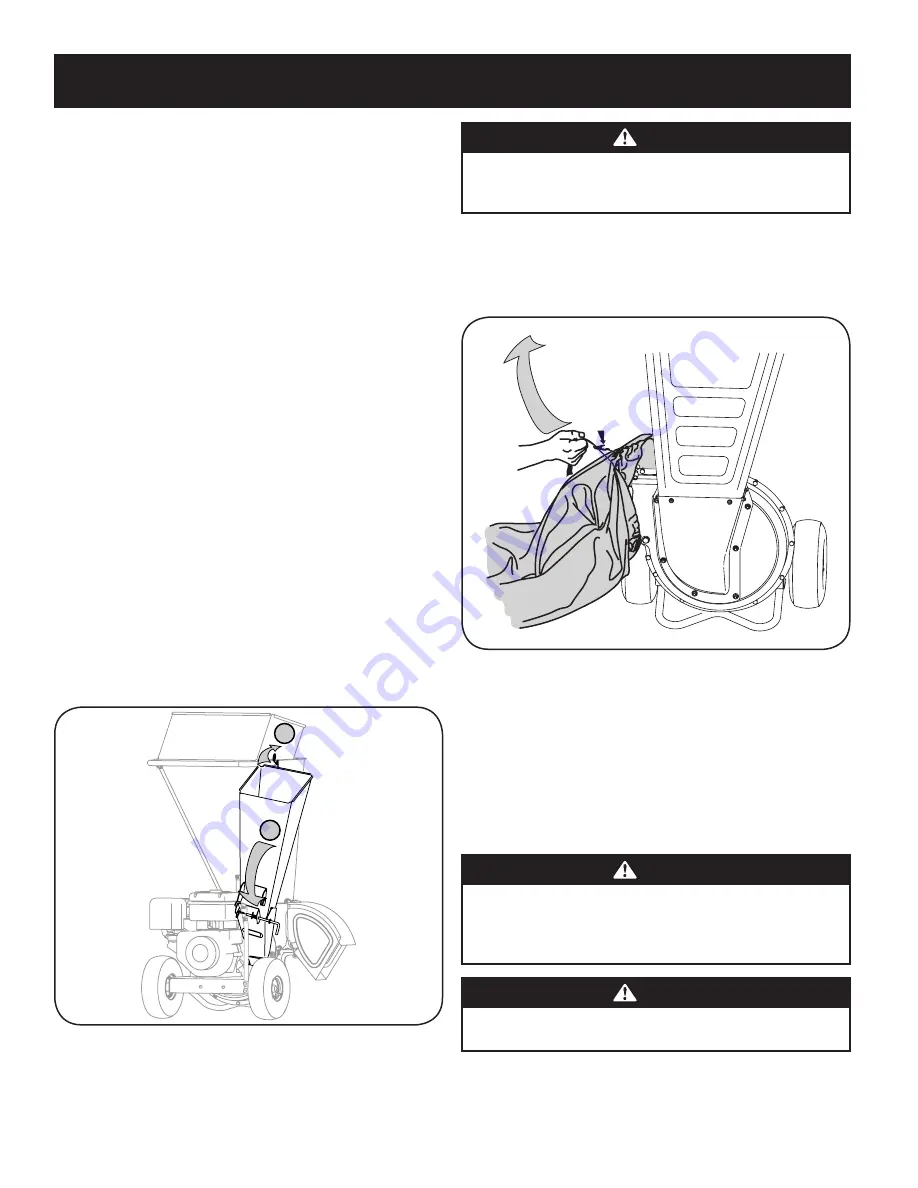
Place the opening of the bag completely over the chute deflector.
See Figure 2.
Figure 2
Set-Up
Gas and Oil fill-Up
Refer to the seperate engine owner’s manual for additional engine information.
1.
Add oil provided before starring unit for the first time out of the box. See the
seperate engine owner’s manual for instructions for adding the engine oil.
2.
Service the engine with gasoline as instructed in the seperate engine
owner’s manual.
WARNING
Use extreme care when handling gasoline. Gasoline is extremely
flammable and the vapors are explosive. Never fuel the machine indoors or
while the engine is hot or running. Extinguish cigarettes, cigars, pipes and
other sources of ignition.
WARNING
Never fill fuel tank indoors with engine running or until the engine has
been allowed to cool for at least two minutes after running.
IMPORTANT:
This unit is shipped without gasoline or oil in the engine. Be certain
to service engine with gasoline and oil as instructed in the Operation section of this
manual before operating your machine.
NOTE:
Reference to right and left hand side of the Chipper Shredder is observed
from the operating position.
UNPACKING
Opening The Carton
1.
Cut each corner of the carton vertically from top to bottom.
2.
Remove all loose parts.
3.
Remove loose packing material.
Removing The Unit From The Carton
1.
Lift unit from the rear to detach it from underlying carton material
and roll unit out of carton.
2.
Check carton thoroughly for any other loose parts.
Loose Parts In Carton
•
Chipper Shredder
•
Bag
•
Safety Glasses
•
Engine Oil
•
Operator’s Manual
•
Engine Operator’s Manual
Chipper Chute
For shipping reasons, the unit is crated with its chipper chute in a raised position. To
pivot it downward, proceed as follows:
1.
Pull the spring latch upward.
2.
Gently pivot the chipper chute down until it clicks into the lock rod. See Figure 1.
B
A
Figure 1


