background image

5

ENGLISH

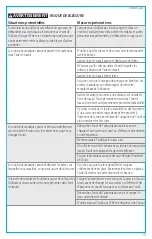
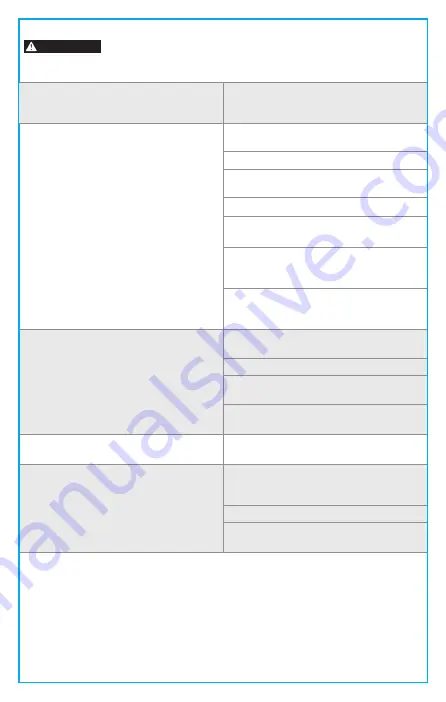
What can happen

How to prevent it

A tool left unattended or with the air hose attached can be 

activated by unauthorized persons leading to their injury 

or injury to others.

Remove air hose when the tool is not in use and store tool 

in a secure location away from reach of children and 

untrained users.

Air tools can propel materials throughout the work area.

Use only parts and accessories recommended by the 

manufacturer.
Keep work area clean and free of clutter.
Do not allow children to operate tool, and keep children 

away from the work area.
Keep work area well lit.  

Make sure the sanding pad is tight and secure. Missing or 

damaged items should be replaced before use. 
Keep bystanders a safe distance away from work area. 

Anyone entering the work area must wear personal 

protective equipment. 
Fragments of workpiece or of a broken accessory may fly 

away and cause injury beyond immediate area of 

operation.

Air tools can become activated by accident during 

maintenance or tool changes.

Disconnect the tool from the air supply during accessory 

changes, tool changes, maintenance or repair.
Never carry the tool by the air hose.
To avoid unintentional operation, never carry the tool with 

the trigger depressed or engaged.
Only an authorized service representative should service 

the tool.

Loss of control of the tool can lead to operator injury or 

injury to others in the work area.

Before changing accessories, making repairs, or when tool 

is not in use, shut off the air supply and release/drain air 

pressure from hose.
Disconnect tool from air supply and store in a safe location.
Never use the tool while using medications, drugs or 

alcohol.

Air tools can cause the workpiece to move upon contact, 

leading to injury.

Always make sure the workpiece is secure. Use clamps or 

other devices to prevent movement.

WARNING

RISK OF PERSONAL INJURY

Summary of Contents for CMXPTSG1014NB

Page 1: ... Lijadora de doble acción de 6 CMXPTSG1014NB INSTRUCTIONMANUAL GUIDED UTILISATION MANUALDEINSTRUCCIONES IFYOUHAVEQUESTIONSORCOMMENTS CONTACTUS POURTOUTEQUESTIONOUTOUTCOMMENTAIRE NOUSCONTACTER SITIENEDUDASOCOMENTARIOS CONTÁCTENOS 1 888 331 4569 WWW CRAFTSMAN COM ...

Page 2: ...ult in death or serious injury CAUTION Indicates a potentially hazardous situation which if not avoided may result in minor or moderate injury NOTICE Indicates a practice not related to personal injury which if not avoided may result in property damage Used without word Indicates a safety related message WARNING Read all safety warnings and all instructions Failure to follow the warnings and instr...

Page 3: ...he tool on or off Do not use this tool at heights exceeding 6 feet 2m Use each tool for its intended function only Do not use this product in unsafe work conditions It is always recommended to keep a fire extinguisher and first aid kit near work areas WARNING User must also read the compressor manual and follow all compressor safety instructions CMXPTSG1014NB Compressor requirements IMPORTANT To o...

Page 4: ...apart becoming projectiles or propelling other objects at the operator or bystanders in the work area Make sure the sanding pad is tight prior to each use 3 ENGLISH SAVE ALL WARNINGS AND INSTRUCTIONS FOR FUTURE REFERENCE What can happen How to prevent it This tool is capable of generating sparks which can result in ignition of flammable materials Never operate tools near flammable substances such ...

Page 5: ...Do not wear loose clothing jewelry or anything that may get caught or tangled when using tool Remove any jewelry which may be caught by the tool Always keep hands and body parts away from moving parts Always wear properly fitted clothing and other properly fitted safety equipment when using this tool What can happen How to prevent it This tool is capable of causing serious injury if operated impro...

Page 6: ...rkpiece or of a broken accessory may fly away and cause injury beyond immediate area of operation Air tools can become activated by accident during maintenance or tool changes Disconnect the tool from the air supply during accessory changes tool changes maintenance or repair Never carry the tool by the air hose To avoid unintentional operation never carry the tool with the trigger depressed or eng...

Page 7: ... Do not lubricate tools with flammable or volatile liquids such as kerosene diesel or jet fuel Repetitive motions awkward positions and exposure to vibration can be harmful to hands and arms Discontinue use of tool if discomfort tingling feeling or pain occurs Consult a physician before resuming use if any of these symptoms occur Using an accessory not intended for a specific tool increases the ri...

Page 8: ...rdware contents list If any part is missing or damaged do not attempt to assemble the product Tools Required for Assembly not included 9 16 in 14 mm or adjustable wrench Thread sealant tape Tool oil Male plug 1 Remove plastic air inlet protective cap from air inlet 3 Place 2 3 drops of air tool oil not provided into the male plug before each use 7 2 Tighten male plug not included turning clockwise...

Page 9: ... be obtained when the concave line on the knob is pointing horizontally 4 Connect the air supply hose to the male plug Set the working pressure at 90 PSI for best tool performance OPERATING 1 Press down on the trigger to start the tool When first making contact with the surface you intend to sand ensure the speed is set to the lowest setting Gradually increase the power speed as needed for your pa...

Page 10: ...ock into position Loosen and remove the sanding pad by spinning the pad in a counterclockwise direction 2 Place the end of a 2 Phillips screwdriver not included into one of the holes and push in on the spindle lock button You can hold the screwdriver and push in the spindle lock button with the same hand Using your other hand loosen and remove the sanding pad by spinning the pad counterclockwise P...

Page 11: ...I Z87 1 approved eye protection when performing this WARNING Never use solvents or other harsh chemicals for cleaning the non metallic parts of the tool These chemicals may weaken the plastic materials used in these parts Use a cloth dampened only with water and mild soap Never let any liquid get inside the tool never immerse any part of the tool into a liquid Repairs WARNING To assure product SAF...

Page 12: ...l runs slowly or will not operate Air hose leaks Tighten and seal hose fittings if leaks are found Use sealing tape Tool runs slowly or will not operate Worn rotor blade Replace rotor blade Tool runs slowly or will not operate Moisture blowing out of tool exhaust Water in compressor tank drain tank See air compressor manual Oil the tool and run until no water is evident Oil the tool again and run ...

Page 13: ...u specific legal rights and you may have other rights which vary in certain states or provinces 90 DAY MONEY BACK GUARANTEE If you are not completely satisfied with the performance of your CRAFTSMAN Power Tool Laser or Nailer for any reason you can return it within 90 days from the date of purchase with a receipt for a full refund no questions asked LATIN AMERICA This warranty does not apply to pr...

Page 14: ...13 ENGLISH Exploded Tool Diagram 1 2 3 4 5 9 8 7 6 11 10 12 13 14 17 18 19 20 21 23 24 25 30 27 31 32 38 37 39 28 29 15 16 22 5 26 49 48 48 45 46 45 47 44 43 42 41 40 33 34 35 36 ...

Page 15: ...Dust Proof Washer 14 1 Front Cover 15 1 O ring 16 1 Bearing 17 1 A Cap 18 1 Cylinder 19 1 O ring 20 1 Alignment Pin 21 1 Rotor 22 6 Blades 23 1 B Cap 24 1 Set Screw 36 1 Spring 37 1 Air Inlet 38 1 O ring 39 1 Metal Filter 40 1 O ring 41 1 Switch Pin Housing 42 1 Lever Bracket 43 1 Nut 44 1 Switch Pin 45 2 E Clip 46 1 Pin 47 1 Lever Bracket 48 2 Screw 49 1 Housing Cover 25 1 Bearing Parts List Part...

Page 16: ... ATTENTION Indique un risque potentiel qui s il n est pas éliminé pourrait provoquer des blessures mineures ou moyennement graves AVIS Indique une pratique ne posant aucun risque de blessure qui si elle n est pas évitée peut entraîner des dommages matériels Utilisé sans explication Indique un message relatif à la sécurité AVERTISSEMENT Lisez tous les avertissements et toutes les instructions Le no...

Page 17: ... la mise en marche ou l arrêt de l outil N utilisez pas cet outil à une hauteur supérieure à 2 m 6 pi Utilisez uniquement un outil quel qu il soit pour l usage auquel il est destiné N utilisez pas cet article dans des conditions de travail dangereuses Il est toujours recommandé d avoir un extincteur d incendie et une trousse de premiers soins à proximité des aires de travail AVERTISSEMENT L utilis...

Page 18: ... les projeter vers l utilisateur ou d autres personnes se trouvant dans la zone de travail Assurez vous que le tampon de ponçage est bien serré avant chaque utilisation CONSERVEZ TOUS LES AVERTISSEMENTS ET TOUTES LES INSTRUCTIONS AFIN DE POUVOIR LES CONSULTER ULTÉRIEUREMENT Situations potentielles Mesures préventives Cet outil peut produire des étincelles susceptibles d enflammer certains matériau...

Page 19: ...tements amples de bijoux ni tout autre article qui pourrait s accrocher ou s emmêler dans l outil lorsque vous utilisez l outil Retirez tout bijou susceptible de s accrocher dans l outil Gardez toujours vos mains et les autres parties de votre corps à distance des pièces en mouvement Portez toujours des vêtements et un équipement de protection bien ajustés lorsque vous utilisez cet outil Situation...

Page 20: ...agments d un accessoire endommagé peuvent être projetés à l extérieur de la zone immédiate de l utilisation de l outil et ainsi entraîner des blessures Les outils pneumatiques peuvent être accidentellement mis en marche lorsque vous les entretenez ou que vous changez d outil Débranchez l outil de l alimentation en air avant de changer d accessoire ou d outil ou d effectuer un entretien ou une répa...

Page 21: ... inflammables ou volatils tels que le kérosène le carburant diesel ou le carburéacteur Les mouvements répétitifs les positions inconfortables et l exposition aux vibrations peuvent présenter un danger pour les mains et les bras Cessez d utiliser l outil si vous ressentez un inconfort un picotement ou une douleur Consultez un médecin avant d utiliser l outil de nouveau si vous éprouvez l un de ces ...

Page 22: ... tentez pas d assembler l article Outils nécessaires pour l assemblage non inclus Clé de 14 mm 9 16 po ou clé à molette Ruban d étanchéité pour joints filetés Huile pour outils Connecteur mâle 1 Retirez le capuchon protecteur en plastique de l entrée d air de l outil 3 Versez 2 ou 3 gouttes d huile à outil pneumatique non incluse dans le connecteur mâle avant chaque utilisation 7 2 Serrez le conne...

Page 23: ...la ligne concave du bouton est à l horizontale 4 Branchez le tuyau d alimentation en air sur le connecteur mâle Pour un fonctionnement optimal réglez la pression de service à 90 lb po UTILISATION 1 Appuyez sur la gâchette pour mettre l outil en marche Le premier contact de l outil sur la surface à poncer doit être effectué à la plus basse vitesse Augmentez graduellement la puissance et la vitesse ...

Page 24: ...errez et retirez le tampon de ponçage en le tournant dans le sens contraire des aiguilles d une montre 2 Insérez l extrémité d un tournevis cruciforme nº 2 non inclus dans l un des trous puis enfoncez le bouton de verrouillage de l axe Vous pouvez tenir le tournevis et enfoncer le bouton de verrouillage de l axe d une seule main Avec votre autre main desserrez et retirez le tampon de ponçage en le...

Page 25: ...nformes à la norme ANSI Z87 1 lorsque vous effectuez cette tâche AVERTISSEMENT N utilisez jamais de solvants ni tout autre produit chimique fort pour nettoyer les pièces non métalliques de l outil Ces produits chimiques peuvent affaiblir le plastique de ces pièces Utilisez un linge humecté d eau et de savon doux uniquement Ne laissez aucun liquide pénétrer à l intérieur du taille bordure et n imme...

Page 26: ...Rincez l outil avec de l huile pour outil pneumatique ou du dissolvant de gomme L outil manque d huile Lubrifiez l outil Le tuyau à air fuit Si vous décelez des fuites serrez les raccords du tuyau et scellez le à l aide de ruban d étanchéité La pale du rotor est usée Remplacez la pale du rotor De l humidité s échappe des orifices de l outil De l eau se trouve dans le réservoir du compresseur videz...

Page 27: ...mmages causés par des réparations non autorisées LA PRÉSENTE GARANTIE LIMITÉE REMPLACE TOUTE AUTRE GARANTIE Y COMPRIS LA GARANTIE IMPLICITE DE QUALITÉ MARCHANDE OU DE CONFORMITÉ À UN USAGE PARTICULIER ET EXCLUT TOUS LES DOMMAGES ACCESSOIRES OU CONSÉCUTIFS Certains États ou certaines provinces ne permettent pas d établir de limitation quant à la durée d une garantie implicite ou l exclusion ou la l...

Page 28: ...1 2 3 4 5 9 8 7 6 11 10 12 13 14 17 18 19 20 21 23 24 25 30 27 31 32 38 37 39 28 29 15 16 22 5 26 49 48 48 45 46 45 47 44 43 42 41 40 33 34 35 36 27 FRANÇAIS Vue éclatée de l outil ...

Page 29: ... Joint torique 16 1 Palier 17 1 Capuchon A 18 1 Cylindre 19 1 Joint torique 20 1 Goupille d alignement 21 1 Rotor 22 6 Lames 23 1 Capuchon B 24 1 Vis de calage 36 1 Ressort 37 1 Entrée d air 38 1 Joint torique 39 1 Filtre en métal 40 1 Joint torique 41 1 Boîtier de goupille d interrupteur 42 1 Support du levier 43 1 Écrou 44 1 Goupille d interrupteur 45 2 Attache en E 46 1 Goupille 47 1 Support du...

Page 30: ...se puede ocasionar la muerte o lesiones graves PRECAUCIÓN indica una situación de posible peligro que de no evitarse podría ocasionar lesiones menores o moderadas AVISO indica una acción no relacionada con lesiones personales que de no evitarse puede ocasionar daños a la propiedad Se usan sin palabra Indica un mensaje de seguridad ADVERTENCIA lea todas las advertencias de seguridad y todas las ins...

Page 31: ...tils Requisitosdeherramientas ADVERTENCIA no cumplir ni seguir las instrucciones de seguridad podría provocar lesiones o la muerte ADVERTENCIA el uso o el mantenimiento inadecuado de esta herramienta pueden ocasionar lesiones graves y daños a la propiedad Lea y comprenda todas las advertencias y las instrucciones de funcionamiento antes de usar esta herramienta Cuando utilice cualquier herramienta...

Page 32: ...tiles o pueden lanzar otros objetos al usuario y los que estén en la zona de trabajo Asegúrese de que la almohadilla para lijar esté apretada antes de cada uso GUARDE TODAS LAS ADVERTENCIAS E INSTRUCCIONES PARA REFERENCIA FUTURA Lo que puede ocurrir Cómo evitarlo Esta herramienta puede producir chispas las cuales podrían causar la ignición de materiales inflamables Nunca use herramientas cerca de ...

Page 33: ...ltas u otros objetos sueltos pueden enredarse en los elementos móviles de esta herramienta y provocar una lesión grave No use vestimenta suelta joyas o elementos que puedan atascarse o enredarse cuando utilice la herramienta Sáquese las joyas que puedan atascarse en la herramienta Mantenga siempre sus manos y partes del cuerpo alejadas de las piezas en movimiento Siempre use ropa y otro equipo de ...

Page 34: ...s lejos del área de operación Las herramientas neumáticas pueden activarse por accidente durante el mantenimiento o el cambio de accesorios Desconecte la herramienta del suministro de aire mientras cambia los accesorios hace cambios en la herramienta durante el mantenimiento o la reparación Nunca transporte la herramienta sujetándola de la manguera de aire comprimido Para evitar un funcionamiento ...

Page 35: ...s o volátilescomoqueroseno dieselocombustibledeaviación Los movimientos repetidos las posiciones incómodas y la exposición a la vibración pueden ser perjudiciales para las manos y los brazos Deje de utilizar la herramienta si se siente incómodo experimenta entumecimiento o tiene dolor Si se presentan algunos de estos síntomas consulte al médico antes de reanudar el trabajo Elusodeaccesoriosquenoes...

Page 36: ...una pieza o si estas están dañadas Herramientas necesarias para el ensamblaje no se incluyen Llave inglesa de 9 16 14 mm Cinta selladora para roscas Aceite para herramientas Conector macho 1 Retire la tapa protectora de plástico de la entrada de aire 3 Coloque de 2 a 3 gotas de aceite para herramientas neumáticas no se incluye en el enchufe macho antes de cada uso 7 2 Apriete el conector mancho no...

Page 37: ...tener cuando la línea cóncava de la perilla está en posición horizontal 4 Conecte la manguera de suministro de aire al enchufe macho Establezca la presión de trabajo en 90 PSI para obtener el mejor rendimiento de la herramienta FUNCIONAMIENTO 1 Presione el gatillo para arrancar la herramienta Al hacer contacto por primera vez con la superficie que desea lijar asegúrese de que la velocidad esté est...

Page 38: ... y retire la almohadilla para lijar girándola en dirección contraria a las manecillas del reloj 2 Coloque el extremo de un destornillador Phillips 2 no se incluye en uno de los orificios y empuje el botón de bloqueo del husillo Puede sostener el destornillador y empujar el botón de bloqueo del husillo con la misma mano Con la otra mano afloje y retire la almohadilla para lijar girándola en direcci...

Page 39: ...iesgo de lesiones oculares use siempre protección ocular aprobada por la norma ANSI Z87 1 cuando realice este procedimiento ADVERTENCIA nunca use solventes u otros productos químicos agresivos para limpiar las partes no metálicas de la herramienta Estos productos químicos pueden debilitar los materiales plásticos utilizados en estas piezas Use un paño humedecido solo con una mezcla de jabón suave ...

Page 40: ...ara herramientas neumáticas o solvente para goma No hay aceite en la herramienta Lubrique la herramienta Hay fugas en la manguera de aire comprimido Apriete y selle los conectores de la manguera si se encuentran fugas Use cinta de sellado Las aspas del rotor están desgastadas Remplace el aspa del rotor Sale humedad del escape de la herramienta Agua en el tanque del compresor drene el tanque consul...

Page 41: ...orios ni a daños causados por reparaciones hechas o que se hayan intentado hacer por otras personas ESTA GARANTÍA LIMITADA SE OTORGA EN LUGAR DE TODAS LAS DEMÁS INCLUIDA LA GARANTÍA IMPLÍCITA DE COMERCIABILIDAD E IDONEIDAD PARA UN FIN DETERMINADO Y EXCLUYE TODOS LOS DAÑOS ACCIDENTALES O RESULTANTES Algunos estados no permiten limitaciones en cuanto a la duración de una garantía implícita ni la exc...

Page 42: ...1 2 3 4 5 9 8 7 6 11 10 12 13 14 17 18 19 20 21 23 24 25 30 27 31 32 38 37 39 28 29 15 16 22 5 26 49 48 48 45 46 45 47 44 43 42 41 40 33 34 35 36 41 ESPAÑOL Diagrama detallado de la herramienta ...

Page 43: ...l 15 1 Junta tórica 16 1 Cojinete 17 1 Tapa A 18 1 Cilindro 19 1 Junta tórica 20 1 Pasador de alineación 21 1 Rotor 22 6 Hojas 23 1 Tapa B 24 1 Tornillo de fijación 36 1 Resorte 37 1 Entrada de aire 38 1 Junta tórica 39 1 Filtro de metal 40 1 Junta tórica 41 1 Carcasa del pasador del interruptor 42 1 Soporte de la palanca 43 1 Tuerca 44 1 Pasador del interruptor 45 2 Sujetador en forma de E 46 1 P...

Reviews: