background image

Summary of Contents for Eager 1

Page 1: ...TARY LAWN MOWER Model No 917 377190 Safety Assembly Operation Maintenance Espa_ol Repair Parts CAUTION Read and follow all Safety Rules and Instructions before operatingthis equipment Sears Roebuck and Co Hoffman Estates IL 60179 Visit our Craftsman website www sears com craftsman ...

Page 2: ...hts and you may also have other rights which vary from state to state SEARS ROEBUCKAND CO 13 817 WA HOFFMAN ESTATES ILLINOIS 60179 Safety standards require operator presence controls to minimize the risk of injury Your unit is equipped with such controls Do not attempt to defeat the function of the operator presence controls under any circumstances TRAINING Road this operator s manual carefully Be...

Page 3: ...ation of damage stop the engine safely check for the cause of vibration and repair as required Do not run the engine indoors Exhaust fumes are dangerous Never cut grass by pulling the mower towards you Mow across the face of slopes never up and down or you might lose your footing Do not mow excessively steep slopes Use caution when operating the mower on uneven terrain or when changing directions ...

Page 4: ...mpt to assemble or operate your new lawn mower IMPORTANT This lawn mower is shipped WITHOUT OIL OR GASOLINE in the engine Your new lawn mower has been assembled at the factory with the excep_n of those parts left unassembled for shipping purposes All parts such as nuts washers belts etc necessary to complete the assembly have been placed in the parts bag To ensure safe and proper operation of your...

Page 5: ...Adjustment section of this manual Operator bar Upper handle Liftup Mowing position Lower handle TOINSTALLA I rACHMENTS Your lawn mower was shipped ready to be used as a mulcher To convert to bagging or discharging Open rear door and remove mulcher plug Store mulcher plug in a safe place You can now install catcher or optional clipping deflector To retum to mulching operation install mulcher plug i...

Page 6: ... Housing Engine oil cap w dipstick Pdmer IMPORTANT This lawn mower is shipped WITHOUT OIL OR GASOLINE in the engine Wheel adjuster on each wheel MEETS CPSC SAFETY REQUIREMENTS Sears rotary walk behind power lawn mowers conform to the safety standards of the American National Standards Institute and the U S Consumer Product Safety Commission The blade tums when the engine is running Operator presen...

Page 7: ... require ments Medium position is best for most lawns To change cutting height squeeze adjuster lever toward wheel Move wheel upor down to suit your requirements Be sure all wheels are in the same setting NOTE Adjuster is properly positioned when plate tab inserts into hole in lever Also 9 position adjusters if so equipped allow lever to be positioned between the plate tabs Plate Tab Lower Wheels ...

Page 8: ...GASOUNE Fill fuel tank Use fresh clean regular unleaded gasoline with a minimum of 87 octane Do not mix oil with gasoline Purchase fuel in quantities that can be used within 30 days to assure fuel freshness WARNING Experience indicates that alcohol blended fuels called gasohol or using ethanol or methanol can attract moisture which leads to separation and formation of acids during storage Acidic g...

Page 9: ...formance keep mower housingfree of built upgrassand trash See Cleaning inMaintenancesection of thismanual The specialmulching bladewillrecutthe grassclippingsmany timesand reduce them in sizeso that as they faUontothe lawn they will disperse into the grass and not be noticed Also the mulched grass will biodegrade quickly to provide nutrients lor the lawn Always mulch with your highest engine blade...

Page 10: ...ve full value from the warranty operator must maintain mower as instructed in this manual Some adjustments will need to be made pedodically to properly maintain your unit All adjustments in the Service and Adjustments section of this manual should be checked at least once each season Once a year replace the spark plug replace air filter element and check blade for wear A new spark plug and oiean n...

Page 11: ...here it cannot come in contact with spark plug Turn lawn mower on its side Make sure air tilter and carburetor are up Use a wood block between blade and mower housing to prevent blade from turning when removing blade bolt Protect your hands with gloves and or wrap blade with heavy cloth Remove blade bolt by turning counter clockwise Remove blade and attaching hardware bolt lock washer and hardened...

Page 12: ...ubstitute ENGINE LUBRICATION Use only high quality detergent oil rated with API service classification SF SG or SH Select the oil s SAE viscosity grade according to your expected operating temperature bolt Crank shaft Lock Blade washer Hardened edge adapter washer GRASS CATCHER The grass catcher may be hosed with water but must be dry when used Check your grass catcher often for damage or deterior...

Page 13: ... in on cover and turn counter clockwise to tighten Collar Slot Clip Turn clockwise to remove Tab Air filter MUFFLER Air filter cover Turn counter clockwise to tighten Inspect and replace corroded muffler as it could create a fire hazard and or damage SPARK PLUG Change your spark plug each year to make your engine start easier and run better Set spark plug gap at 030 inch CLEANING IMPORTANT For bes...

Page 14: ...yand roll beit off Tum lawn mower on itsside with carbure tor and fuel cap up Remove blade Remove debris shield Remove belt from engine pulley on crankshaft Install new belt by reversing above steps Always use factory approvedbelt to assure fit and long life Belt _ _ _ Push ImH downI Inl iii TO ADJUST HANDLE The handle can be mounted in a high or low position The mounting holes in the bottom of lo...

Page 15: ...increase engine speed or it may result in personal injury If you believe that the engine is running too fast or too slow take your lawn mower to an authorized service center for repair and adjustment CARBURETOR Your carburetor has a non adjustable fixed main jet for mixture control If your engine does not operate properly due to suspected carburetor problems take your lawn mower to an authorized s...

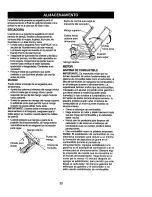
Page 16: ...om the storage position the lower handle will automatically lock into the mowing position Lower handle Squeeze to fold bracket Operator presence control bar Fold foward for storage Upper Fold backward Lower Mowing handle position ENGINE FUEL SYSTEM IMPORTANT It isimportant to preventgum depositsfrom formingin essentialfuel system pads such as carburetor f fuel filter fuel hose or tank duringstorag...

Page 17: ...r can starts to rusL Rust and or dirt inyour gasoline will cause problems If possible store your unit indoors and cover it to give protection from dust and dirt Cover your unit with a suitable protective cover that does not retain moisture Do not use plastic Plastic cannot breathe which allows condensation to form and will cause your unit to rust IMPORTANT Never cover mower while engine and exhaus...

Page 18: ... Grass is tee highor wheel heightistee low 2 Rear of lawn mower housingor blade dragging ingrass 3 Grass catchertee full 4 Handle height positionnot rightfor you 1 Replace blade 13ghten blade bolt 2 Contact an authorized service center 1 Depress controlbarto upper handle before pullingstarterrope 2 Contactan authorized servicecenter 3 Replace blade adapter 4 Move lawn mowerto cut grassor to hardsu...

Page 19: ...cos y puede quetambi6ntanga otrosderechos que varfande estadea estade Sears Roebuckand Co D 817WA HoffmanEstates IL 60179 USA Los estandrares de seguridedexJganla presencia del operatoren loscontrolespara reduelra un minimo el desgo de lesionarse Su unidadviane equipadacon dichoscontroles Pot ningunmo_o trate del eliminarla funcibn de loscontmlesque exigenla presenciadel operador ENTRENAMIENTO Lea...

Page 20: ...haga funcionar el motor en recintoscerrados Los gases de escape son peligrosos Nunca corte el crisped tirando la segadora hacia usted Siegue a travds de la cara de las pendientes nunca hacia arriba o hacia abajo pues pueds perder el equilibrio No siegue pendientes demasiado empinadas Tenga cuidado cuando opere la segadora en terreno disparejo o cuando cambie de direcci6n mantenga un buen equilibri...

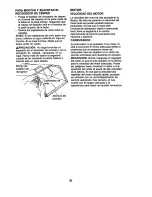
Page 21: ...ar el montajehart sidecolocadesen la boisede partes Para asegurarseque su segadora funcioneen formasegum y adecuada tedes les panes y los artfculosde ferreter a que se monten tienen que ser apretadesseguramente Use las herramientas correctes coma sea necesario pera esegurar que se aprietenadecuadamente PARA REMOVER LA SEGADORA DE LA CAJA DE CARTON Remueva las partes sueltesque se induyen con la se...

Page 22: ...colchadora Gu_rdela en un lugarseguro Ahorapuede instalarel recogedoro el desviadorde recortesopcional Para volvera la operack_n de acolchamiento con capa vegetal instalala tapon acolchadora en la aberturade descargade la segadora Aseg_rese de que todas las orejas est_n asentadas en forma adecuada parasegar Mango inferior Tapon acolchadora _ PRECAUCl6N No haga funcionar su segadora sin la tapon ac...

Page 23: ... de nivel Cebador IMPORTANT Este cortacespedviene SIN ACEITE O GASOUHA en el motor Ajustador de la roeda en cada rueda Caja CUMPLE CON LOS REQUISITOS DE SEGURIDAD DE LA CPSC Las segadoras a motor que se conducen desde la parte de atrds rotatodas Sears cumplen con los estdndares de seguridad del American National Standards Institutey de la U S Consumer Product Safety Commission La cuchilla gira cua...

Page 24: ...l ajustaderhaciaia meda Mueva la rueda haciaardba o haciaabajo de modo que se acomode a sus requisitos Aseg5rese que todeslas ruedas queden igualmenteajustadas AVISO El ajustador esta correctamente colocado cuando las orejas de la placa estdn insertadas en el agujero del mango Tambi6n los ajustes de 9 posiciones si equipado permiten que el mango pueda ser movido entre las orejas de la placa Orejas...

Page 25: ...ecesitarcambiar el aceite mds a menudo cuandolas condicionesson polvoroseso suc as 25 AGREGUE GASOUNA Llene el estanquede combustible Use gasolinaregular sin plomo nuevay iimpiacon el minimode 87 octanos No mazcle el acelte con la gasolina Para asegurar que la gaselina utilizada sea fresca compre estanques los cueles puedan ser utilizados durantelos primaros 30 d as AADVERTENCIA La experiencia ha ...

Page 26: ... arrancador despejada y sin recortes de crisped y paja Esto ayudard el flujo del aim del motor y extender su duraci6n CONSEJOS PARA SEGAR Y ACOLCHAR IMPORTANTE Pare obtenorel meW rendimeinto mantanga la caja de la segadora sin acumlacicn de cesped y basura Vea LIMPIEZA en seccion de Mantenimento de este manual La cuchillaacoichaderaespecialva a volvera cortar los recortes de c_sped m_ veces y los ...

Page 27: ...e la garantla el operador tiene que mantener la segadora segL_n las instrucciones descritas en este manual Hay algunos ajustes que se tienen que hater en forma peri_lica para poder mantener su unidad adecuadamente Todos los ajustes en la secci6n de Servicio y Ajustes de este manual tienen que set revisados por Io menos un vez pot cada temporada Una vez al aRo cambie la bujia limpie o cambie el ele...

Page 28: ... el carburador queden mirando hacia arriba Use un bloque de madera entre la cuchilla y la caja de la segadora para evitar que la cuchilla gire cuando se le quite el pemo Proteja sus manos con guantes y o envuelva la cuchilla con una tela gruesa Remueva el pemo de la cuchilla gir ndolo en el sentido contrario en que giran las manillas del reloj Remueva la cuchilla y los artfculos de ferreterfa adju...

Page 29: ...rica La i_nica vez que el lubricante nocesita atenci6nes cuando se le ha prestadosewicio a la caja de engrenajes Si se necesitalubricante use solamente Grasa Texaco StarplexPremium 1 Parte No 750369 No use substitutos RUEDAS DE IMPULSION Revise las ruedasde impulsi6ndelanterascada vez antes de segar pare asegurarsede que se mueven libremente Si las ruedas no giran libremente quiere decirque hay ba...

Page 30: ...rela en el sentido contrario de las maninas del reloj para apretarla Gire en el sentido I A las manillas del reloj para apretarla remover Co _brazadera Ranura Filtro de aire Oreja Cubierta del filtrode aire SILENCIADOR Gire en el sentido contrario las manillas del reloj para apretar Inspeccione y cambie el silenciador si estd corroido pues producir un peligro de incendio y o dai_o BUJ A Cambie su ...

Page 31: ...n su _adoconel flltmde aire y el carburadormirandohacia arnba Remueva la cuchilla Remueva la defensaen contradel desperdicio Remueva la correa de la polea delmotoren el cigue_ai Ins_e la correanueva siguiendolos anterioresen el ordeninverso Siempre use la correaaprobada pot _ f_0_ca para asegurarseque caice y dure Cubierta de la impt_lsion Empujar hacia abajo PARA AJUSTAR EL MANGO El mango puede s...

Page 32: ...otor ha sido ajustada en la fdbdca No trate de aumentar la velocidad del motor pues se pueden producirlesiones personales Si cree que el motor est funcionando demasiado rdpido o demasiado lento Ileve su segadora a un centro departamento de servicioautorizado para repararla o ajustarla CARBURADOR Su carburador no es ajustable Si su motor no est funcionando en forma adecuada debido a problemas que s...

Page 33: ...xigo la presencia del operador Mango superior _i _ z_ _ _ Doblar hacia _ _ _ _ adlantepara _ _ y almacenar _ J _4 _ _ __ Dobiar _ _ _ _ _ _y haciaatras ICO Z_ _ _ _ para segar Mango inferior MOTOR SISTEMA DE COMBUSTIBLE IMPORTANTE Es importanteev_tarque se formendepceitce de partcefundamantalesdel sistemade comu_ble tales comoel carburador el flltrodelcombutible la mangueradelcombustible o onel es...

Page 34: ...nzar una llama expuesta o una chispa Permita qua se enfrie el motor antes de almacenada en algt_nrecinto cerrado CAUSA CORRECCION 1 Filtro de aire sucio 2 Sin combustible 3 Combustible rancio 4 Agua en el combustible 5 Alambre de la buj a desconectado 6 Bujl amala 7 Cuchilla suelta o adaptador de la cuchilla quebrado 8 Barra de control en la posici6n suelta 9 Barra de control defectuosa 1 Cuchilla...

Page 35: ... la caja cuchilla de la segadora arrastr ndose en el c6sped Recogedor de c6sped demasiado Ileno Posici6n de la altura del mango no adecuada para usted 1 Cambie la cuchUla Apriete el perno de la cuchilla 2 Ajuste todas las ruedas a la misma altura 3 Umpie la parte inferior de la caja de la segadora 1 Cambie la _iUa Apriete el pemo de la cuchilla 2 Contacts con su centro de servicioautorizado mds ce...

Page 36: ...36 ...

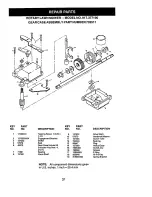
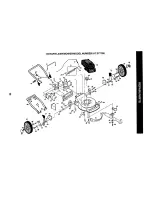
Page 37: ...crew 1 4 20 x 9 137074 Drive Shaft 1 1 4 10 57079 HardenedWasher EngagementBracket 11 131484 ClutchYoke Shifter 12 700343 Bushing Seal 13 86447 Plug Gear Case Halves Kit 14 137050 Helical Gear includes Key Nos 4 15 750436X ClutchJaw and 7 16 750369 Grease Bearing 17 12000003 E Ring Worm Shaft 18 850848 Hi Pro Key 19 81585X004 Spring Bracket NOTE All component dimensions given in U S inches 1 inch ...

Page 38: ...ROTARY LAWN MOWERMODEL NUMBER917 377190 61 10 31 3 _ 28 29 32 69 I 15 16 12 31 35 34 53 56 52 41 29 28 69 ...

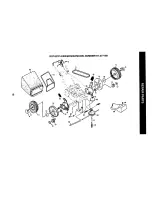
Page 39: ...ing Spacer Wheel AdjustingBracket Thread CuttingScrew w Seres 5 16 18 x 3 4 Flatwasher 3 8 Handle Bracket Assembly Left Handle Bracket Assembly Right Hex Head Thread RollingScrew 3 8 16 x 1 1 8 44 172835 Lawn Mower Housing Incl Key 14 15 51 46 851514 Blade Adapter 47 141114 Blade22 48 851074 HardenedWasher 49 850263 Helical Washer 3 8 24 x 1 3 8 Gr 8 50 851084 Hex Head Machine Screw 3 8 24 x 1 3 8...

Page 40: ...ROTARY LAWN MOWER MODEL NUMBER 917 377190 54 5 I 18 15 14 16 11 14 12 13 40 36 37 ...

Page 41: ...iner Hubcap Flanged Nut Wheel Tire Assembly E Ring Pinion Dust Cover FeltWasher Washer 1 2 x 1 1 2 x 134 Selector Knob KEY PART NO NO DESCRIPTION 26 1436O3 28 154990 31 132010 32 137052 35 151521 36 702511 37 137090 38 STD541425 40 75192 41 151520 54 169932 55 86012 57 169931 Pan Head Tapping Screw 10 24 x 2 3 4 DriveCover Hex Flange Nut DrivePulley Wheel Adjuster Assembly Left Gear Case Assembly ...

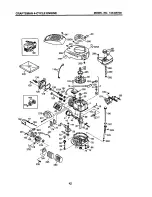
Page 42: ...CRAFTSMAN 4 CYCLE ENGINE MODEL NO 143 006700 400 130 120 416 417f_ 126151A 1C 119 125 _390 245 238 250 42 ...

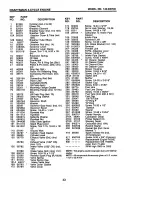
Page 43: ...92 650815 Belleville Washer 370A 36261 93 650816 Flywheel Nut 370C 37318 100 34443B Solid State Ignition 370R 37317 101 610118 Spark Plug Cover 380 640271 103 651007 Screw Torx To15 10 24 x 15 390 590739 16 400 36792B 110 37047 Ground Wire 119 36787 Cylinder Head Gasket 416 36085 120 36825 Cylinder Head 125 36779 Exhaust Valve Std Incl 417 650760 151 900 36780 Exhaust Valve 1 32 OS 900 Incl 151 12...

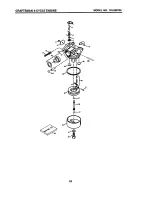
Page 44: ...CRAFTSMAN 4 CYCLE ENGINE MODEL NO 143 006700 17 _ 36A 27 _37 _m37 4O 44 ...

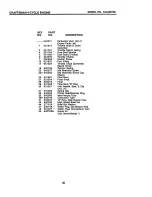
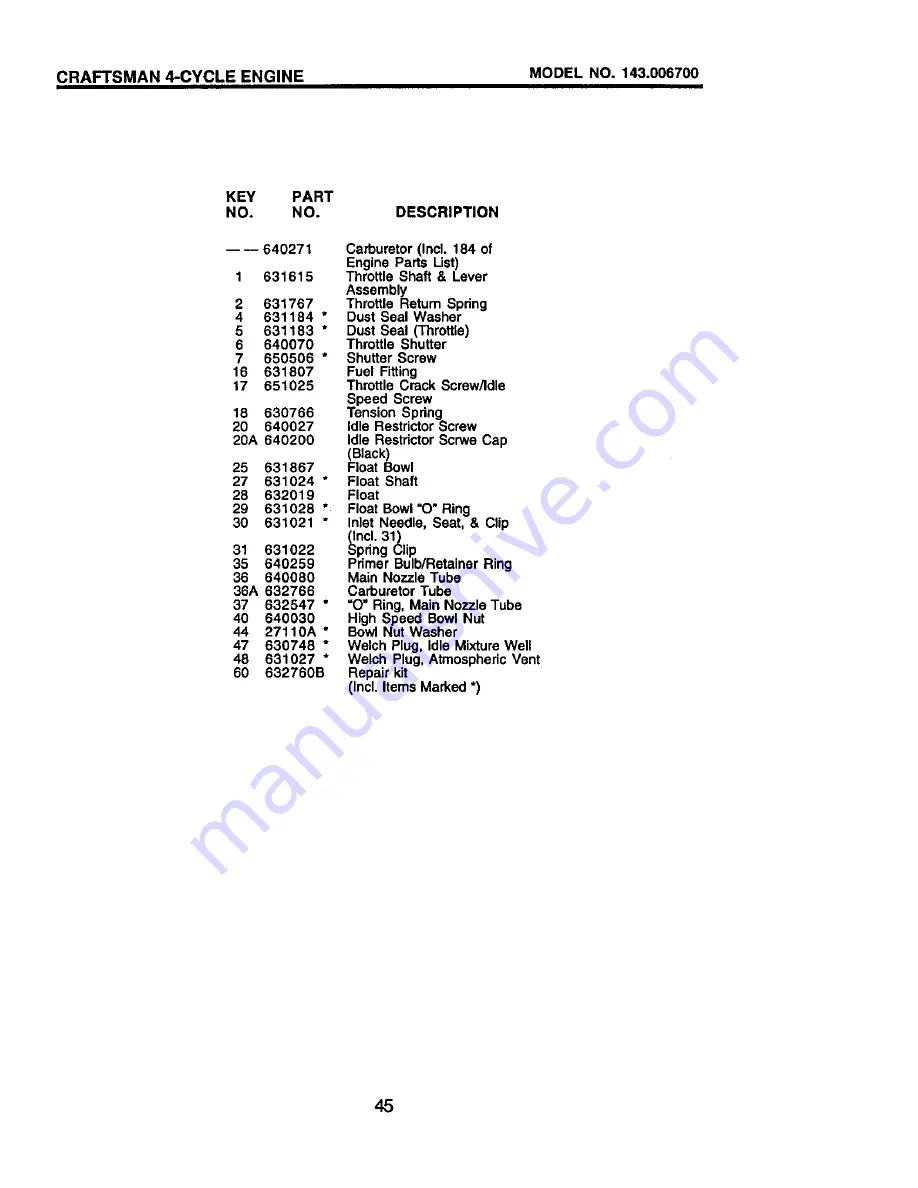
Page 45: ... 184 of Engine Parts Ust Throttle Shaft Lever Assembly Throttle Return Spdng Dust Seal Washer Dust Seal Throttle Throttle Shutter Shutter Screw Fuel Fitting Throttle Crack Screw Idle Speed Screw Tension Spdng Idle RestdctorScrew Idle RestdctorScrwe Cap Black Float Bowl Float Shaft Float Float Bowl O Ring Inlet Needle Seat Clip _ncl 31 pring Clip Pdmer Bulb RetainerRing Main Nozzle Tube Carburetor ...

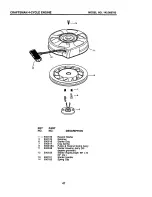
Page 46: ... 8 11 12 13 590702 Recoil Starter 590599A Spring Pin Incl 4 590600 Washer 590696 Retainer 590601 Washer 590697 Brake Spring 590698 Starter Dog 590699 Dog Spring 590700 Pulley Rewind Spring Ass y 590703 Starter Housing Ass y 40 degree grommet 590535 Starter Rope 98 X 9 64 dia 590701 Starter Handle 46 ...

Page 47: ...NO 590739 3 590740 6 590616 7 590617 8 590618A 11 590638 12 590535 13 590701 14 590760 DESCRIPTION Rewind Starter Retainer Starter Dog Dog Spring Pulley Rewind Spring Ass y Starter Housing Ass y 40 degree grommet Starter Rope Length 98 x 9 64 dia Starter Handle Spring Clip 47 ...

Page 48: ...anuals that you need to do it yourself call Sears PartsDirectSM 1 800 366 PART 6am 11 pm CST 1 800 366 7278 7 daysa week www sears condpartsdirect To purchase or inquire about a Sears Service Agreement 1 800 827 6655 7 a m 5 p m CST Mon Sat Pare pedir servicio de reparaci_ n a domicilio Au Canada pour service en frangais y para ordenarplazas conentregaa domicino 1 877 LE FOYER s 1 877 533 6937 1 8...

Reviews: