background image

Summary of Contents for EZ3 917.271064

Page 1: ...s differently from previously built engines Before you start the en glne read end understand this Owner s Manual CAUTION Read and follow all Safety Rules and Instructions before operating this equipment For answers to your questions aboutthisproduct Call 1 800 659 5917 Sears Craftsman Help Line 5 am 5 pm Mon Sat Sears Roebuck and Co Hoffman Estates II 60179 Visit our Craftsman website www sears co...

Page 2: ...speedingthe engine Repairsnecessarybecauseof operator negligence including but not limitedto electricaland mechanicaldamage causedby improperstorage failure to use the propergrade and amountof engineoil failure to keep the deck clearof flammable debris or the failure to maintainthe equipmentaccordingto the instructions containedin the owner smanual Engine fuel system cleaningor repairscaused by fu...

Page 3: ... 60 years and above are involved in a large percentage of riding mower related injuries These operators should evaluate their ability to operate the riding mower safely enough to protect themselves and others from serious injury II SLOPE OPERATION Slopes ere a major factor related to loss of control and tipover accidents which can result in severe in ury or death All slopes require extra caution I...

Page 4: ...arly Keep machinefree of grass leaves or otherdebds build up Clean oil or fuel spillage Allowmachineto cool before storing Stopand inspectthe equipmentif you stdkean object Repair if necessary before restarting Never make adjustments or repairs withthe engine running Grass catchercomponentsare subject to wear damage and deterioration whichcouldexposemovingpartsor allow objectsto be thrown Frequent...

Page 5: ...ire where it cannot contact spark plug CAUTION Do not coast down a hill in neutral you may lose control of the tractor CAUTION Tow only the attachment that are recommended by and comply with specifications of the manufacturer c your tractor Use common sense when towing Operate only at the lowest possible speed when on a slope Too heavy of a load while on a slope is dangerous Tires can lose tractio...

Page 6: ...intainyourtractorproperly Alwaysobservethe SAFETY RULES REPAIR AGREEMENT A Repair Agreement is available on this product Contact your nearest Sears store for details CUSTOMER RESPONSIBILITIES Read and observe the safety rules Follow a regular schedule in maintain ing caring for and using your tractor Follow the instructions under Mainte nance and Storage sections of this owner s manual _LWARNING T...

Page 7: ...1 Steedng _ _ 5_I 6L l C8knut Boot J Wheel Adapter _ Steering 1 Large Flat Washer 1 Hex Bolt 5 16 18 x 1 1 4 Steering Extension Shaft Seat _Washer 17 32 x 1 3 16 x 12 Gauge _ 1 Knob _ Shoulder olt 5 16 18 Slope Sheet For Future Use Keys 2 Keys Video Cassette 7 ...

Page 8: ...BOOT 1 Slide extension shaft onto lower steering shaft Align mounting holes in extension and lower shafts and install 5 16 hex bolt and Iocknut Tighten securely 2 Place tabs of steering boot over tab slots in dash and push down to secure INSTALL STEERING WHEEL 3 Position front wheels of the tractor so they are pointing straight forward 4 Remove steering wheel adapter from steering wheel and slide ...

Page 9: ...al 3 Place freewheel control in freewheel ing position to disengage transmis sion See TO TRANSPORT in the Operation section of this manual 4 Roll tractor forward off skid 5 Remove banding holding deflector shield up against tractor TO DRIVETRACTOR OFF SKID See Operation section for location and function of controls WARNING Before starting read understand and follow all insfructions in the Operatio...

Page 10: ...K BRAKE SYSTEM Afteryoulearn howto operateyour tractor checkto see thatthe brakeis properlyadjusted See TO ADJUST BRAKE inthe Serviceand Adjustments sectionof thismanual V CHECKLIST Beforeyou operate and enjoyyour new tractor we wishto assure that youreceive the best performanceand satisfaction from thisQualityProduct Please reviewthe following checklist All assemblyinstructions have been complete...

Page 11: ...EVERSE FORWARD FAST SLOW OIL PRESSURE LIGHTS ON OVER TEMP LIGHT FUEL CHOKE MOWER HEIGHT PARKING BRAKE UNLOCKED LOCKED MOWER LIFT _ 1 R N H L c _I ATTACHMENT REVERSE NEUTRAL HIGH LOW PARKING BRAKE CLUTCH ENGAGED KEEP AREA CLEAR SLOPE HAZARDS ATTACHMENT IGNITION CLUTCH DISENGAGED SEE SAFETY RULES SECTION DANGER KEEP HANDS AND FEET AWAY 11 FREE WHEEL Automatic Models only ...

Page 12: ...tery AI FACHMENT CLUTCH LEVER Used to engage the mower blades or other attachments mounted to your tractor ATTACHMENT LIFT LEVER Used to raise lower and adjust the mower deck or other attachments mounted to your tractor CLUTCWBRAKE PEDAL Used for declutching and braking the tractor and starting the engine MOTION CONTROL LEVER Selects the speed and direction of tractor IGNITION SWITCH Used for star...

Page 13: ...n and remove key Always remove key when leaving tractor to prevent unauthorized use Never use choke to stop engine IMPORTANT Leaving the ignition switch in any position other than OFF will cause the battery to be discharged dead NOTE Under certain conditions when tractor is standing idle with the engine running hot engine exhaust gases may cause browning of grass To eliminate this possibility alwa...

Page 14: ... BLADES disengage attachment clutch control _ CAUTION Do not operate the mower without either the entire grass catcher on mowers so equipped or the deflector shield in place AttachmentClutchLever Attachernnt Position Position _ Low Position Deflector Shield TO OPERATE ON HILLS _CAUTION Do not drive up or down hills with slopes greater than 15 and do not drive across any slope Choose the slowest sp...

Page 15: ...bon and lead oxide deposits and reduce valve life Do not mix oil with gasoline Pumhase fuel in quantities that can be used within 30 days to assure fuel freshness IMPORTANT When operating in temperatures below 32 F 0 C use fresh clean winter grade gasoline to help insure good cold weather starting _iLWARNING Experience indicates that alcohol blended fuels called gasohol or using ethanol or methano...

Page 16: ...nd Adjustments section of this manual PURGETRANSMISSlON _CAUTION Never engage or disen gage freewheel lever while the engine is running To ensure proper operation and perfor mance it is recommended that the transmission be purged before operating tractor for the first time This procedure will remove any trapped air inside the trans mission which may have developed during shipping of your tractor I...

Page 17: ...achments select a ground speed that will suit the terrain and give best performance of the attachment being used J MULCHING MOWINGTIPS IMPORTANT For best performance keep mower housing free of built up grass and trash Clean after each use The special mulching blade will recut the grass clippings many times and reduce them in size so that as they fall onto the lawn they will disperse into the grass...

Page 18: ...tructed in this manual Some adjustments will need to be made periodically to properly maintain your tractor All adjustments in the Service and Adjustments section of this manual should be checked at least once each season Once a year you should replace the spark plug clean or replace air filter and check blades and belts for wear A new spark plug and clean air filter assure proper air fuel mixture...

Page 19: ...st results mower blades must be kept sharp Replace bent or damaged blades BLADE REMOVAL 1 Raise mower to highest position to allow access to blades 2 Remove hex bolt lock washer and flat washer securing blade 3 Install new or resharpened blade with trailing edge up towards deck as shown IMPORTANT To ensure proper assembly center hole in blade must align with star on mandrel assembly 4 Reassemble h...

Page 20: ...ls To prevent damage to seals do not use compressed air or high pressure sprayer to clean cooling fins TRANSAXLE PUMP FLUID The transaxle was sealed at the factory and fluid maintenance is not required fc the life of the transaxle Should the transaxle ever leak or require servicing contact your nearest authodzed service center department ENGINE LUBRICATION Only use highqualitydetergentoil rated wi...

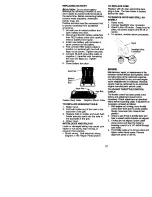
Page 21: ...move knob and cover 2 Remove wing nut and air cleaner from base TO SERVICE PRE CLEANER 3 Slide foam pre cleaner off cartddge 4 Wash it in liquid detergent and water 5 Squeeze it dry in a clean cloth Allow itto dry 6 Saturate it in engine oil Wrap it in clean absorbent cloth and squeeze to remove excess oil 21 TO SERVICE CARTRIDGE Replace a dirty bent or damaged cartddge NOTE Do not wash the paper ...

Page 22: ... do not recommend using a gards hose to clean your tractor unless the electrical system muffler air filter and carburetor are covered to keep water Water in engine can result in a shoals engine life IN LINE FUEL FILTER The fuel filter should be replaced once each season If fuel filter becomes clogged obstructing fuel flow to carbure tor replacement is required 1 With engine cool remove filter and ...

Page 23: ...nect anti swaybar from chassis bracket by removing retainer spring 7 Disconnect suspension arms from rear deck brackets by removing retainer spdngs 8 Disconnect front links from deck by removing retainer springs 9 Raise lift lever to raise suspension arms Slide mower out from under tractor Small RetainerSpring Clutch IMPORTANT If an attachment other than the mower deck is to be mounted on the trac...

Page 24: ...heck adjustment on right side of tractor Measure distance D directly in front and behind the mandrel at bottom edge of mower housing as shown Before making any necessary adjust ments check that both front links are equal in length Both links should be approximately 10 3 8 If links are not equal in length adjust one link to same length as other link To lower front of mower loosen nut E on both fron...

Page 25: ...lation guide decal on bottom side of left footrest 1 Remove mower See TO REMOVE MOWER in this section of this manual 2 Remove belt from stationary idler and clutching idler 3 Pull belt slack toward rear of tractor Carefully remove belt upwards from transmission input pulley and over cooling fan blades 4 Pull belt toward front of tractor and remove downward from around engine pulley 5 Install new b...

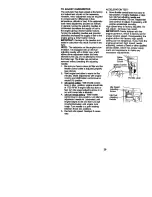
Page 26: ...xle Insert square key 4 Replace washers and snap retaining ring securely in axle groove 5 Replace axle cover NOTE TO sea_ tire punctures and prevent flat tires due to slow leaks tire sealant may be purchased from your local parts dealer Tire sealant also prevents tire dry rot and corrosion Washers Retaining _ __ Ring ff ll Axle I El _ t_ Square Key Rear Wheel Only TO START ENGINE WITH A WEAK BATTE...

Page 27: ...rom starling Check wiring See electrical widng diagram in the Repair Parts section TO REPLACE FUSE Replace with 20 amp automotive type plug in fuse The fuse holder is located behind the dash TO REMOVE HOOD AND GRILL AS SEMBLY 1 Raise hood 2 Unsnap headlight wire connector 3 Stand in front of tractor Grasp hood at sides tilt toward engine and lift off of tractor 4 To replace reverse above procedure...

Page 28: ...trollever in neutral N position 3 Idtesceed eaffin_o W dhthrottle control lever in slow position engine should idle at 1750 RPM Ifengine idlestoo slow or fast turn idle speedadjustingscrew in or out untilcorrect idle is attained 4 Idle fuel needle setting With threttle controllever in slow position turn idle fuel adjustment needle in clockwise until engine begins to die and thanturn out counterclo...

Page 29: ... essential fuel system parts such as carburetor fuel hose or tank during storage Also experiance indicates that alcohol blended fuels called gasohol or using ethanol or methanol can attract moisture which leads to separation and formation of acids dudng storage Acidic gas can damage the fuel system of and engine while in storage 1 Drain the fuel tank 2 Start the engine and let it run until the fue...

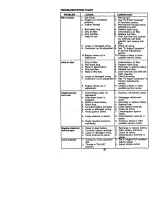
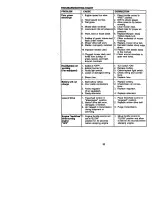
Page 30: ...ein CHOKE position 3O CORRECTION 1 Fillfuel tank 2 See TOSTARTENGINE in Operationsection 3 Wait severalminutesbefore attempting to start 4 Replace spark plug 5 Clean replaceair filter 6 Replace fuel filter 7 Drainfuel tank and carbure tor refilltank withfresh gasolineand replace fuel filter 8 Check all wiring 9 See ToAdjustCarburetor in ServiceAdjustments section t0 Contact a Sears or other qualif...

Page 31: ...g 14 See ToAdjustCarburetor in ServiceAdjustments section 15 Contacta Sears orother qualified servicecenter Excessive I Replace blade vibration Tighten blade bolt 2 Replace blade mandrel 3 Tighten loose part s Replace damaged parts Enginccontinuea 1 Faulty operator safety 1 Check wiring switches and to run when presence control system connections If not corrected operator leaves contact a Sears or...

Page 32: ...Motion ddve belt worn damaged or broken Air trapped in transmission during shipment or servicing Enginethrottlecontrol not set at SLOW positionfor 30 seconds before stoppingengine CORREC_ON 1 Place throttle control in FAST position 2 Shift to slower speed 3 Allow grass to dry before mowing 4 Level mower deck 5 Check tires for proper air pressure 6 Replace sharpen blade Tighten blade bolt 7 Clean u...

Page 33: ... _ ii I OFF M p_ _ A1 NONE RUN I IGHT B AI A2_ RUN B_ AI NONE START B S A1 NONE RELAY NON REMOVABLE REMOVABLE CONNECTIONS CONNECTIONS WIRING INSULATED CUP8 NOTE IF WIRING INSULATED CLIPS WERE REMOVED FOR SERVICING OF UNIT THEY SHOULD BE REPLACED TO PROPERLY SECURE YOUR WIRING 33 ...

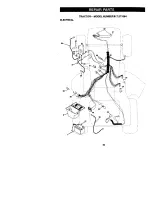
Page 34: ...ELECTRICAL TRACTOR MODEL NUMBER 917 271064 I t t 34 ...

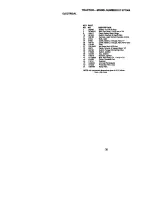
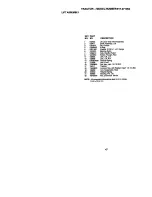
Page 35: ... 6 Gauge Red 11 25 146147 Cable Battery 6 Gauge Red W 16 Wire 26 175158 Fuse 27 73510400 Nut Keps Hexl 4 20 Unc 28 4207J Cable Ground 6 Gauge Black 12 29 160784 Switch Plunger Normal Op Olive 30 175566 Switch Ignition 33 140403 Key Ignition 40 17_219 Harness Ignition 41 71110406 Bolt Hex Heed Rn 114 20 x 1i2 42 131563 Cover Terminal Red 43 175141 Solenoid 45 122822X Ammeter Rectangular 52 141940 p...

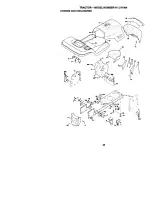
Page 36: ...TRACTOR MODEL NUMBER 917 271064 CHASSIS AND ENCLOSURES 208 11 _ _ 54 74 1 ...

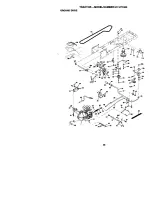
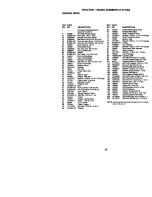
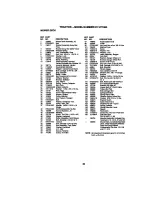
Page 37: ... x 1 2 Tyt 38 169834 Bracket Asm Pivot Mower Rear 51 73800400 Nut Lock w Insert 1 4 20 UNC 52 19091416 Washer 9 32 x 7 8 x 16 Ga 53 145201 Bracket Gdlle Plckoff LH 54 161464 Screw Hex Wshd 8 18 x 7 8 55 145202 Bracket Gdlle Ptckoff RH 57 STD522507 Bolt Fin He 1 4 20 UNC x 75 58 150127 Duct Air Engine P I LT 60 72140606 Bolt Rdhd Sqnk 3 8 16 UNC x 3 4 64 154798 Dash Lower STLT 74 73680600 Nut Crown...

Page 38: ...TRACTOR MODEL NUMBER 917 271064 GROUND DRIVE 36 38 ...

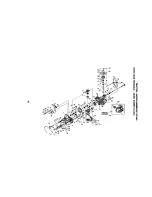
Page 39: ...Hd 5 16 18 Unc x 3 4 g6 4497H Retainer Spdng 1 Zinc Cad 15 5071 Shaft FOOt Pedal 116 72110610 Bolt Rdhd Sqneck 3 8 16 x 1 25 120183X Bearing Nyton 120 73900600 Nut Lock Rg 3 8ot6 Unc 19211615 Washer 150 165850 Bushing Bellcrank Grd Ddve 1572H Pin Roll 151 19133210 Washer 13 32 x 2 x 10 Ga 131494 Polley Idler Flat 156 166002 Washer Srrted 5 161D x 1 125 74760644 Bolt 158 165589 Bracket Sh_ft Mount ...

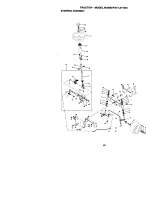
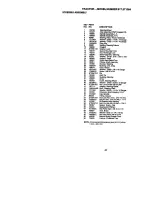
Page 40: ...TRACTOR MODEL NUMBER 917 271064 STEERING ASSEMBLY _41 47 40 ...

Page 41: ... x 7 8 x 16 Gauge 29 17060612 Screw 3 8 16 x 3 4 30 STD561210 Pin 3_ 130465 Rod Tie 36 155099 Bushing Steedng 37 152927 Screw 38 139769 Insert Steedng Wheel 39 19133812 Washer 13 32 x 2 3 8 x 12 Gauge 40 STD541537 Nut LockCenter3 8 24UNF 41 100711L Adaptor Steedng Wheel 42 145054x428 Boot Steedng Shaft 43 121749X Washer 25 32 x 1 1 4 x 16 Gauge 44 153720 Extension Shaft Steedng LR LT 46 121232X Ca...

Page 42: ...ENGINE TRACTOR MODEL NUMBER 917 271964 14 _ i _ 105 42 ...

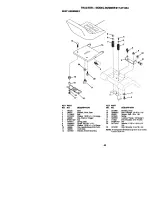
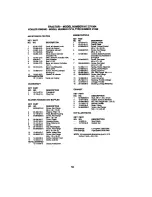
Page 43: ...1092 _X Tank Fuel 1589S0 Cap Assemely Fuel Seam Vented 33 123487X Clamp Ho_e 37 137040 Line Fuel 38 148315 Plug Dreln Oil Easy 40 124028X BuShing Snap Fuel Une 44 17670412 Screw Hex Washer Head TIKI Roll 1 4 20 x 3 4 45 170 X_12 Screw Hex Wsh Thdr 3 8 16 x 3 4 46 19091416 Washer 9 32 x 7 8 x 16 Gauge 77 19101216 Washer 5 16 x 3 4 x 16 Ga 80 7476 To0_ Belt Hex Hd 5 16 18 Unc x 1 2 81 73510400 Nut K...

Page 44: ...10Gange 16 121250X Spdng 5 145006 Clip Push In Hinged 17 123976X LOcknut Flange 1 4 Grade 5 6 S_1437 Nut 21 171852 Bolt Shoulder 5 16 18 UNC 7 124181X Spring Seat 22 STD541431 Nut 8 17000616 Screw 3 8 16x1 t 2 24 19171912 Washer 17 32x 1 3 16x 12 9 19131614 Washer 13 32 x 1 x 14 Gauge Ga 10 155_ 5 Pan Seat Emboea QCK Conn 25 127018X B_t Shoulder 5 16 18 x 62 11 166369 Kf _t Se _t NOTE Ati componen...

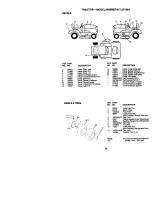
Page 45: ... 165799X428 Pad Footrest RH STLT 10 156439 D6cal Fender Danger 169210 De_al By Pass LT Hydro 12 146046 Decal V Bait Drive Schematic 177558 Owner s Manual English 13 163261 Decal Dash Pal 177559 Owner s Manual Spanish YHEELS TIRES 11 KEY PART NO NO DESCRIPTION 1 59 i92 Valve Cap Tire 2 65139 Stem Valve 3 106222X Tire Front 4 59904 Tube Front Tire Not Provided Ser Ace Item Only 5 106732X427 Rim Fron...

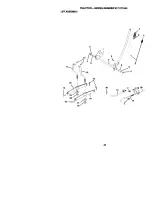
Page 46: ...TRACTOR MODEL NUMBER 917 271064 LIFTASSEMBLY I 6 5 20 15 _ _ 161_71_ 2_ _ 46 ...

Page 47: ...on 7 125631X Gdp Handle Fluted 8 122365X Button Plunger Red 11 139665 Link Uft LH 12 13_66 Link Lift R H 13 STD6240_ Retainer Spring 15 173288 Link Front 16 73350800 Nut Hex Jam 1 2 13 UNC 17 130171 Trunnion 18 73800800 Locknut Hex with Washer Insert 1 2 13 UNC 19 139868 Arm Suspension Rear 20 163552 Retsiner Spring 31 169865 Beadng Pvt Lift 73540600 NuL Crownlock 3 8 24 NOTE All component dimensi...

Page 48: ...TRACTOR MODEL NUMBER 917 271064 MOWER DECK 34 119 118 16 1 19 13_ 10_ 9_ 27 48 ...

Page 49: ...Nut Centedock 3 8 16 Butt Shoutder 119 s rD5510G7 Washer3iSxT Sx14Gauge Baffle Vortex 121 143723 Bracket Nut Crownlock 5 16 18 UNC 129 19131312 Washer 13 32 x 13 16 x12 Ga Stiffener Bracket 130 STD523710 Bolt Rn Hex 3 6 16 UNC xl Bracket Deflector Gr 5 Cap Sleeve 131 STD533710 Bolt RdhdSqnk3 8 16UNCxl Spd ng Torsion Deltector 142 165890 Arm 6pdng Brske Mower Nut Push 143 157109 Bracket Arm Idler42...

Page 50: ...81 77 79 73 16 32 93 58 48 19 124 107 43 120 88 88 9OO o n i o _ oO mo r m Z r c Z z m_ m _ W _ 4 ...

Page 51: ...1 575 X 625 Nylon _nasd 3_ 170389 SleeveSeadng Ou_0 ard 81 170423 Wedge Fdct on Pack 75x1 750x 625 82 170424 Ctip Washer 316xl 50x 1046 33 142991 Washer Plated 3 4 Id X 1 1 20d X I3 Thk 83 161162 Pin Standard Headless 34 17 _90 Up Seal _ Seal 84 170425 Fi_ng 5 16 Sae 5 32 Tube 35 170391 Shaft Axle 75 X 11 39 Key R H 85 170426 Hose Expansion Tank 36 170392 Shaft Axle 75 X 16 99 Key LH 86 170427 Exp...

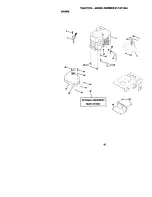
Page 52: ...TRACTOR MODEL NUMBER 917 271064 KOHLER ENGINE MODEL NUMBER CVIS TYPE NUMBER 41598 1 8 CRANKSHAFT I EXHAUSTJ O 5 _ 4 6 52 ...

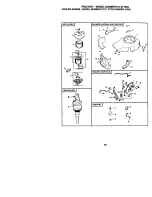
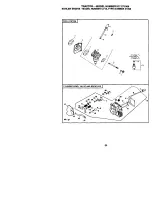
Page 53: ...M6x 1 0x20 6 24 096 _5 S Cover Pinion 7 12 _7 32 S Housing Btower 9 12 141 01 S Ring Retainer 2 8 12 G96 28 S Cover 10 25 154 02 S Clip Mountlug 3 11 M 0545020 S Screw Hex Flange M5 x 8 x 20 3 12 12 063 05 S Baffle Intake Side 13 M _45016 S Screw Hex Range M6x 1 0 x 16 2 14 12 063 08 S Baffle Cylinder Head 15 12 063 01 S Baffle Cylinder NOTILLUSTRATED 12 113 64 S Decal Horsepower 13 12 090 85 S 14...

Page 54: ...TRACTOR MODEL NUMBER 917 271064 KOHLER ENGINE MODEL NUMBER CV15 TYPE NUMBER 41598 FUEL SYSTEM I 7 11 CYLINDER HEAD VALVE AND BREATHER I 54 ...

Page 55: ...es 15 12 454 16 M _ 03 S Tie wire 25 45220 S Termlnai 17 12 Q_6 07 S 15 12 041 06 S Gasket bowl retainer screw 18 235011 S NOTILLLt_t_ATED 19 24 03_ 05 S 12 041 01 S Gasket Carburetor 20 M 0640034 S 12 757 03 S Kit Carbureto_ Rapst r 12 518 37 S Lead Red 37 20 Gauge 21 24 194 01 S Uoinsulated Socket and 22 24 186 03 5 Insulated Socket Terminal 23 M 3545010 S M 561010 S Screw Thread FomWlg M5 X 8 x...

Page 56: ...TRACTOR MODEL NUMBER 917 271064 KOHLER ENGINE MODEL NUMBER CV15 TYPE NUMBER 41598 IGNITION I ELECTRICAL I OIL PAN LUBRICATION J _10 14 CRANKCASE STARTING SYSTEM I ...

Page 57: ...39 09 S Kit Oil F I Cap includes Key 3 19 12 755 64 S O Ring Dipstick O Ring Upper Oil Fill Tube Tube Oil Fill 20 12 144 24 S 21 X 25 10_ S Screw Hex Flange 22 12 0_2 01 S M6 x 1 0 x 25 23 SM 0631015 S O Rieg Lower Oti Fill Tube Screen Oil Pick up 24 12 154 _o S Cover Oil Pick up Screen Screw Hex Range M5 x 08 x 16 STARTING SYSTEM Oil Filter Valve Oil Pressure Relief KEY PART Rug square head sotid...

Page 58: ...58 ...

Page 59: ...LY RIDE UP AND DOWN HILL NOT ACROSS HILL I_ Operate your Tractor up and down the face of slopes not I greater than 15 never across the time Make tums gradu J ally to prevent tipping or loss of control Exercise extreme caution when changing direction on slopes ...

Page 60: ...cessories and owner s manuals that you need to do it yourself call Sears ParteDirect SM 1 800 366 PART 6a m p m CST 1 800 366 7278 7 days a week www sears com partsdlrect To purchase or inquire about a Sears Service Agreement 1 800 827 6655 7 a m 5 p m CST Mon Sat Parapedir serviciode reparacibna domicilio y para ordenarpiezas con entrega a domicilio 1 888 SU HOGAR s 1 888 784 6427 Au Canada pours...

Reviews: