background image

Summary of Contents for EZ3 917.271071

Page 1: ...on Maintenance Repair Parts CAUTION Read and follow all Safety Rules and Instructions before operating this equip ment For answers to your questions about this product Call 1 800 659 5917 Sears Craftsman Help Line 5 am 5 pro Mort Sat Sears Roebuck and Co Hoffman Estates IL 60179 Visit our Craftsman Website ww x sears com craftsman ...

Page 2: ...t is available at no charge for 30 days from the date of purchase Please contact your nearest service center After 30 days from the date of purchase warranty service is available by taking your Craftsman riding equipment to your nearest Sears Service Center In home warranty service will still be available after 30 days from the date of purchase but a standard trip charge will apply This warranty a...

Page 3: ...slopes slow and gradual Do not make sudden changes in speed or direction 3 Avoid starting or stopping on a slope If tires lose traction disengage the blades and proceed slowly straight down the slope DO NOT Do notturn on slopes unless neces sary and then turn slowly and gradually downhill if possible Do not mow near drop effs ditches or embankments The mower could suddenly turn over if a wheel is ...

Page 4: ...backing Never carry children They may fall off and be seriously injured or interfere with safe machine operation Keep children ou ff the mowing area and under the w_ hful care of another responsible adult Be alert and turn machine off if children enter the area Before and when backing look behind and down for small children Mow up and down slopes 15 Max not across Remove obstacles such as rocks tr...

Page 5: ...nable you to assemble and maintain your tractor properly Always observe the SAFETY RULES MAINTENANCE AGREEMENT A Sears Maintenance Agreement is available on this product Contact your nearest Sears store for details CUSTOMER RESPONSIBILITIES Read and observe the safety rules Follow a regular schedule in maintain ing caring for and using your tractor Follow the instructions under Mainte nance and St...

Page 6: ...olt 5 16 18 x 1 1 4 1 Lockwasher 3 8 1 Large Flat Washer 1 Hex Bolt 3 8 16 x 1 1 Locknut 5 16 18 L 1 Knob 1 Washer 17 32 x 1 3 16 x 12 Gauge 1 Shoulder Bolt 5 16 18 2 ckWashers 10 2 Weld Nuts 10 2 Screws 10 x 5 8 2 Washers 3 16 x 3 4 x 16 Gauge ...

Page 7: ...eering Boot Seat Video Cassette Mulcher Plate Manual Parts Bag Steering Wheel Parts Bag contents not shown full size Slope Sheet t teering Extension Shaft _ teering Wheel Insert Steering Wheel Adapter 2 Keys _2 I I Latch Hook Assemblys 7 ...

Page 8: ...ditional loose parts or boxes and remove BEFORE ROLLING TRACTOR OFF SKID ATTACH STEERING WHEEL ASSEMBLE EXTENS ON SHAFT AND BOOT Slide extension shaft onto lower steering shaft Align mounting holes in extension and lower shafts and install 5 16 hex bolt and Iocknut Tighten securely IMPORTANT Tighten bolt and nut securely to 18 22 ft Ibs torque Place tabs of steering boot over tab slots in dash and...

Page 9: ...ts highest position Release parking brake by depressing clutch brake pedal Place gearshift lever in neutral N position Roll tractor forward off skid Remove banding holding discharge guard up against tractor TO DRIVE TRACTOR OFF SKID _1 WARNING Before starting read understand and follow all instructions in the Operation section of this manual Be sure tractor is in a well ventilated area Be sure the...

Page 10: ... Install two latch hooks to mulc her plate using screw washer lock washer and weld nut as shown NOTE Pre assemble weld nut to latch hook by inserting weld nut from the top with hook pointing down Tighten hardware securely Raise and hold deflector shield in upright position Place front of mulcher plate over front of mower deck opening and slide into place as shown Hook front latch into hole on fron...

Page 11: ... factory Be sure mower deck is properly leveled side to side front to rear for best cutting results Tires must be properly inflated for leveling Check mower and drive belts Be sure they are routed properly around pulleys and inside all belt keepers Check wiring See that all connections are still secure and wires are properly clamped While learning how to use your tractor pay extra attention to the...

Page 12: ...OR REVERSE FORWARD FAST SLOW WARNING ov FUEL CHOKE MOWER HEIGHT PARKING BRAKE UNLOCKED MOWER LIFT LOCKED R N H L ATFACHMENT REVERSE NEUTRAL HIGH LOW PARKING BRAKE CLUTCH ENGAGED KEEP AREA CLEAR SLOPE HAZARDS _TTACHMENT IGNITION C FCH DISENGAGED DANGER KEEP HANDS AND FEET AWAY SEE SAFETY RULES SECTION FREE WHEEL Automatic Models only 12 ...

Page 13: ... LEVER Used to engage the mower blades or other attachments mounted to your tractor LIGHT SWITCH Turns the headlights on and off THROTTLE CHOKE CONTROL Used to control engine speed CLUTCH BRAKE PEDAL Used for declutching and braking the tractor and starting the engine GEARSHIFT LEVER Selects the speed and direction of the tractor HEIGHT ADJUASTMENT KNOB Used to Adjust the mower cutting height ATTA...

Page 14: ...sition and allowing engine to idle before stopping may cause engine to backfire Turn ignition key to OFF position and remove key Always remove key when leaving tractor to prevent unauthorized use Never use choke to stop engine IMPORTANT Leaving the ignition switch in any position other than OFF will cause the battery to be discharged dead NOTE Under certain conditions when tractor is standing idle...

Page 15: ... operator presence sensing switch Any attempt by the operator to leave the seat with the engine running and the attachment clutch engaged will shut off the engine Select desired height of cut Lower mower with attachment lift control Start mower blades by engaging attachment clutch control TO STOP MOWER BLADES disen gage attachment clutch control _CAUTION Do no_ operate the mower without either the...

Page 16: ...ould be emptied before stor ge of 30 days or longer Drain the gas tank start the engine and let it run until the fuel lines and carburetor are empty Use fresh fuel next season See Storage Instructions for additional information Never use engine or carburetor cleaner products in the fuel tank or permanent damage may occur _ CAUTION Fill to bottom of gas tank filler neck Do not overfill Wipe off any...

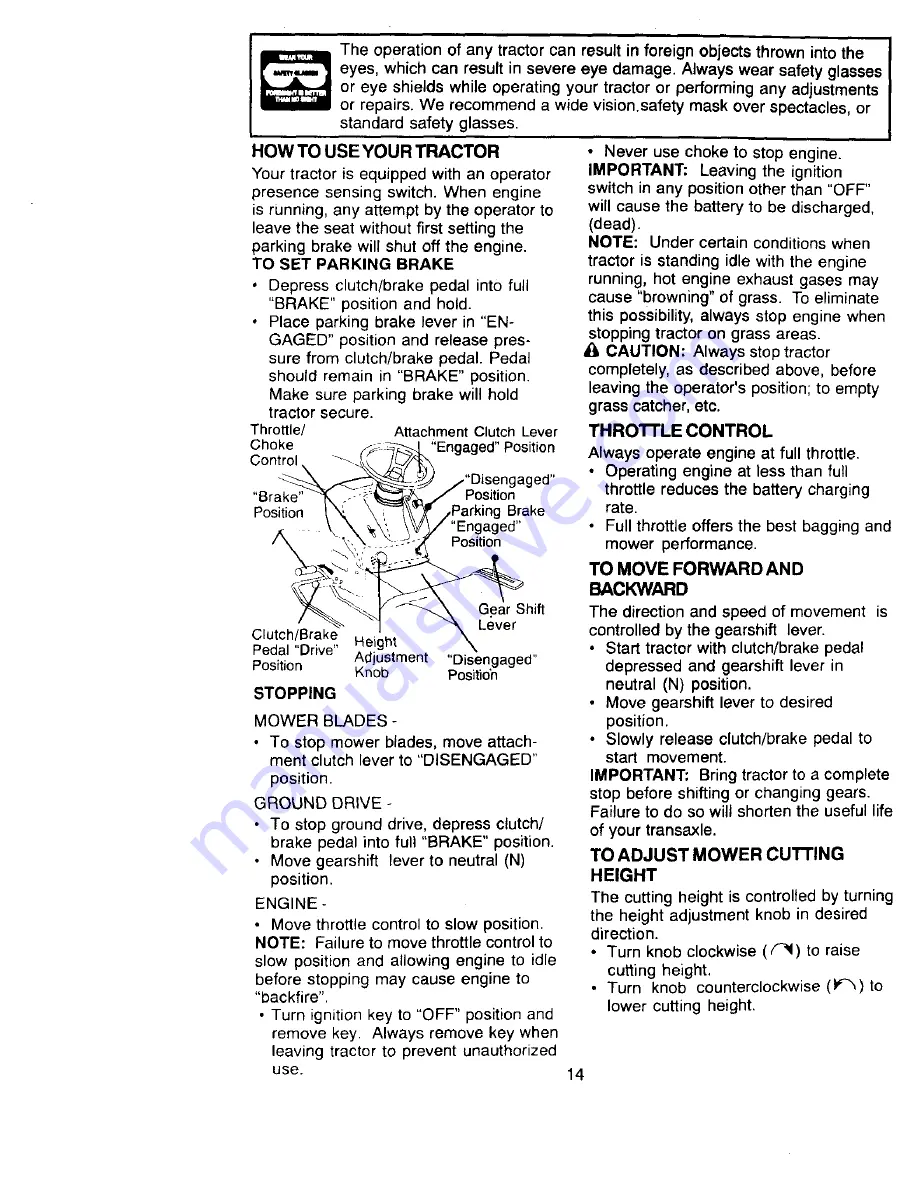
Page 17: ...ial Regulate ground speed by selecting a low enough gear to give the mower the best cutting perfor mance as well as the quality of cut desired When operating attachments select a ground speed that will suit the terrain and give best performance of the attachment being used f 1 MULCHING MOWING TIPS J IMPORTANT For best performance keep mower housing free of built up grass and trash Clean after each...

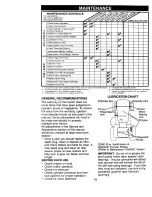
Page 18: ...COMMENDATIONS I The warranty on this tractor does not cover items tha_ have been subjected to operator abuse or negligence To receive full value from the warranty operator must maintain tractor as instructed in this manual Some adjustments will need to be made periodically to properly maintain your tractor All adjustments in the Service and Adjustments section of this manual should be checked at l...

Page 19: ...BLADE CARE For best results mower blades must be kept sharp Replace bent or damaged blades BLADE REMOVAL Raise mower to highest position to allow access to blades Remove hex bolt lock washer and flat washer securing blade Install new or resharpened blade with trailing edge up towards deck as shown IMPORTANT To ensure proper assem bly center hole in blade must align with star on mandrel assembly Re...

Page 20: ...l s SAE viscosity grade according to your expected operating temperature Change the oil after every 50 hours of operation or at least once a year if the tractor is not used for 50 hours in one year Check the crankcase oil level before starting the engine and after each eight 8 hours of operation Tighten oil fill cap dipstick securely each time you check the oil level TO CHANGE ENGINE OIL Determine...

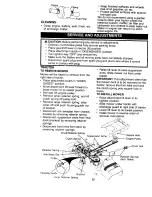
Page 21: ... tighten knob securely ENGINE OIL FILTER Replace the engine oil filter every season or every other oil change if the tractor is used more than 100 hours in one year Drain oil from engine crankcase See TO CHANGE ENGINE OIL in this section of this manual through step remove drain plug Remove oil filter and wipe off filter adapter Apply a thin coating of new engine oil to the rubber gasket on replace...

Page 22: ...AGED position Move attachment lift lever forward to lower mower to its lowest position Roll belt off engine pulley Remove small retainer spring and lift clutch spring off pulley bolt Remove large retainer spring slide collar off and push housing guide out of bracket Disconnect anti swaybar from chassis bracket by removing retainer spring Disconnect suspension arms from rear deck bracket_ by removi...

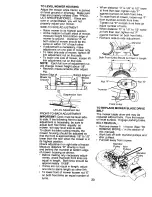
Page 23: ...hould be adjusted so that the front is approximately 1 8 to 1 2 lower than the rear when the mower is in its highest position Check adjustment on right side of tractor Measure distance D directly in front and behind the mandrel at bottom edge of mower housing as shown Before making any necessary adjust ments check that both front links are equal in length Both links should be approximately 10 3 8 ...

Page 24: ...lt keepers Pull belt toward front of tractor and remove downwards from around engine pulley Install new belt t reversing above procedure Engine Pulley _ Clutching Idler f J Stationary Idler Transaxle Pulley 7 TRANSAXLE GEAR SHIFT LEVER NEUTRAL ADJUSTMENT The transaxle should be in neutral when the gear shift lever is in the neutral N lock gate position The adjustment is preset at the factory howev...

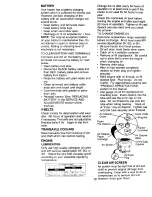
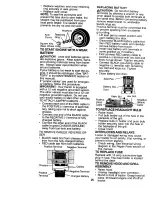
Page 25: ...ve Terminal Negative Terminal Positive rminal Y REPLACING BATTERY d _CAUTION Do not shod battery terminals by allowing a wrench or any other object to Contact both terminals at the same time Before connecting battery remove metal bracel ts wristwatch bands rings etc Positive terminal must be connected first to prevent sparking from accidental grounding Lift seat pan to raised position and open bat...

Page 26: ...may result if needle is turned in too tight NOTE The carburetor on this engine is low emission It is equipped with an idle fuel adjusting needle with a limiter cap which allows some adjustment within the limits allowed by the cap Do not attempt to remove the limiter cap The limiter cap cannot be removed without breaking the adjusting needle Be sure you have a clean air filter and the throttle cont...

Page 27: ...stem parts such as carburetor fuel filter fuel hose or tank during storage Also experience indicates that a_cohol blended fuels called gasohol or using ethanol or methanol can attract mois ture which leads to separation and for mation of acids during storage Acidic gas can damage the fuel system of an engine while in storage Drain the fuel tank Start the engine and let it run until the fuel lines ...

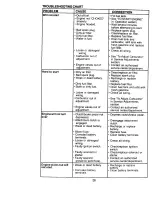
Page 28: ...ry Corroded battery terminals Fill fuel tank See TO START ENGINE in Operation section Wait several minutes before attempting to start Replace spark plug Clean replace air filter Replace fuel filter Drain fuel tank and carburetor refill tank with fresh gasoline and replace fuel filter Check all wiring See To Adjust Carburetor in Service Adjustments section Contact an authorized service center depar...

Page 29: ... mandrel Clogged mower deck ventholes from buildup of grass leaves and trash around mandrels CORRECTION Check art wir ng Check replace solenoid or starter Set in Higher Cut position reduce speed Adjust throttle control Clean underside of mower housing Clean replace air filter Check oil level change oil Clean and regap or change spark plug Replace fuel filter Drain fuel tank and refill with fresh g...

Page 30: ...h is OFF Bulb s burned out Fautty light switch Loose or damaged wirir_g Blown fuse Bad battery cell s Poor cable connections Faulty regulator if so equipped Faulty alternator Engine throttle control not set at SLOW position for 30 seconds before stopping engine i CORRECTION Place throttle control in FAST position Shift to slower speed Allow grass to dry before mowing Level mower deck Check tires f...

Page 31: ...T O R PRESENCE RELAY 1 BLUE i 85 86 I II _IL_C_ E7 i 3o IGN_ _J_IN CYL ENGINES IGNITION PLUG I UNIT GAP OPERATORLAY 2 2 PLUGS ON _ REGULATOR _ _LLOw IREGUL_ T OR _I_Oi_IECTEO I OPERATOR PRESENCE RELAY 3 I _ I aLUE E5 86 1i _HEADUGHTS _EJ _ BLAC_ i REn i NON REMOVABLE REMOVABLE CONNECTIONS CONNECTIONS RELAY IGNITION SWITCH WIRING INSULATED CLIPS POSITION CIRCUIT MAKE OFF G M L NONE RUN LIGHT B L A ...

Page 32: ...ELECTRICAL TRACTOR MODEL NUMBER 917 271071 32 ...

Page 33: ...ch Hinge Switch Interlock N OPN N OPN Washer Lock 1 4 Nut Hex Jam 1 4 20UNC Harness Light Socket w 4152J Light Bulb Cable Battery 6 Gauge Red 11 Cable Battery 6 Gauge Red W16 Wire Fuse 15Amp Nut Keps Hex 1 4 20 Uric Cable Ground 6 Gauge Black 12 Switch Plunger Normal OP Olive Switch Ignition 4 Position Nut Ignition Cover Ignition Switch Key Molded Craftsman Harness Ignition Bolt BIk Fin Hex 1 4 20...

Page 34: ...TRACTOR MODEL NUMBER 917 271071 CHASSIS AND ENCLOSURES 28 58 12 14 53 55 7 54 ...

Page 35: ... 3 8 16x 1 Panel Dash LH Clip Tinnerman Grille P L Panel Dash RH Screw Thd Roll 3 8 16 x 1 2 Hood Assembly Bumper Hood Washer 13 32 x 13 16 x 12 Gauge Locknut Grille Lens Asm Lens Grille Fender Footrest Pnt STLT N Hold 558 Bracket Fender Support Screw Thdrol 5 16 18 x 1 2 Pivot Bracket Assembly LH Pivot Bracket Assembly RH Nut Lock w Insert 1 4 20 UNC Washer 9 32 x 7 6 x 16 Gauge Bracket Grille Pi...

Page 36: ...TRACTOR MODEL NUMBER 917 271071 GROUND DRIVE 57 26 27 36 ...

Page 37: ... NO 59 140312 61 17060612 62 8883R 63 140186 64 164975 65 STD551143 66 154778 70 134683 72 19132012 74 137057 75 121749 76 STD581075 77 123583X 78 121748X 79 2228M 80 145090 81 165592 82 165711 83 19171216 84 166231 85 150360 89 158391X428 90 124346X 97 449714 112 19O9121O 113 127285X 116 72110610 145 74490540 150 165850 151 19133210 156 166002 158 165589 159 165494 160 19292016 161 72140406 162 7...

Page 38: ...TRACTOR MODEL NUMBER 917 271071 STEERING ASSEMBLY _83 _11 4_ i 2 62 44 38 ...

Page 39: ...trg BIk Draglink Extended Stamped Washer Lock Hvy Hlcl Spr 3 8 Bearing Axle STLT GT Locknut Flange 5 8 11 UNC Shaft Asm Strg Private Label Washer Thrust 515 x 750 x 033 Support Shaft Screw Hex Wsh Hd Torx Shaft Asm Pittman Bracket Steering Bushing Rod Tie BIk Lt Gear Sector Washer 13 32 x 7 8 x 16ga Screw 3 8 16x3 4 Pin Cotter 1 8 x 3 4 Cad Rod Tie Wire Form 1975 Mech Bushing Strg 5 8 Id Dash Scre...

Page 40: ...ENGINE TRACTOR MODEL N UMBER 917 271071 2 1 _79 33 4 29 23 OPTIONAL EQUIPMENT I SparkArrester J __ _3s 4O ...

Page 41: ...gine SeeBreakdown Kohler Model CV 16S 43519 Muffler Gasket Kohler Nipple Pipe 3 8 NPT x 3 1 2 Elbow Std 90 Degree 3 8 18 Npt Washer Shield BRN DBR Guard Arrestor Spark Tank Fuel Cap Assembly Fuel Tank Vented Clamp Hose BIk Screw 5 16 18 x 3 4 Line Fuel Plug Oil Drain See Engine Breakdown Bushing Snap Fuel Line Screw Hex WasheP Head Thd Roll 1 4 20 x 3 4 Washer 9 32 x 7 8 x 16 Gauge Washer Lock Was...

Page 42: ...2x 1 x 10 Gauge 16 121250X Clip Push In Hinged 17 123976X NUt 21 153236 Spring Seat 22 STD541431 Screw 3 8 16 x 1 1 2 24 19171912 Washer 13 32 x 1 x 14 Gauge 25 127018 Pan Seat EmbossQCK Conn KnobSeat Bracket Switch Mounting DESCRIPTION Bushing Snap Bolt Carriage 1 4 20 x 1 1 2 Spacer Split 26 x 68 Spring Locknut Flange 1 4 Grade 5 Bo_t Shoulder 5 16 18 UNC Nut Washer 17 32 x 1 3 16 x 12 Ge Bolt S...

Page 43: ...ecal_V Belt Drive Schematic Decal V Belt Schematic Decal Battery Dngr Psn Eng Decal Battery Diehard Sears Decal Uft Handle Pad Footrest LH STLT Pad Footrest RH STLT Owner s Manual English Owner s Manual Spanish WHEELS TIRES 2 _ 5 8 7 4 10 11 KEYPART NO NO 1 59192 2 65139 3 t 06222X 4 59904 5 106732 427 6 278H 7 9040H 8 106108X427 9 122O82X 10 7152J 11 1_75_ 144334 DESCRIFRON Valve Cap Tire Stem Va...

Page 44: ...TRACTOR MODEL NUMBER 917 271071 LIFTASSEMBLY 27 37 41 6 23 3O 7 8 5 4 13 19 _13 _32 2O 15 2O 44 ...

Page 45: ...3680800 Nut Crownlock 1 2 13 UNC 19 139868 Arm Suspension Rear 20 163552 Retainer Spring 23 110807X Nut Special 24 19131016 Washer 13 32 x 5 8 16 Ga 25 2876H Spring 2 1 8 26 76020308 Pin Cotter 3 32 x 1 2 27 126971X Rod Adj Lift 28 73550600 Nut Hex Jam 3 8 16uric 29 138057 knob Infin Height 30 150233 Trunnionlnfin Height 31 140302 Bearing Pivot Lift Spherical 32 73540600 Nut Crownlock 3 8 24 36 15...

Page 46: ...MOWER DECK TRACTOR MODEL NUMBER 917 271071 157 2 16 1 18 115_ 112 118 h 27 46 ...

Page 47: ...C Arm Assembly Pad Brake Washer Hardened Arm Idler Spacer Retainer Guard TUV Idler KEY PAR r NO NO 67 149846 68 144959 85 72140614 92 STD541437 101 136420 102 71161010 103 19061216 104 STO551110 105 160793 106 2029J 111 155197 112 155198 113 17060512 114 STD541431 115 72110504 116 4898H 117 165746 118 73930600 119 STD551037 121 143723 128 153390 129 19131312 130 STD523710 131 STD533710 142 165890 ...

Page 48: ...TRACTOR MODEL N UMBER 917 271071 PEERLESS TRANSAXLE MODEL NUMBER 206 545C 35A 157 180 _ 150 47 13 MODEL and SERIAL NUMBERS HERE 45 79 50 157 42A 52 J 34 _87 29 48 ...

Page 49: ... 031W 76 780090 29A 780160 Thrust Washer 762 ID x 031W 77 788078A 296 780051 Thrust Washer 762 ID x 031W 79 792144 29C 780199 Anti Rotation Washer 632 82 778333 30 780108 CupWasher 1 127 IDx 032W 83 778338 31 780001 Flat Washer 750 ID x 056W Use _5 792154 AS Needed 87 788089A 31A 780195 Flat Washer 750 ID x 062W 150 788093A 32 788083 Oil Seal 5 8 157 788088A 34 780194 Bushing 563 180 730229A 35 78...

Page 50: ...TRACTOR MODEL NUMBER 917 271071 KOHLER ENGINE MODEL NUMBER CV16S TYPE NUMBER PS 43519 CYLINDER HEAD VALVE AND BREATHER I CRANKCASE J 18 22 t 19 5 50 ...

Page 51: ...ing valve 2 24 874 11 Cap valve spring 2 12 874 08 Kit retainer 2 12 874 09 Washer plain 13 32 11 12 018 02 Spacer head bolt exhaust port 12 12 108 07 Screw hex flange MI0xl 5xB1 12 108 08 5 12 108 09 Clamp hose 2 13 12 067 Q5 Hose breather 12 067 O9 Screw hex flange M6xl 0x20 14 12 380 01 5 15 12 043 O9 Cover valve w nipple 16 M_6310O9 Screw hex flange M5x0 Bxl0 17 12 144 02 Retainer breather ree...

Page 52: ...D 25 518 29 Lead 25 518_ 5 Lead 12 176 36 Harness X 25 5 Washer plain 5 16 12 155 02 Connector 23 517 03 Clip Cable 1 M 0545010 Screw hex flange M5x0 8xl0 8 2 24_168 10 Washer plain 1 4 3 12 146_7 Plate blower housing 4 24 086 18 Screw phillip hd M4x0 7 X8 2 5 24 096 05 Cover pinion 6 22 To34 Washer plain 5 16 2 7 12_ 27 54 Housing blower 8 12 063 10 Baffle intake side 9 25 154 O2 Clip mounting 3 ...

Page 53: ...TRACTOR o MODEL NUMBER 917 271071 KOHLER ENGINE MODEL NUMBER CV16S TYPE NUMBER PS 43519 IGNITION ELECTRICAL I 11 BLOWER HOUSING AND BAFFLES I 13 L_ 12 52 ...

Page 54: ...TOR MODEL NUMBER 917 271071 KOHLER ENGINE MODEL NUMBER CV16S TYPE NUMBER PS 43519 STARTING SYSTEM I 4 1 _ _ 2 L s p I 8 i ENGINE CONTROLS I 11 OIL PAN LUBRICATION I i 1 _ _i 4 9 0 4 S I 6 _ 22 7 _ 16 tB 54 ...

Page 55: ...443020 2 8 12 089 11 9 12 089 23 10 12 089 24 11 12 755 83 12 12 100 07 13 52 211 04 DESCRIP_ON 14 12 090 28 15 25 158 08 Dipstick assembly Includes2 3 16 12 079 01 Kit oil fill cap Includes3 17 25 168 11 O Ring oil fill cap O Ring upperoilfill tube Tube oilfill Screw hex flange M5x0 8x20 O Ring loweroilfill tube Screen oil pickup Cover oilpickup screen Screw hex flange M5xOSx16 Valve oil pressure...

Page 56: ...TRACTOR MODEL NUMBER 917 271071 KOHLER ENGINE MODEL NUMBER CV16S TYPE NUMBER PS 43519 CRANKSHAFT I 2 EXHAUST I J 1 3m_ 9 FUEL SYSTEM I 56 ...

Page 57: ...12 454 0t 25452 20 Gasket air cleaner Carburetorassembly For informationonlynot available separately Gasket carburetor 2 Deflector heat Clipcable Clamp hose 2 Une fuel 9 Filter fuel Kit float Kit carburetor repair Gasket carburetor Gasket air cleaner Gasket bowl Gasket bowlscrew Seal solenoid Kit solenoidrepair Gasket bowlscrew Tie wire T_ Tie cable Screw threadformingM5X0 SX10 Screw hex flange M6...

Page 58: ...58 ...
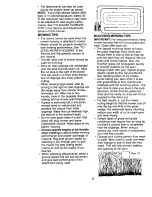
Page 59: ...SIGHTING ONLY RIDE UP AND DOWN HILL NOT ACROSS HILL g_ Operate your Tracto_ up and down the face of slopes not I I Ai Jk greater than 15 never across the face Mak_ turns gredu ally to prevent tipping or loss of Control Exercise extreme L__ging direction on slopes ...

Page 60: ...ir or replacement parts you need Call 6 am 11 pm CST 7 days a week PartsDirect s 1 800 366 PART 1 800 366 7278 Para ordenar piezas con entrega a domicilio 1 800 659 7084 For the location of a Sears Parts and Repair Center in your area Call 24 hours a day 7 days a week 1 800 488 1222 For information on purchasing a Sears Maintenance Agreement or to inquire about an existing Agreement Call 9 am 5 pr...

Reviews: