22
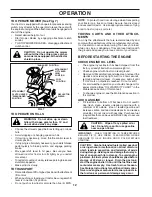
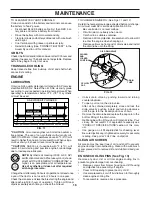
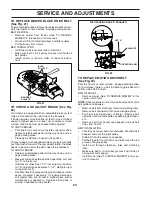
HOOD
HEADLIGHT
WIRE
CONNECTOR
FIG. 27
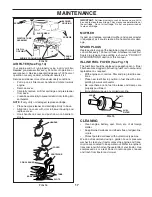
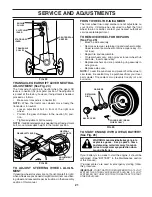
GOVERNOR
CONTROL LEVER
GOVERNOR
CONTROL PLATE
CLAMP SCREW
THROTTLE
CABLE
HOLES "A"
ENGINE
Maintenance, repair, or replacement of the emission con-
trol devices and systems, which are being done at the
cus tom ers expense, may be performed by any non-road
engine repair establishment or individual. Warranty repairs
must be performed by an authorized engine man u fac tur er's
service outlet.
TO AD
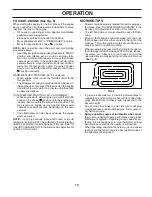
JUST THROTTLE CON TROL CABLE
(See Fig. 28)
The throttle control has been preset at the factory and
ad just ment should not be necessary. Check adjustment
as described below before loosening cable. If adjustment
is necessary, proceed as follows:
• With engine not running, move throttle control lever
from slow to choke position. Slowly move lever from
choke to fast position.
• Check that holes “A” in governor control lever and hole
in governor plate line-up. If holes “A” are not aligned,
loosen clamp screw and move throttle cable until holes
are aligned. Tighten clamp screw securely.
FIG. 28
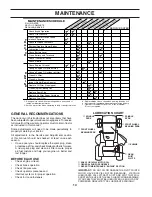
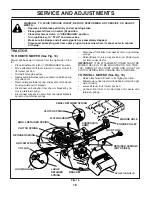
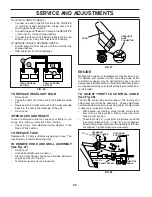
FIG. 26
TO REPLACE HEADLIGHT BULB
• Raise hood.
• Pull bulb holder out of the hole in the backside of the
grill.
• Replace bulb in holder and push bulb holder securely
back into the hole in the backside of the grill.
• Close hood.
INTERLOCKS AND RELAYS
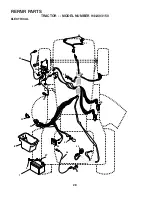
Loose or damaged wiring may cause your tractor to run
poorly, stop running, or prevent it from starting.
• Check wiring. See electrical wiring diagram in the
Repair Parts section.
TO REPLACE FUSE
Replace with 20 amp automotive-type plug-in fuse. The
fuse holder is located behind the dash.
TO REMOVE HOOD AND GRILL ASSEMBLY
(See Fig. 27)
• Raise hood.
• Unsnap headlight wire connector.
• Stand in front of tractor. Grasp hood at sides, tilt toward
engine and lift off of tractor.
• To replace, reverse above procedure.
SERVICE AND ADJUSTMENTS
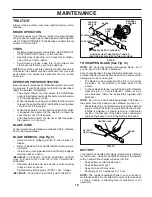
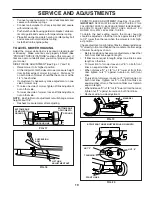
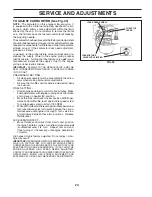
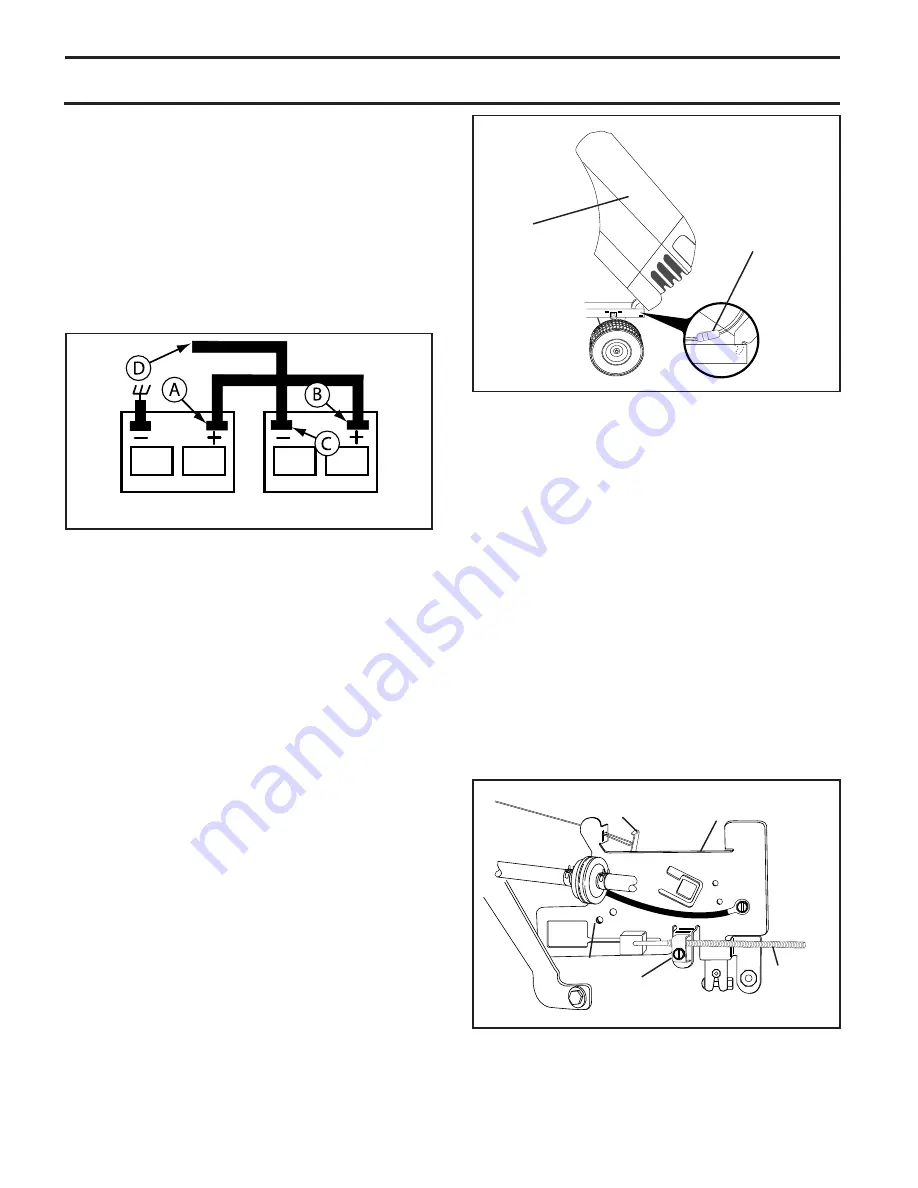
TO ATTACH JUMPER CABLES -
• Connect one end of the RED cable to the POSITIVE
(+) terminal of each battery(A-B), taking care not to
short against tractor chassis.
• Connect one end of the BLACK ca ble to the NEGA TIVE
(-) terminal (C) of fully charged battery.
• Connect the other end of the BLACK cable (D) to good
chassis ground, away from fuel tank and bat tery.
TO REMOVE CABLES, REVERSE ORDER -
• BLACK cable fi rst from chassis and then from the fully
charged battery.
• RED cable last from both batteries.
WEAK OR DEAD
BATTERY
FULLY CHARGED
BATTERY

