background image

Summary of Contents for WEEDWACKER 358.794251

Page 1: ...1 For Occasional Use Only WARNING Read and follow all Safety Rules and Operating Instructions before first use of this product For answers to your questions about this product Call 7 am 7 pm Mon Sat or 10 am 7 pm Sun 1 800 235 5878 ou_ listed are CentraI Time Sears Roebuck and Co Hoffman Estates IL 60179 U S A 530086411 4 9 01 ...

Page 2: ...rights and you may also have other rights which vary from state to state Sears Roebuck and Co D 817 WA Hoffman Estates IL 60179 WARNING When using gar dening appliances basic safety pre cautions must always be followed to reduce the risk of fire and serious injury Read and follow all instructions This power unit can be dangerous Op erator is responsible for following instructions and warnings on u...

Page 3: ...re unit is assembled cor rectly as shown in this manual Make carburetor adjustments with lower end supported to prevent line from contacting any object Keep others away when making car buretor adjustments Use only recommended Craftsman accessories and replacement parts Have all maintenance and service not explained in this manual per formed by a Sears Service Center FUEL SAFELY Mix and pour fuel o...

Page 4: ...mal homeowner use the muffler and spark arresting screen will not require any service After 50 hours of use we recommend that your muffler be serviced or replaced by your Sears Service Center CARTON CONTENTS Check carton contents against the fol lowing list Model 358 794251 Trimmer Shield Wing Nut screwed onto shield Assist Handle with bolt and knob Container of Oil Replacement Spool Examine parts...

Page 5: ... removes air from the carburetor and fuel lines and fills them with fuel This allows you to start the engine with fewer pulls on the starter rope Activate the primer bulb by pressing it and allowing it to return to its original form CHOKE The CHOKE helps to supply fuel to the engine to aid in cold starting Activate the choke by moving the choke lever to the FULL CHOKE posiUon After the en _ne atte...

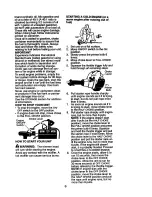
Page 6: ...e engine Avoid any contact with the muffler A hot muffler can cause serious burns STARTING A COLD ENGINE or a warm engine after running out of fuel 1 Set unit on a flat surface 2 Move ON OFF switch to the ON position 3 Slowly press the primer bulb 6 times 4 Move choke lever to FULL CHOKE position 5 Squeeze the throttle tdgger fully and hold through all remaining steps _AL_ Ch ke Lever _Pri er _ Bu...

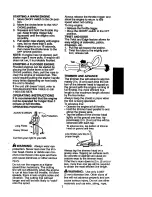
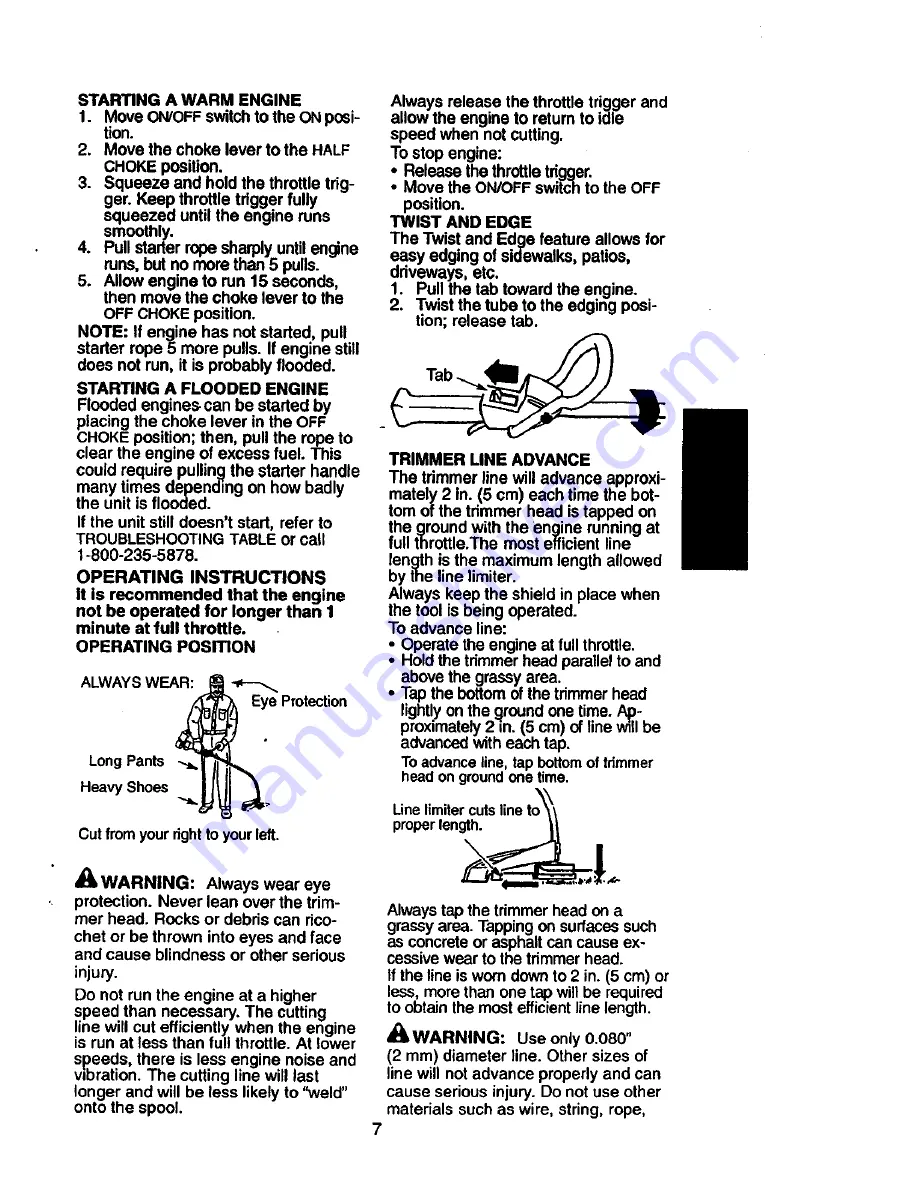
Page 7: ...tube to the edging posi tion release tab TRIMMER LINE ADVANCE The trimmer line will advance approxi mately 2 In 5 cm each time the bot tom of the trimmer head is tapped on the ground with the engine running at full throttle The most efficient line length is the maximum length allowed by the line miter Always keep the shield in place when the tool is being operated To advance line Operate the engin...

Page 8: ...is can scalp the flli_ _K ground and damage the tool Mowing I_ _ The line will easily remove grass and _ _L_ f weeds from around walls fences trees and flower beds but it also can cut the tender bark of trees or shrubs and scar fences To help avoid dam age especially to delicate vegetation or trees with tender bark shorten line to4 5 in 10 13 cm and use at less than full throttle For trimming or s...

Page 9: ...D CLEAN UNIT AND LABELS After each use inspect complete unit for Ioo6e or damaged pads Clean the unit and labels using a damp cloth with a mild detergent Wipe off unit with a clean dry cloth CLEAN AIR RLTER A dirty air filter decreases engine per formance and increases fuel consump tion and harmful emissions Always clean after every 5 hours of operation 1 Clean the cover and the area _ around it t...

Page 10: ... this procedure Wear your protective equipment and observe all safety pre cautions After making mixture adjust ments recheck idle speed Carburetor adjustment is critical and if done improperly can permanently damage the engine as well as the car buretor If you require further assis tance or are unsure about performing this procedure call our customer as sistance help line at 1 800 235 5878 Old fue...

Page 11: ...stments check for acceleration Reset if necessary Acceleration Check If engine dies or hesitates instead of accelerating turn the low speed mix ture screw L counterclockwise until you have smooth acceleration 4BbWARNING Perform the follow ing steps after each use Allow engine to cool and secure the unit before stodng or transporting Store unit and fuel in a well ventilated area where fuel vapors c...

Page 12: ...d up on muffler outlet screen 5 Compression low 1 Choke partially on 2 Fuel mixture incorrect 3 Air filter dirty 4 Carburetor requires adjustment 1 Fuel mixture incorrect 2 Spark plug incorrect 3 Carburetor requires adjustmenL 4 Carbon build up on muffler outlet screen 2 See Starling a Rooded Engine in Operation Section 3 Fill tank with correct fuel mixture 4 Install new spark plug 5 Check for dir...

Page 13: ...l off road engine to a Sears authorized re pair center as soon as a problem exists Warranty repairs should be completed in a reasonable amount of time not to exceed 30 days If you have any ques tions regarding your warranty rights and responsibilities you should contact your nearest authorized service center or call Sears at 1 800 469 4663 WARRANTY COMMENCEMENT DATE The war ranty period begins on ...

Page 14: ...on related pads will be provided without charge to the owner if the part is under warranty EMISSION CONTROL WARRANTY PARTS LIST Carburetor IgnitionSystem Spark Plug covered up to maintenanceschedule IgnitionModule Mufflerincludingcata lyst MAINTENANCE STATEMENT The owner is responsiblefor the perfor manceof all requiredmaintenanceas definedinthe owner s manual This engine is certified to be emissi...

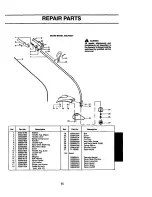
Page 15: ... Hsg Right Throttle Lever Spdnll Compression Ac_Jator Locator dght Assy D k e Shah Hsg Flex Drive Shaft Screw ThrottleI Lsg Left Locator lett Screw W_ngnut Bolt Handld AssistHanole Line kJmlter Screw Line Umiter Shield Kit Ass_ Incl 16 17 19 20 21 22 23 24 25 26 27 Not Part No 53OO15820 530015934 5300t6118 53OO95574 53OO54459 530095770 530401958 530401957 71 85846 Shown 530086411 530055574 5300555...

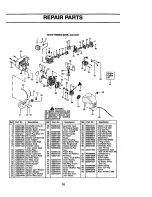
Page 16: ...530032124 Screw Air Box 41 530019179 Choke Spacer 42 530015945 Washer 43 530032125 Spacer lgnit Module i 530015934 530015810 IgnitionModule 46 530055516 Screw lgnit MOdule 47 530049379 GroundWire Ass y Description Lead Wire Ass_ Kit Englne Gasket Incl 7 10 35 56 S_lch On OIf tarter Handle Kit Rope Screw Drive Coupling Spring Stader Dog Rot Ring C shaft Gasket Cylinder ConnectingRod Assy PistonRing...

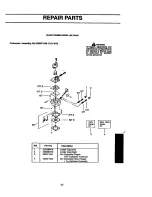
Page 17: ...ce not ciescdbed in Ihe Operator s Manual mus_ lie iiIdomled bY qUlllltlld service personmlL il KIT O _ 2 KIT D _ _ __ KITI_ I gi _ K T 3 4 Ref Part No DescdpUon 1 530038478 LimiterCap low 2 530038479 LimiterCap high 3 530071441 Kit Carburetor Repair KIT IndicatesContents 4 530071442 Kit Carburetor Minor Repair D Indicates Contents 17 ...

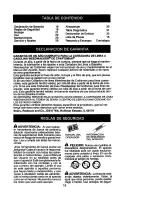
Page 18: ...EDWACKER AL TIENDA DE SEARS O CENTRO DE SERVICIO MAS CERCANO EN LOS ESTADOS UNIDOS Esta garanti a confiere derechos legales especificos al propietario que tal vez tenga asimismo otros derechos que vanan entre estados Sears Roebuck and Co I 817 WA Hoffman Estates IL 60179 _l ADVERTENClA AI usarcualqui er herrarnienta de fuer za de jardiner a deber n observarse precauciones bdsi cas de s e juirdaden...

Page 19: ... de un recinto cerrado Respirar los vapores del combustible Io puede matar Mantenga las manijas libres de aceite y de combustible SEGURIDAD DEL APARATO Y EN EL MANTENIMIENTO Desconecte la bujla antes de hacer cualquier mantenimiento menos los ajustes al carburador Inspeccione el aparato y cambie las piezas dafiadas o flojas antes de cada uso Repare toda fuga de com bustible antes de usar el aparat...

Page 20: ...usar herides accidentales Se puede col gar el aparato por la caja el eje de propuls On Guarde el aparato fuera del alcance de los ni_os AVISO DE SEGURIDAD El estar ex puesto a las vibraciones a travds del uso prolongado de herramientas de fuerza a gasolina puede causar dar_iosa los vasos sangufneos o a los nervios ae los dedos las manos y las coyunturas en aquellas personas que tienen pro pensidad...

Page 21: ...1 Monte el mango en el aparato como se ilustra asegdrese que la parte inferior del mango se en cuentre en la ranura en la caja del gatillo AVISO La perilla de ajuste deberd ser instalada en el lado izquierdo de el a_arato como se muestra en el ilustra 2 Asegt_rese de que el tornillo se en cuentre Iocalizado dentro del hue co en forma de hexagonal que se encuentra en el mango 3 Gire el mango hasta ...

Page 22: ...OKE Despu6s que el motor intente arrancar mueva la pa lanca del cebador a la posici6n HALF CHOKE Despu6s que el motor se haya puesto en mamha pon_a la pa lanca del cebador en la posic 6n OFF CHOKE GUlA PARA BORDES La GUIA PARA BORDES impedird que el aparato toque el suelo durante el pro cedimiento de bordear ANTES DE PONER EN MARCHA EL MOTOR _ ADVERTENCIA Lea atentamente la informaci6n sobre el co...

Page 23: ... MARCHA EL MOTOR ADVERTENCIA El cabezat de code girard mientras se est6 intentan do poner en marcha el motor Evite el hacer ningun tipo de contacto con el silenciador Un silenciador caliente podrla provocar quemaduras de gra vedad si se toca PAPA ARRANCAR CON MOTOR FRIO o motor caliente despuds de quedar sin combustible 1 Ponga el aparato en una superficie plana 2 Mueva el intermptor ON OFF a la p...

Page 24: ...a la posici6n OFF CHOKE luego tire de la cuerda para aclarar el exceso de combustible Esto podrd re querir que se tire del mango de la cuerda muchas veces dependiendo cuan ahogado se encuentre el motor Si el aparato sigue sin ponerse en marcha vea la TABLADIAGNOSTICAo llama al ndmero 1 800 235 5878 INSTRUCClONES DE USO Se recomlenda qua no opere el mo tor pot mas de un minuto a la velo cidad m txi...

Page 25: ...e al aire causando serio peligro La punta de la Ifnea es la que corta Se conseguird mejor rendimiento y el minimo desgaste si no se mete la linea dentro del material que se est_ cortando La ilustraci6n a continua cibn muestra la forma correcta e in correcta de cortar La Ifnea estd meti da dentro del ma tedal de trabajo Incorrecto La Ifnes retire fitcilmente el c_ped y las malas hierbas de aTrededo...

Page 26: ...E Mientras se encuentre bordeando permita que sea la punta de la linea la que haga el contacto con el material a bordear No fuerce la Ifnea Mantenga mdxima pre caucibn al bordear ya que objetos pueden ser arrojados al aire por la linea de corte _ ADVERTENCIA Desconecte la bujfa antes de hacer cualquier manten imiento con la excepci6n de los ajustes al carburador TAREA DE CUIDADO Y MANTENIMIENTO Ve...

Page 27: ...cualquier otro solvente inflam able 3 Limpie el filtro con agua y jab6n 4 Permita qua el filtro se seque 5 Aplique varias gotas de aceite al fil tro expdma el filtro para distribuir el aceite 6 Reponga las piezas INSPECCIONE EL SILENCIADOR Y LA REJILLA ANTICHISPAS ADVERTENCIA El silenciador en este producto contiene las substan cias qurmicas que el estado de Califor nia reconoce como causantes de ...

Page 28: ...se mantendrd girando durante la mayor parte de este procedimiento Use su equipo protector y observe to das las precauciones de seguridad Verifique la marcha lenta despuds de cada ajuste de mezcla El ajuste del carburador es de primor dial importancia Si se hace incorrecta mente puede dafiar tanto el motor como el carburador permanente mente Si necesita mds ayuda o no estd seguro de c6mo hacer este...

Page 29: ...ajas Revoluciones L 1 Deje el motor en mamha lenta 2 Gire el tomillo de las bajas revolu ciones L hacia la derecha hasta que la velocidad empiece a dismi nuir 3 Gire el tomillo de las bajas revolu ciones L hacia la izquierda hasta que la velocidad aumente y luego empiece a disminuir nuevamente 4 Coloque el tomillo para bajas revo luciones L en un punto intermedio entre las dos posiciones ante rior...

Page 30: ...STECIMIENTODEL MO TOR Los estabilizadores de combus tible son una alternativa aceptable para minimizar la formaci6n de depOsi tos de goma durante el almacenaje Afiada estabihzador a la gasolina en el tanque de combustible o en el reci piente para almacenar el mismo Siga las instmcciones de mezcla que se en cuentran impresas en el envasa Pon ga el motor en marcha y d_jelo en marcha por unos 5 minut...

Page 31: ... instalado la bujfa incorrecta 3 El carburedor requiem ajusts 4 Acumulaci6n de Carb6n SOLUCION 1 Coloque el intenuptor ON OFF ala poslci6n ON 2 Vea Arranque de Motor Ahogado en la seccl6n Uso 3 Liens el tanquo con la mezcla correcta de combustive 4 Instele una bujfa nueva 5 Veritique si el filtro de combustible no est6 sucio cdmbielo VedFKluesi hay dobleces en la II neade combustible o si est_ par...

Page 32: ...era pero Sears no podr8 negar el ser vicio bajo garantla Onicamente a causa de la falta de recibos o por el incumplimiento de su par_e en asegu rame que el mantenlmiento programa do haya sido desempeSado Como due_o de una m tquina de motor pe queSo para uso fuera de carretera usted deberd contar con el conoci miento de queSears puede negar la cubierta bajo garantia si su rndquina de motor peque_o ...

Page 33: ...s a_adidas o de piezas modificadas COMO ENTABLAR UNA RECLAMAClON Si cuenta usted con alguna pregunta relaciona da con sus derechos y responsabili dades de garant a usted deberd en trar en contacto con su centro de servicio autodzado mds cercano o Ila mar a Sears al 1 800 469 4663 DONDE OBTENER SERVIClO DE GARANTIA Servicio o reparaciones bajo garant a deberdn ser provistas en todos los Centros de ...

Page 34: ......

Page 35: ......

Page 36: ...ccessories and owner s manuals that you need to do it yourself call Sears PartsDirect sM 1 800 366 PART 6arn 11p mCST 1 800 366 7278 7 days a week www sears com partsdirect To purchase or inquire about a Sears Service Agreement 1 800 827 6655 7 a m 5 p m CST Mort Sat Para pedir servicio de reparaci6n a domicd_o y para ordenar piezas con entrega a dornicd_o 1 888 SU HOGAR s_ Au Canada pour service ...

Reviews: