background image

Summary of Contents for WEEDWACKER C944.515570

Page 1: ... WEEDWAOKER Model No C944 515570 Safety Assembly Operation Maintenance Parts List For Occasional Use Only WARNING Read and follow all Safety Rules and Operating Instructions before first use of this product Sears Canada Inc Toronto Ontario M5B 2B8 545001412 3 7 05 ...

Page 2: ...e provincial legisla tion Furthermore some provinces do NOT allow limitations on how long an implied warranty will last so the above limitations may not apply to you Sears Canada Inc Toronto Ontario MSB 2B8 Zt ltWARNING When using gar dening appliances basic safety pre cautions must always be followed to reduce the risk of fire and serious injury Read and follow all instructions This power unit ca...

Page 3: ...er head make sure it is properly installed and securely fastened Make sure unit is assembled cor rectly as shown in this manual Make carburetor adjustments with lower end supported to prevent line from contacting any object Keep others away when making car buretor adjustments Use only recommended Craftsman accessories and replacement parts Have all maintenance and service not explained in this man...

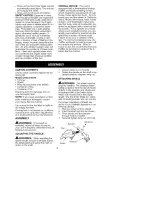
Page 4: ...nd spark arresting screen will not require any service After 50 hours of use we recommend that your muffler be serviced or replaced by a Sears Service Centre CARTON CONTENTS Check carton contents against tile fol lowing list Model 0944 515570 Trimmer Shield Wing Nut screwed onto shield Container of line Container of oil Examine parts for damage Do not use damaged parts NOTE If you need assistance ...

Page 5: ...to read the fuel information in the safety rules before you begin If you do not under stand the safety rules do not attempt to fuel your unit Contact your Sears Service Centre FUELING ENGINE _WARNING Remove fuel cap slowly when refueling This engine is certified to operate on unleaded gasoline Before operation gasoline must be mixed with a good quality synthetic 2 cycle air cooled en gine oil We r...

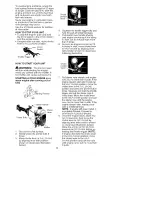
Page 6: ... or a warm engine after running out of fuel __rting Position Primer Bulb Choke P Lever Muffler 1 Set unit on a flat surface 2 Slowly press the primer bulb 6 times 3 Move choke lever to FULL CHOKE by aligning lever with position shown on decal see illustration below Choke position decal 7 Pull starter rope sharply until engine runs but no more than 6 pulls If the engine doesn t start after 6 pulls ...

Page 7: ... eye protection and heavy clothing Hold trigger handle with right hand and assist handle with left hand Keep unit below waist level Cut only from your left to your right to ensure debris is thrown away from you Without bending over keep line near and parallel to the ground and not crowded into material being cut Do not run the engine at a higher speed than necessary The cutting line will cut effic...

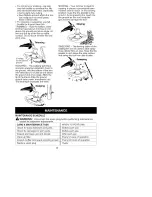
Page 8: ...his technique increases line wear Scalping MOWING Your trimmer is ideal for mowing in places conventional lawn mowers cannot reach In the mowing position keep the line parallel to the ground Avoid pressing the head into the ground as this can scalp the ground and damage the tool Mowing SWEEPING The fanning action of the rotating line can be used to blow away loose debris from an area Keep the line...

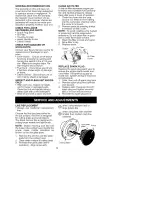
Page 9: ...p dirt from falling into the carburetor chamber when the cover is removed 2 Remove parts by pressing button to release air filter cover NOTE To avoid creating a fire hazard or producing harmful evaporative emissions do not clean filter in gaso line or other flammable solvent 3 Wash the filter in soap and water 4 Allow filter to dry 5 Replace parts _ Air Filter Button _F_ _ REPLACE SPARK PLUG Repla...

Page 10: ...nt and observe all safety precautions After making ad justments the trimmer head must not move or spin at idle speed The carburetor has been carefully set at the factory Adjustments may be necessary if you notice any of the fol lowing conditions Engine will not idle when the throttle is released The trimmer head moves or spins at idle Make adjustments with the unit sup ported so the cutting attach...

Page 11: ...n your engine Fuel stabilizer is an acceptable alter native in minimizing the formation of fuel gum deposits during storage Add stabilizer to the gasoline in the fuel tank or fuel storage container Follow the mix instructions found on stabilizer container Run engine at least 5 min utes after adding stabilizer Craftsman 40 1 2 cycle engine oil air cooled is already blended with fuel stabilizer If y...

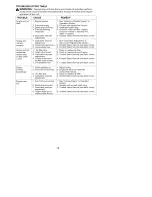
Page 12: ... Carburetor requires 4 adjustment 1 Fuel mixture incorrect 1 2 Spark plug incorrect 2 3 Carburetor requires 3 adjustment 4 Carbon build up on 4 muffler outlet screen See Starting a Flooded Engine in Operation Section Fill tank with correct fuel mixture Install new spark plug Check for dirty fuel filter replace Check for kinked or split fuel line repair or replace Contact Sears Service see back cov...

Page 13: ...ed 30 days If you have any questions regarding your war ranty rights and responsibilities you should contact your nearest authorized service centre or call Sears Canada at 1 800 469 4663 WARRANTY COM MENCEMENT DATE The warranty pe riod begins on the date the small off road engine is purchased LENGTH OF COVERAGE This warranty shall be for a period of two years from the initial date of purchase WHAT...

Page 14: ...IST Carburetor Ignition Sys tem Spark Plug covered up to mainte nance schedule Ignition Module MAINTENANCE STATEMENT The owner is responsible for the perfor mance of all required maintenance as defined in the instruction manual The information on the product label indicates which standard your engine is certified Example Year EPA Phase 1 or Phase 2 and or CALIFORNIA This engine is certified to be ...

Reviews: