background image

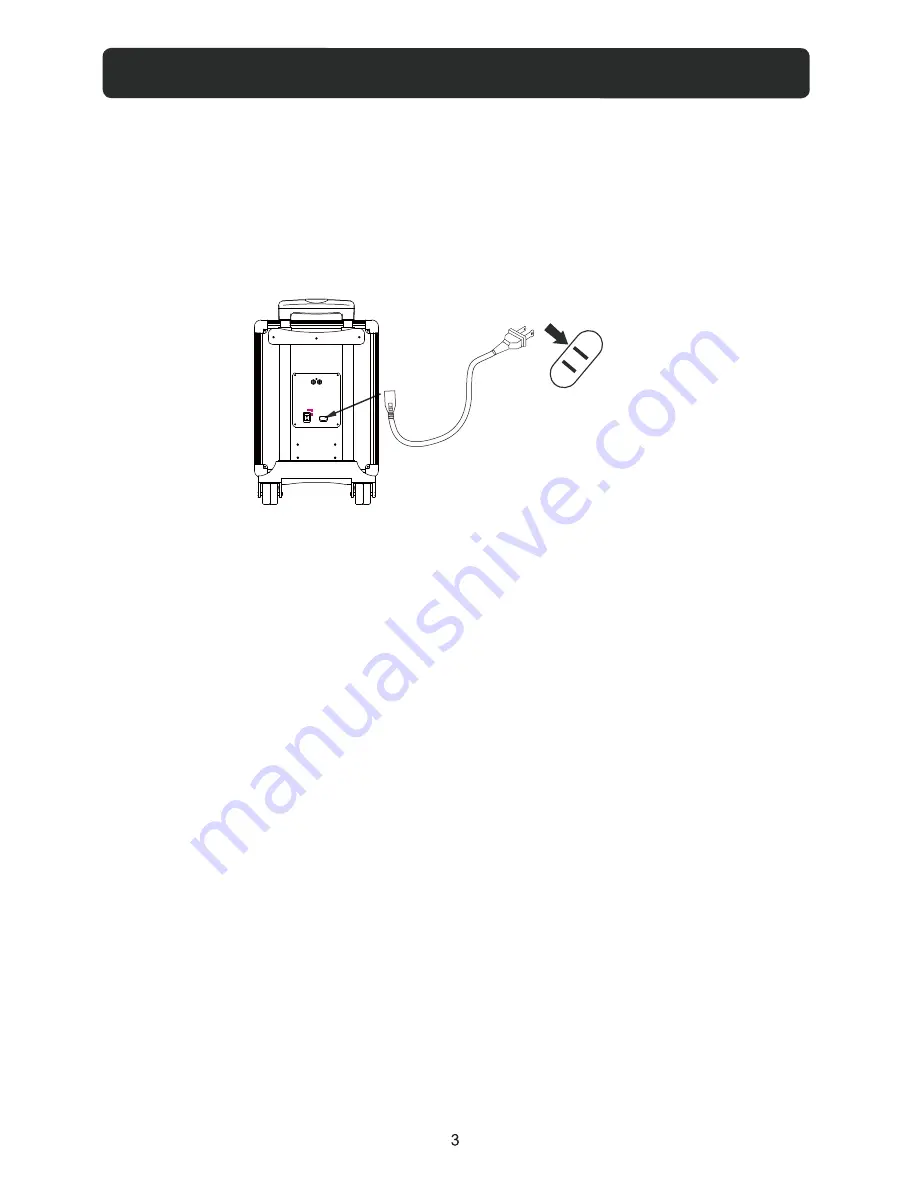
TO AC IN JACK

To Wall Outlet

POWER SOURCE

This unit can be powered by either AC power or built-in rechargeable battery.

AC Operation:

To operate the unit using AC power:

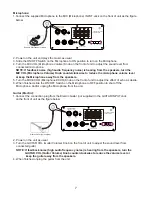
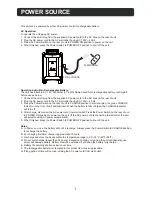
1.  Connect the small plug from the supplied AC power cord to the AC Jack on the rear of unit. 

2.  Plug the AC power cord to the AC wall outlet having AC 120V~, 60Hz.

3.  Press the Power Switch on the rear of unit to POWER ON position to power on the unit. 

4.  When finished, press the Power Switch to POWER OFF position to shut off the unit.

Operation by Built-in Rechargeable Battery:

The unit has a built-in DC 12V, 2600mAH (31.2 WH) Sealed Lead Acid rechargeable battery, recharge it 

before use as below:

1.  Connect the small plug from the supplied AC power cord to the AC Jack on the rear of unit. 

2.  Plug the AC power cord to the AC wall outlet having AC 120V~, 60 Hz.

3.  Press the Power Switch on the rear of unit to CHARGE position to start charging, the green CHARGE 

     Indicator on the front of unit will illuminate. When the battery is fully charged, the CHARGE Indicator

     will turn off.

4.  After charge, disconnect the AC power cord from wall outlet. Press the Power Switch on the rear of unit 

     to POWER ON position to power on the unit. (If the AC power cord is connecting to wall outlet, the unit 

     will select to using AC power automatically).

5.  When finished, press the Power Switch to POWER OFF position to shut off the unit.

Notes: 

A.  In Power on mode, the battery will not be recharge. Always press the Power Switch to CHARGE position 

     to recharge the battery.

B.  For charging first time, charge it approximate 10 hours. 

C.  Recharge and store the device within the temperature range to 5°C~35°C (40°F~95°F).

D.  Do not overcharges (longer than 24 hours). Excessive charging or running the unit until battery goes 

     empty will damage battery. Battery life will be extended if you keep the battery fully charge.

E.  Battery life naturally shortens slowly over time.

F.  The rechargeable battery incorporated in this product is not user replaceable.

G. If long period of time will not use, unplug the AC power cord from wall outlet. 

AC 120V ~ 60Hz

ON

AUX 2

L

R

CHARGE

OFF

POWER

Summary of Contents for CHT825

Page 1: ...Size 148x210MM ...

Page 2: ......

Page 3: ...2 ...

Page 4: ...f unit will illuminate When the battery is fully charged the CHARGE Indicator will turn off 4 After charge disconnect the AC power cord from wall outlet Press the Power Switch on the rear of unit to POWER ON position to power on the unit If the AC power cord is connecting to wall outlet the unit will select to using AC power automatically 5 When finished press the Power Switch to POWER OFF positio...

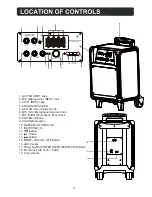
Page 5: ...E Knob 11 INDICATOR S 12 Button 13 Button 14 Button 15 MODE LED ON OFF Button 16 AUX 2 Jacks 17 Power Switch POWER ON POWER OFF CHARGE 18 AC IN Jack AC 120V 60Hz 19 Carry Handle 4 8 9 2 4 19 5 6 7 3 1 11 10 13 14 15 16 18 17 12 AC 120V 60Hz ON AUX 2 L R CHARGE OFF POWER 4 BAND EQUALIZER MIC INPUT AUX 1 INPUT GUITAR INPUT GUITAR VOL VOL MIC ECHO INDICATOR MODE LED ON OFF POWER CHARGE MASTER VOLUME ...
Page 6: ...on the unit repeatedly until the color of the Indicator is changed to Blue and blinking 3 Power on the external BT Device and enter to searching mode Start pairing as the on screen instructions on the external BT Device After paired the Blue Indicator will stop blinking For details pairing procedures please refer to the user s manual of your BT Device Notes When the external BT player searched the...

Page 7: ...Jack Line Out Jack or AUX Out Jack on external audio device such like the iPhones iPad iPod MP3 Player Discman etc 2 Insert the other plug to the AUX 1 INPUT Jack on the front of unit as the figure below 3 Power on the unit as previously procedures 4 Press the MODE LED ON OFF Button repeatedly until the color of the Indicator is changed to Red 5 Plays the music in the connected external Audio devi...

Page 8: ...ff the Microphone And or unplug the Microphone from the unit Guitar Electric 1 Connect the connection plug from the Electric Guitar not supplied to the GUITAR INPUT Jack on the front of unit as the figure below 2 Power on the unit as usual 3 Turn the GUITAR VOL Guitar Volume Knob on the front of unit to adjust the sound level from connected guitar NOTE If feedback noise high audio frequency noise ...

Page 9: ...evice too far from the unit POSSIBLE SOULTION MASTER VOLUME AC Power Cord Built in battery cannot be recharge The Power Switch has not press to CHARGE position Press the Power Switch to CHARGE position Built in rechargable battery consume Recharge the built in battery as page 3 unit Place the external BT device close to the unit Reduce the volume and or bass level of the connected paired device Vo...

Page 10: ...cid battery Recharge by AC 120V 60 Hz Power Consumption Max 21W Radio FM Band Coverage 87 5 108MHz BT Effective Range Up to 32 Feet in open area BT Version 2 1 EDR Audio Power 20W Impedance of Speakers 3 Ohms 15W x 2 Cleaning 1 To prevent fire or shock hazard disconnect your unit from the AC wall outlet when cleaning 2 The finish on your unit may be cleaned with a dust cloth and cared for as other...

Page 11: ......

Reviews: