background image


FCC Information and Copyright 


This equipment has been tested and found to comply with the limits for a Class B digital device, 

pursuant to part 15 of the FCC Rules. 

These limits are designed to provide reasonable protection against harmful interference in a residential 

installation. This equipment generates, 

uses and can radiate radio frequency energy and, if not installed and used in accordance with the 

instructions, may cause harmful interference 

to radio communications. However, there is no guarantee that interference will not occur in a particular 

installation. If this equipment does 

cause harmful interference to radio or television reception, which can be determined by turning the 

equipment off and on, the user is 

encouraged to try to correct the interference by one or more of the following measures: 

—Reorient or relocate the receiving antenna. 

—Increase the separation between the equipment and receiver. 

—Connect the equipment into an outlet on a circuit different from that to which the receiver is 

connected. 

—Consult the dealer or an experienced radio/TV technician for help. 


15.19 Labelling requirements.


This device complies with part 15 of the FCC Rules. Operation is subject to the 
following two conditions: 
(1)This device may not cause harmful interference, and   
(2) this device must accept any interference received, including interference that may 
cause undesired operation. 
 

changes or modifications not expressly approved by the party responsible for compliance could 

void the user's authority to operate the equipment. 


FCC RF warning 

statement: the device has been evaluated to meet general RF exposure 

requirement , The device can be used in portable exposure condition without restriction.


Summary of Contents for CLP289

Page 1: ...1 Model CLP289 ...

Page 2: ... 5 times and wait for 30 seconds Select Forgot pattern and enter your Gmail account username and password Make sure you use the same account that was used to activate the device and double check the password by logging in to that Google account in a browser on laptop or PC If you don t have access to the original Gmail account you will need to do a hard reset and lose your settings and apps on the...

Page 3: ...3 ...

Page 4: ...4 ...

Page 5: ...5 ...

Page 6: ...soon after restart C Operation buttons do not work properly D The unit will not turn on Note Chargers of other models cannot be used for this device because they may cause damage to the device that will void the warranty Please contact our customer service department if you need a replacement charger Do not disconnect the device while formatting downloading and or uploading otherwise application e...

Page 7: ...owly over time E The rechargeable battery incorporated into this product is not user replaceable SD card This device supports an SD Memory Card Card not included T o increase memory size insert an SD card into the card slot on the side of unit as the figure below Notes A Insert the card Up to 32GB not included into the card slot on right side of unit with metal chip face down B T o take out the ca...

Page 8: ... o power off the device press and hold the Power On Off button until the sub setting menu appears on the screen Move the cursor to the Power off button and then click the left button Power off menu will appear move the cursor to OK button then left click it Notes Like your computer after turning on the Device you may have to wait a short while to let the operating system boot up before the home pa...

Page 9: ...Ports 6 Earphone Jack Green 7 Mic Microphone Jack Pink 8 MICRO SD Slot 9 Keyboard 10 Two Full Size USB Ports 11 Mini HDMI Port 12 Mini USB Port 13 Built in Microphone 14 Touch Pad 15 Reset 16 Speakers F Function Button s assignment F1 Browser F2 Camera F3 My Music F4 Gallery F5 Calendar F6 Calculator F7 Back Light F8 Back Light F9 File browser F10 Sound F11 Sound F12 Settings ...

Page 10: ... change output resolution Tap on the HDMI Switch APP on the APPS page Important HDMI output operates in Video playback mode only Earphone Headphone jack For private listening connect an Earphone Headphone to the Headphone jack on the right side of cabinet The speaker will cut off automatically Earphone Headphone not included Getting Started On home page touch the button on the upper right corner t...

Page 11: ... it to the right to turn Wi Fi ON wait a few seconds the available Wi Fi networks will appear 2 Touch on the desired network to start connection as on screen instructions Maybe ask for password NB After setting you can turn it ON or OFF by touching the widget on the screen The device automatically scans and lists all local Wi Fi Network found indicates secure networks that require login name passw...

Page 12: ...12 ...

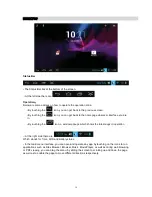
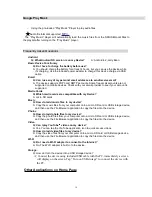
Page 13: ...u are in By touching the icon a window popups which shows the latest apps in operation At the right side there are Which stands for Time WiFi and Battery status In the main menu interface you can open and operate any app by touching on the icons to run applications such as Files Browser Browser Music MoviePlayer as well as during web browsing or PDF viewing you can drag the menu by sliding the scr...

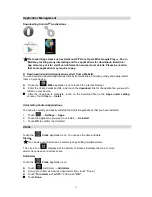
Page 14: ...k for the application you want to install on your device After the download is complete touch on the download file in the Apps under setting screen Touch Open Install Uninstalling Android Applications You can also quickly and easily uninstall the Android applications that you have installed 1 Touch Settings Apps 2 Touch the application you want to uninstall Uninstall 3 Touch OK to confirm the Unin...

Page 15: ...ser Touch the browser icon on the apps page and then you can open the Web browser CALENDAR Touch the Calendar application icon For the first time using the Calendar you need to add a Gmail account Enter Gmail address and password Click Next and follow the prompts to complete the account configuration Then you can use the Calendar Note In Account Set up screen manual change the server for www googl...

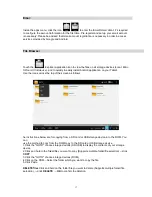
Page 16: ...Tablet Use the icons across the top of the screen as follows he instructions below are for copying from a SD card or USB storage device in to the ROM You can use the method to copy from the ROM copy to the SD card or USB storage device 1 Click the GOTO choose storage devices SD USB to display the contents of your storage device 2 Click and hold in the folder file you want to copy Supports multiple...

Page 17: ...ro SD cards Music Q How do I add music files to my device A Copy the music files from your computer onto a micro SD card or USB storage device and then use the File Browser application to copy the files into the device Photos Q How do I add photo files to my device A Copy the photo files from your computer onto a micro SD card or USB storage device and then use the File Browser application to copy...

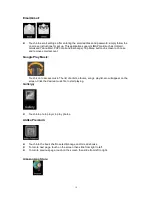
Page 18: ...d remove email account T Google Play Music Touch icon to access music The list of artists albums songs playlist etc will appear on the screen Click the desired music file to start playing GalleryR R Touch into photo player to play photos Aldiko Premium Touch into the book shelf to select manage and or read ebooks To turn to next page touch on the screen then slide from right to left To turn to pre...

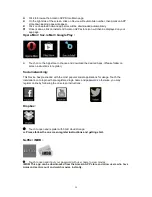
Page 19: ...Please follow on screen instructions to register Social networking T This Device has pre loaded with the most popular social applications for usage Touch the individual icon to login with pre registered login name and passwords otherwise you may register online by following the on screen instructions Dropbox Touch to open and register with 5 GB cloud storage Please follow the on screen register in...

Page 20: ...d Nook Most other book stores will use third party applications such as Aldiko which can be download from the Opera Mini or Amazon APP store Media files can t be found If new files were added onto the device click the File Browser icon on the APPS menu to search Use correct Apps to open corresponding media files Click Gallery to view photos Click Play Music to play music How to enter the Settings ...

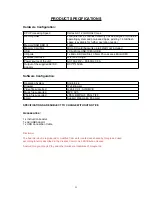
Page 21: ...ower source of the unit AC 100 240V 50 60Hz 0 5A Output of the supplied AC DC Adaptor DC 5V 2A Software Configuration Operating System Android 4 2 Browser Web Browser Video file supported H 264 VC 1 AVI RMVB Music file supported MP3 AC3 Photo file supported JPEG BMP GIF PNG TIFF Email Support Web mail Pop mail SPECIFICATIONS ARE SUBJECT TO CHANGE WITHOUT NOTICE Accessories 1 x Instruction booklet ...

Page 22: ...rex or its dealer or service station authorized by Everex c Any defect or damage that occurs due to transport fall shock etc After purchase of the product d Any defect or damage that occurs due to fire earthquake flood damage thunderbolt other natural disasters environmental pollution and irregular voltage sources e Any defect that occurs due to improper maintenance etc f Any defect that occurs du...

Page 23: ...y consequential incidental or indirect damages including but not limited to damages for loss of business profits business information arising from the use of or inability to use these written materials or software The information contained in this Warranty Certificate is subject to change without prior notice Everex Email marketing everexltd com Fax 852 31522713 Registration Product Name Model Num...

Page 24: ...ect the interference by one or more of the following measures Reorient or relocate the receiving antenna Increase the separation between the equipment and receiver Connect the equipment into an outlet on a circuit different from that to which the receiver is connected Consult the dealer or an experienced radio TV technician for help 15 19 Labelling requirements This device complies with part 15 of...

Reviews: