7
OPERATIONS:
1. Insert the Micro SD Card to the unit as previous procedures.
2. Recharge the built-in battery as previous procedures.
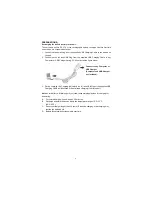
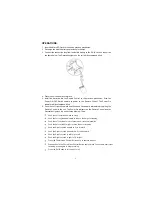
3. Connect the connection plug from the built-in battery to the DC IN Jack on the unit as
the figure below. The Decorative Lights on the unit will illuminate and blink.
4. Place the unit on a horizontal place.
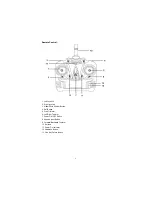
5. Install the batteries into the Remote Control as the previous procedures. Slide the
Power ON-OFF Switch upward to power on the Remote Control. The Power On
Indicator will illuminate and blink.
6.
Push the Left Joystick upward and then push it downward immediately to pairing the
Remote Control to the unit. The Power On Indicator on the Remote Control and the
Decorative Lights on the unit will stop blinking. Then:
Push the Left Joystick upward to rising.
Push the Left Joystick downward to reduce the height or landing.
Push the Left Joystick to left to turns the unit counterclockwise.
Push the Left Joystick to right to turns the unit clockwise.
Push the Right Joystick upward to fly to forward.
Push the Right Joystick downward to fly to backward.
Push the Right Joystick to left to fly to left.
Push the Right Joystick to right to fly to right.
Press the Photo/Video Shutter Button once to capture a photo.
Press
and hold the Photo/Video Shutter Button approximate 2 seconds to start video
recording, press again to stop recording.
Press the Roll Button to let the unit to roll.
Summary of Contents for CRT706
Page 1: ...INTERCEPTOR Capture incredible aerial photos and videos ...
Page 11: ......


