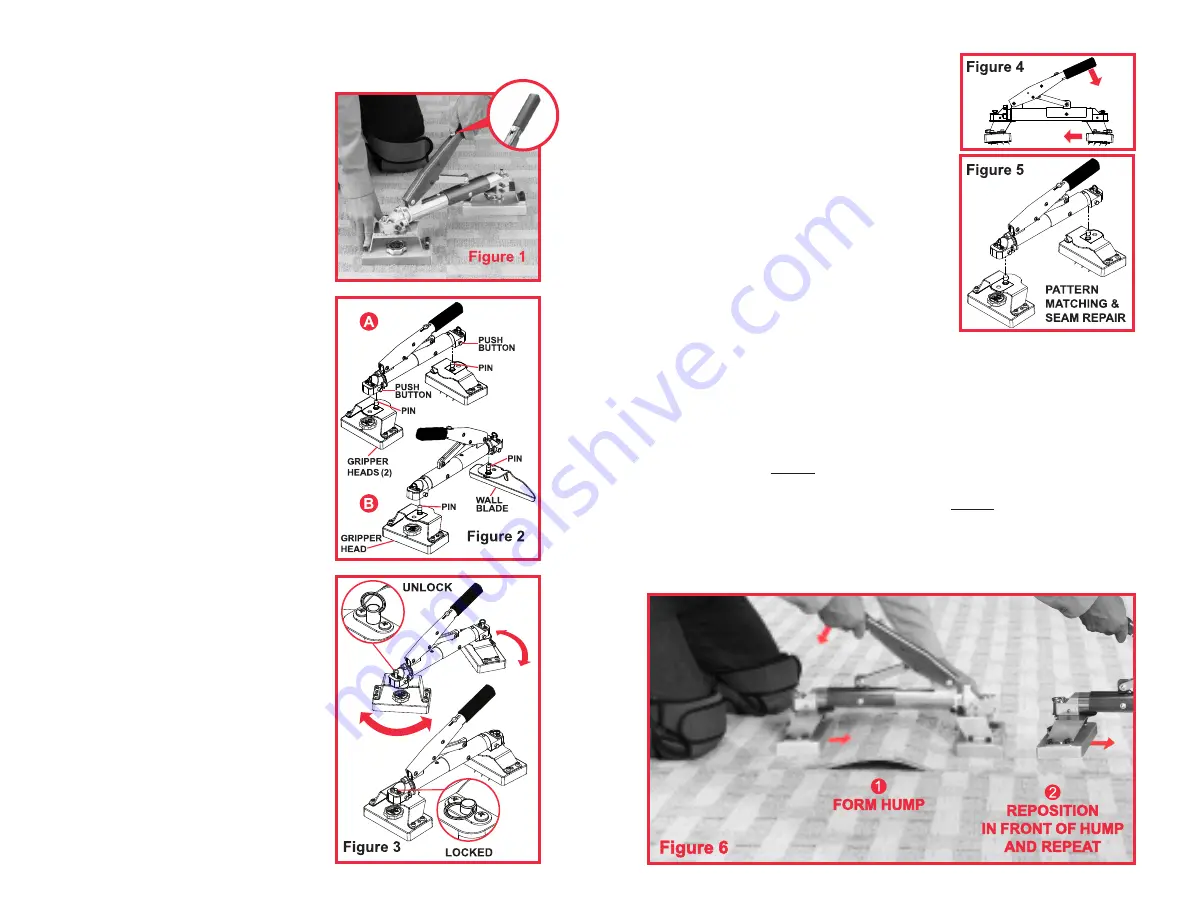
QUICK-CHANGE
PUSH BUTTONS:
As shown in Figure 2, both ends of the
tool have sockets with quick-change
push buttons to install either A.) two
gripper heads, or B.) one gripper head
and a wall blade. Depress a push
button, and the pin on the gripper head
or wall blade can be inserted into or
removed from the socket. Release the
push button with the pin fully inserted in
the socket, and the pin will lock in place.
CRAIN NO. 515 MINI-STRETCHER FEATURES
STRETCH LOCK BUTTON:
The stretch lock button (Figure 1) holds
a stretch. This frees up your hands for
tucking or seam repair work. You can
lock the stretcher at any point by pushing
the locking button forward to the position
marked “LOCK”. To release the lock, pull
the button back to the upper position.
The leverage handle also locks at the
bottom of its downward movement.
DUAL PIVOTS &
PIVOT LOCK PINS:
The gripper heads or wall blade will pivot
when installed on either end (Figure 3),
or they can be locked if desired. The
gripper heads can be pivoted parallel
to the seam for pattern matching work
(Figure 1). The gripper heads and tail
blade can be locked perpendicular to the
tubes by depressing the pivot lock pins
on either end of the tool (Figure 3).
1
PATTERN MATCHING USAGE
GENERAL USAGE:
Attach gripper heads on both ends (Figure 5).
Set the pin depth on both gripper heads using
the dial. The pins should penetrate into the
carpet’s backing, but not through the backing,
or damage to the carpet may result. Turn
clockwise for greater pin depth penetration,
or counterclockwise for reduced penetration.
For pattern matching work, the Mini-Stretcher
can be used for either “CRAB WALKING” (Figure 6) one side of the carpet
seam at a time, or “DIAGONAL STRETCHING” (Figure 1) which pulls both
sides of the seam inwards simultaneously.
CRAB WALKING:
Place the Mini-Stretcher in the middle of the seam, and on one side of the
seam (Figure 6). Step 1: raise the leverage handle to maximum height,
anchor the grippers in the carpet, then lower the leverage handle. This
forms a hump of carpet between the grippers. Step 2: place Mini-Stretcher
in front of the hump just created, and repeat. Steps 1 & 2 gradually pull
the carpet forward, bringing that side of the carpet into alignment with the
other side. At the end of the seam, return to the middle and work in the
opposite direction to bring the entire seam into alignment.
2
START
AT MIDDLE
OF SEAM
The Mini-Stretcher works by pulling the rear
gripper head towards the front, when the
leverage handle is lowered (Figure 4).


