5
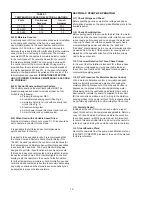
B-3) Liquid Level Controls:
It is recommended to use a liquid level control system
that allows the on and off point to be separated by at least
twelve inches. An additional set point (lag point) should
be incorporated with an alternator switching system for
a duplex (two pump) station. A high level alarm may be
required to alert maintenance personnel that there is a
high water situation in the wet well should the output of the
pump station drop below the inflow rate. A low level cut off
may be installed to provide system shutdown if the main
level control system malfunctions. The off point should be
positioned so that the liquid level never drops below the
minimum continuous duty point for the pump shown in
Figure 1.
B-4.1) Electrical Connections:
WARNING! - All model pumps and
control panels must be properly
grounded per the NATIONAL
ELECTRIC CODE or CANADIAN
ELECTRIC CODE, State, Province
and local codes. Improper
grounding voids warranty.
B-4) Power/Control Cord:
The cord assembly mounted to the pump must not be
modified in any way except for shortening to a specific
application. Any splice between the pump and the control
panel must be made in accordance with all applicable
electric codes. It is recommended that a junction box (if
used) be mounted outside the sump or be of at least Nema
6 or 6P construction with NEMA 6 or 6P watertight cord
grips if located within the wet well. A water and vapor tight
seal fitting
MUST
be used in conduit leaving the wet well
to prevent moisture and gases from reaching the control
panel. Prior to installation, the pump power cable should be
inspected for nicks or damage. If damaged, the cord should
be replaced before installation.
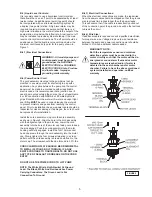
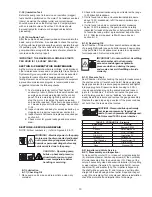
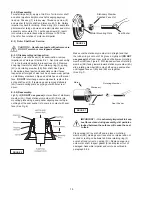
Install the cord assembly o-ring onto the cord assembly
as shown in Figure 2. Align the hole in the cord assembly
with the alignment pin in the motor cap. Lower the cord
assembly into the bore of the motor cap taking care to keep
the pins aligned. Push the cord assembly into the motor
housing until fully engaged. Install the four 12mm socket
head cap scews through the cord assembly into the motor
cap. Slowly tighten the four screws alternating in a cross
pattern until the cord assembly is drawn down flush to the
motor cap. The screws should then be torqued to 35 ft. lbs.
CORD CLAMPING PLATE SHOULD BE DRAWN METAL
TO METAL (35 FT/LBS BOLT TORQUE). IF A GAP
EXISTS CONTINUE TO TIGHTEN BOLTS. DO NOT USE
ANY TYPE OF SEALANT OR GREASE ON THE CORD
ENTRY.
DO NOT USE THE POWER CORD TO LIFT PUMP.
NOTE: The White Wire Is Not A Neutral Or Ground
Lead. The Black, White And Red Leads Are Power
Carrying Conductors. The Green Lead Is For
Connection To Ground.
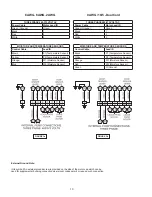
B-4.1) Electrical Connections:
When the electrical connections are made, the lead wires
from the power cable should be stripped so that the ground
wire is at least two inches longer than the power leads.
This will ensure that if the cable is inadvertently pulled out
of the connection point, the ground wire will be the last lead
to break the circuit.
B-4.2) Wire Size:
If additional cable is required consult a qualified electrician
for proper wire size. Voltage drop due to wire resistance
between the pump and power connection point should be
limited to 3% when additional cable is added.
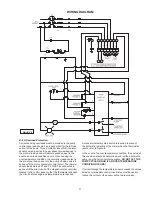
WARRANTY NOTE:
Both the temperature sensor and moisture
detection system must be connected to the
motor circuitry such that the motor will be de-
energized or sound alarm if excessive motor
temperatures are reached and/or if water is
detected in the seal chamber and/or motor
chamber. Failure to have the above mentioned
systems installed and operative, nullifies
warranty
FIGURE 2
Summary of Contents for DEMING 7365N-X54-95-30N
Page 18: ...18 FIGURE 9 Vortex Enclosed CROSS SECTIONS FIGURE 10 ...
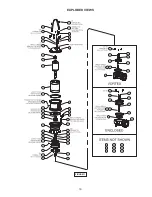
Page 19: ...19 EXPLODED VIEWS FIGURE 11 ...
Page 22: ...22 Notes ...


