

5
2.
Ensure that the heater’s power switch (on the back of the unit) is
switched to Power Off.
3.
Plug the heater into a 120VAC outlet. This heater has a polarized
plug. As a safety feature to reduce the risk of electrical shock, this
plug is intended to fit in a wall outlet in one way. If the plug does
not fit fully in the outlet, contact a qualified electrician. Do not
attempt to defeat this safety feature.
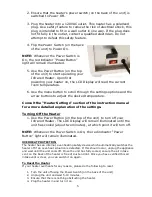
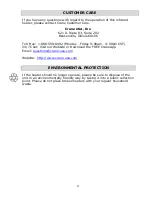
4.
Flip the Power Switch (on the back
of the unit) to Power On.
NOTE:
Whenever the Power Switch is
On, the red indicator “Power Button”
light will remain illuminated.
5.
Use the Power Button (on the top
of the unit) to start operating your
Infrared Heater. Upon first
powering your heater on, the LCD Display will read the current
room temperature.
6.
Use the menu button to scroll through the settings options and the
arrow buttons to adjust the desired temperature.
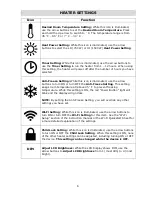
Consult the “Heater Settings” section of the instruction manual
for a more detailed explanation of the settings.
Turning Off the Heater
1.
Use the Power Button (on the top of the unit) to turn off your
Infrared Heater. The LDC Display will remain illuminated until the
unit has cooled (about two minutes), at which point it will turn off.
NOTE:
Whenever the Power Switch is On, the red indicator “Power
Button” light will remain illuminated.
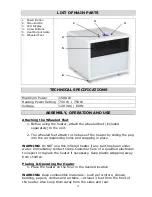
OVERHEAT PROTECTION
The heater has an internal, over-heating safety device which automatically switches the
heater off if an over-heat situation is detected. If this should occur, unplug the appliance
and wait until the unit cools off. Once the unit has fully cooled, ensure the air intake
vent on the back of the heater is free of dust and lint. Once you have verified this air
intake vent is clear, you can switch it on again.
To Reset the Heater
If your heater overheats for any reason, please do the following to reset.
1.
Turn the unit off using the Power Switch (on the back of the unit)
2.
Unplug the unit and wait 5-10 minutes.
3.
Ensure that there is nothing obstructing the heater.
4.
Plug the heater in and turn it on.
Summary of Contents for EE-8077
Page 12: ...11 ...


