Initial Setup
Merchant™ Operators’ Guide
August 2009
16
1810025
Operating Trays Outside the Merchandiser
The tray harnesses are long enough to remove the trays and set the middle and bottom trays
on the floor in front of the merchandiser and the top trays on the top of the merchandiser without
unplugging the tray harnesses.
Replacing a Motor With a Spiral Bearing
REMOVING A MOTOR
1.
Disconnect the harness from the motor.
(See
“Connecting and Disconnecting a Motor Harness” on page 17)
.
2.
Remove the spiral. (See
“Removing and Installing Spirals” on page 18).
3.
Remove the spiral coupler. (See
“Removing a Spiral Coupler” on page 20).
4.
Remove the motor. (See
“Removing and Installing a Spiral Motor” on page 20).
INSTALLING A SPIRAL BEARING
1.
Put the gear into position if required in this set-up as shown.
(See
“Installing a Gear” on page 21).
2.
Install the spiral coupler. (See
“Installing a Spiral Coupler” on page 22).
A coupled spiral does not use a motor.
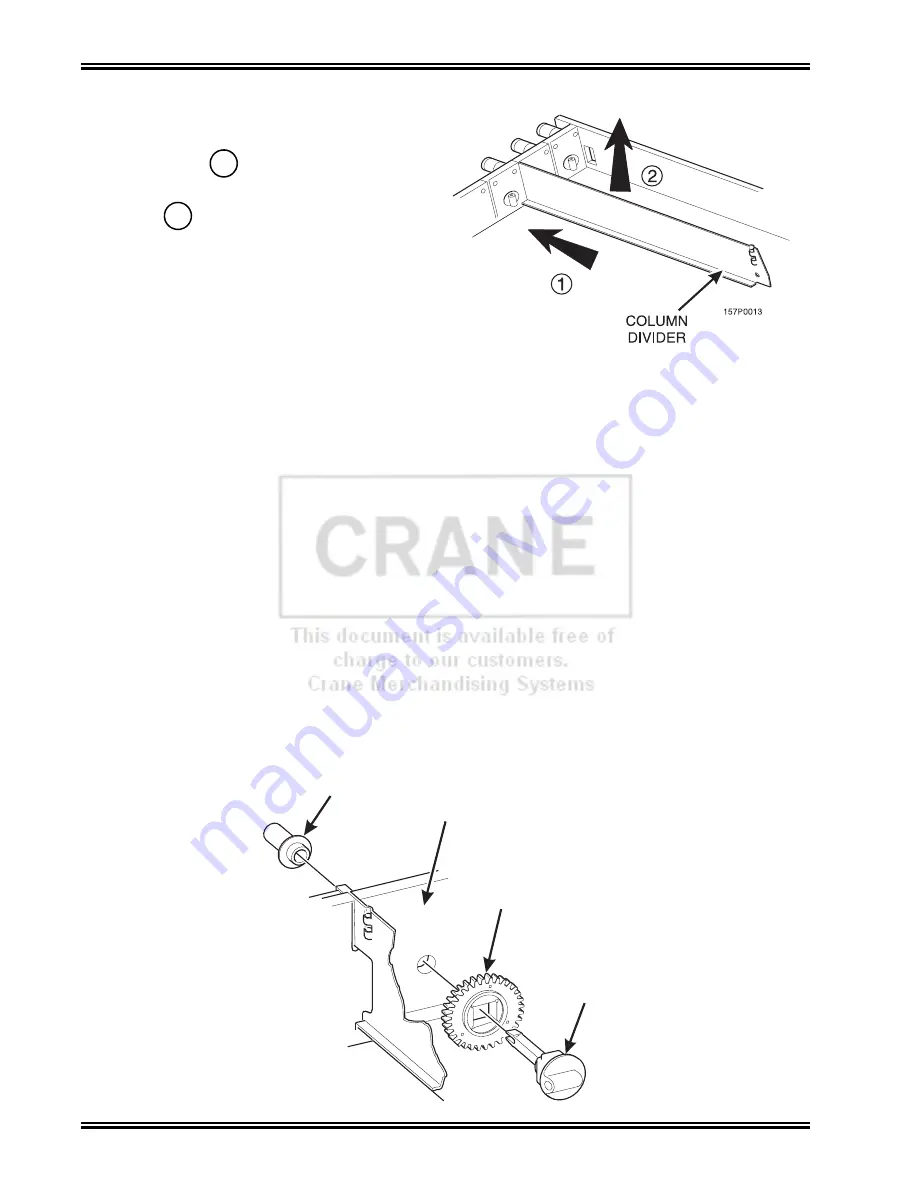
Removing and Installing Column Dividers
1.
Push the column divider toward the back
of the tray -
.
2.
Lift the column divider clear of the
tray -
.
3.
Install the column divider in the reverse
order of removal.
1
2
SPIRAL
BEARING
GEAR
SPIRAL
COUPLER
BACKWALL
OF TRAY
˜
Summary of Contents for Merchant Six 180
Page 1: ......
Page 7: ...Merchant Operators Guide Initial Setup 1810025 1 August 2009 FRONT EXTERIOR VIEWS ...
Page 9: ...Merchant Operators Guide Initial Setup 1810025 3 August 2009 ALL MODELS MONETARY STANDARD ...
Page 10: ...Initial Setup Merchant Operators Guide August 2009 4 1810025 INTERIOR VIEW ...
Page 204: ...Program System Settings Merchant Operators Guide August 2009 198 1810025 Service ...


