background image

5

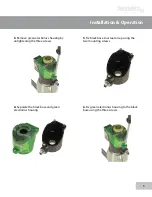
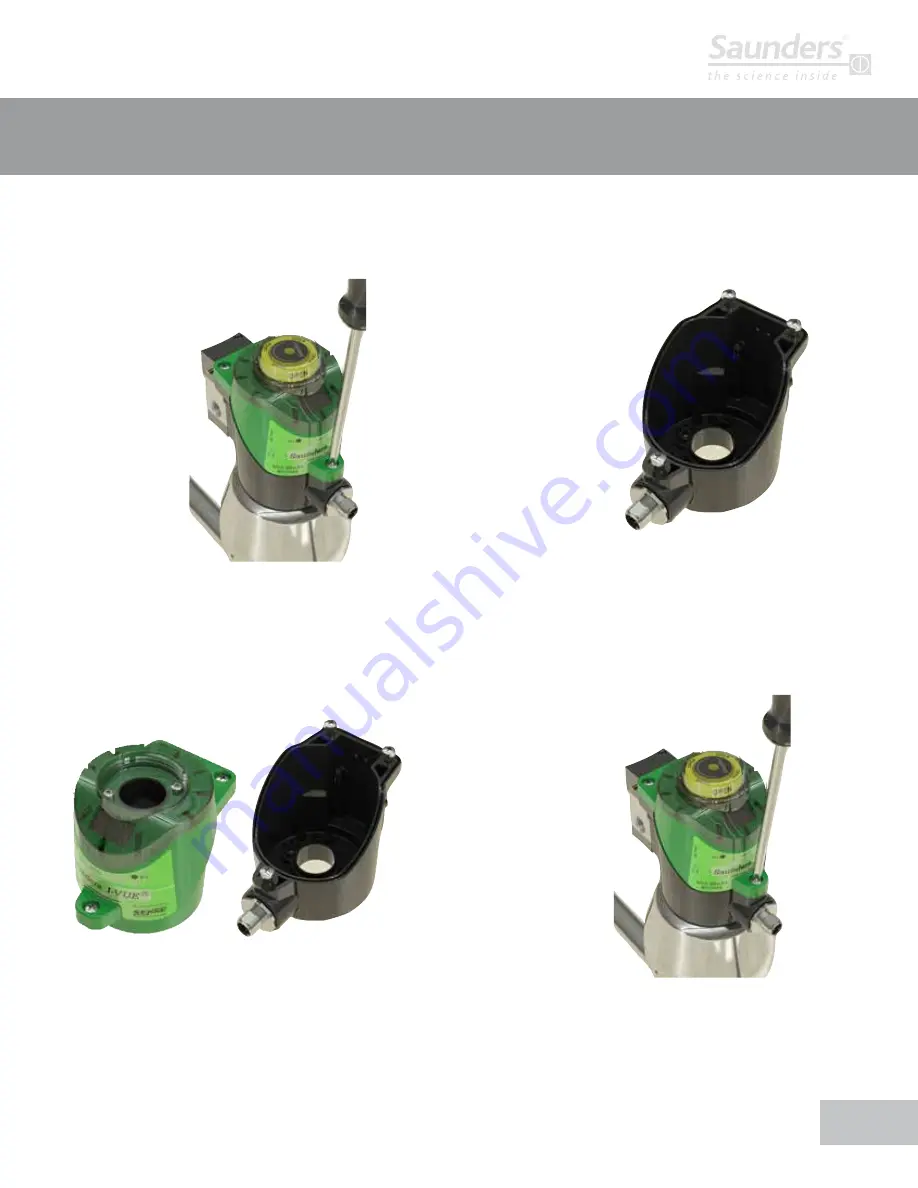
3.

Remove green electronics housing by

untightening the three screws.

4.

Separate the black base and green

electronics housing

5.

Fix black base to actuator cap using the

two mounting screws.

6.

Fix green electronics housing to the black

base using the three screws.

Installation & Operation 

Summary of Contents for Saunders I-VUE

Page 1: ...brands you trust Saunders I VUE Installation Assembly Instruction Saunders I VUE ...

Page 2: ...2 Index Components List Page 3 Schematic of Build Sequence Operation Page 4 Installation Operation Page 5 7 ...

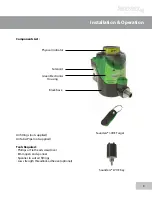
Page 3: ...Green Electronics Housing Black base Air fittings not supplied Air Tube Pipe not supplied Tools Required Phillips or Flat head screwdriver 8mm open end spanner Spanner to suit air fittings Low strength threadlock adhesive optional Saunders I VUE Target Saunders I VUE Key ...

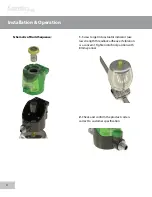
Page 4: ...Build Sequence 1 Screw target into actuator indicator use low strength threadlock adhesive if vibration is a concern Tighten into final position with 8mm spanner 2 Check and confirm the product code is correct to customer specification 4 ...

Page 5: ...ntightening the three screws 4 Separate the black base and green electronics housing 5 Fix black base to actuator cap using the two mounting screws 6 Fix green electronics housing to the black base using the three screws Installation Operation ...

Page 6: ... air fittings to actuator 8 Connect required air fittings to solenoid Port Air supply in Port 2 Air supply to actuator 9 Connect air tube piping as per customer specification 10 Connect power supply Installation Operation ...

Page 7: ...quence 12 Initiate self calibration sequence a Hold black side of I VUE key over black N3 button for 3 seconds 12 b I VUE screen reads SURE 12 c Confirm self calibration by holding green side of I VUE key over green S2 button 12 d Self calibration sequence runs Installation Operation ...

Page 8: ... such altera tion can be made without changes being necessary in specifications already agreed unless otherwise indicated All trademarks in this ma terial are property of the Crane Co or its subsidiaries The Crane and Crane brands logotype DEPA ELRO Krombach PSI Resistoflex ResistoPure Revo Saunders and XOMOX are registered trademarks of Crane Co or its subsidiaries All rights reserved 2014 CRANE ...

Reviews: