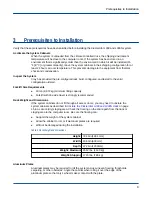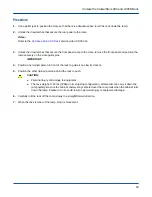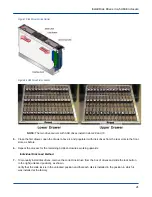
Figure 10. Speedloader
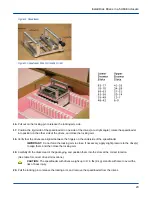
Figure 11. Speedloader Drive Slot Insertion Order
16. Pull out on the locking pin to release the locking arm side.
17. Position the rigid side of the speedloader to one side of the drives (at a slight angle), rotate the speedloader
into position on the other side of the drives, and close the locking arm.
18. Verify that the drives are aligned between the fingers on the underside of the speedloader
IMPORTANT: Do not force the locking arm to close. If necessary, apply slight pressure to the drive(s)
to align them, and then close the locking arm.
19. Carefully lift the disks clear of the packaging, and position them into the slots at the correct location.
(See table for correct drive slot locations.)
CAUTION: The speedloader with drives weighs up to 17.6 lbs (8 kg). Handle with care to avoid the
risk of back injury.
20. Pull the locking pin to release the locking arm, and remove the speedloader from the drives.
Install Disk Drives in a 5U84 Enclosure
23

