13
ENGLISH
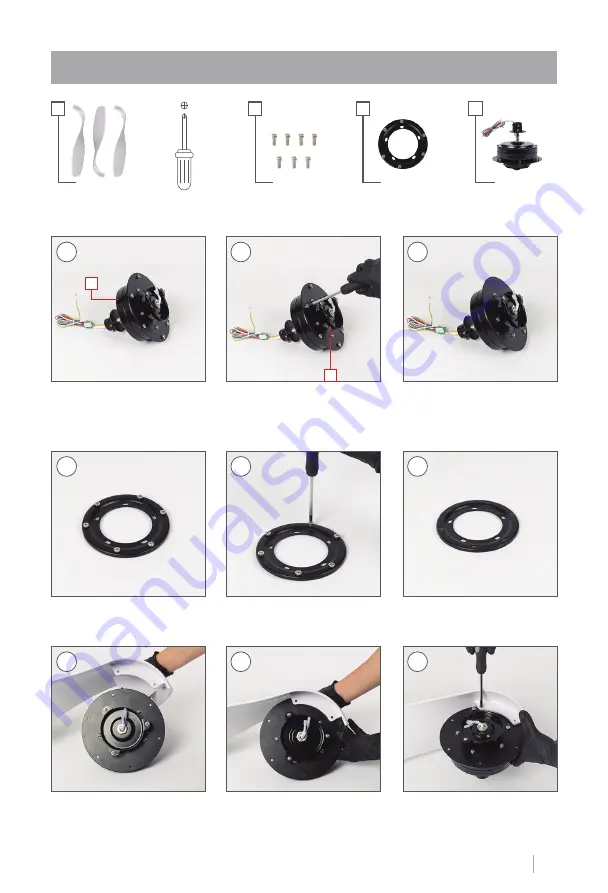
STEP 2. BLADE ASSEMBLY
+
+
+
+
E
Q
R
(x3)
BLADES
1
4
7
2
5
8
3
6
9
H
Start by removing the engine bolts.
H
, if your screws
Q
are in a plastic bag, go to step 4.
Q
Remove the blade support bolts.
R
and save them for the next step.
Start placing the blades
E
screwing the screws
Q
from the bottom of the engine
H
, as shown
in the images. Remember to tighten the screws gradually.
(x7) SCREWS
BLADES
BLADE SUPPORT
H
ENGINE
Summary of Contents for WIND FOLD
Page 1: ...1 ENGLISH WIND FOLD CEILING FAN WITH LIGHT MANUAL ASSEMBLY ...
Page 2: ......
Page 3: ......
Page 23: ......
Page 24: ...24 ENGLISH ...


