2
2 Install the Drivers and Camera
Installing the Drivers and Software
1. Do not connect Creative WebCam NX Ultra to your computer before installing the drivers. If you accidentally begin
installation with Creative WebCam NX Ultra connected, the
Add New Hardware Wizard
or
Found New Hardware
Wizard
dialog box appears. Click the
Cancel
button and disconnect the WebCam from your computer.
2. Insert the Creative WebCam NX Ultra Installation CD into your CD-ROM drive. If it does not run automatically, click
Start
->
Run
and type
d:\ctrun\ctrun.exe
(replace
d:\
with the drive letter of your CD-ROM drive).
3. Click the options for installing drivers and applications.
4. Follow the onscreen instructions.
5. You may be asked, after an application is installed, if you want to restart your computer. Click the
No
button until all the
drivers and applications are installed.
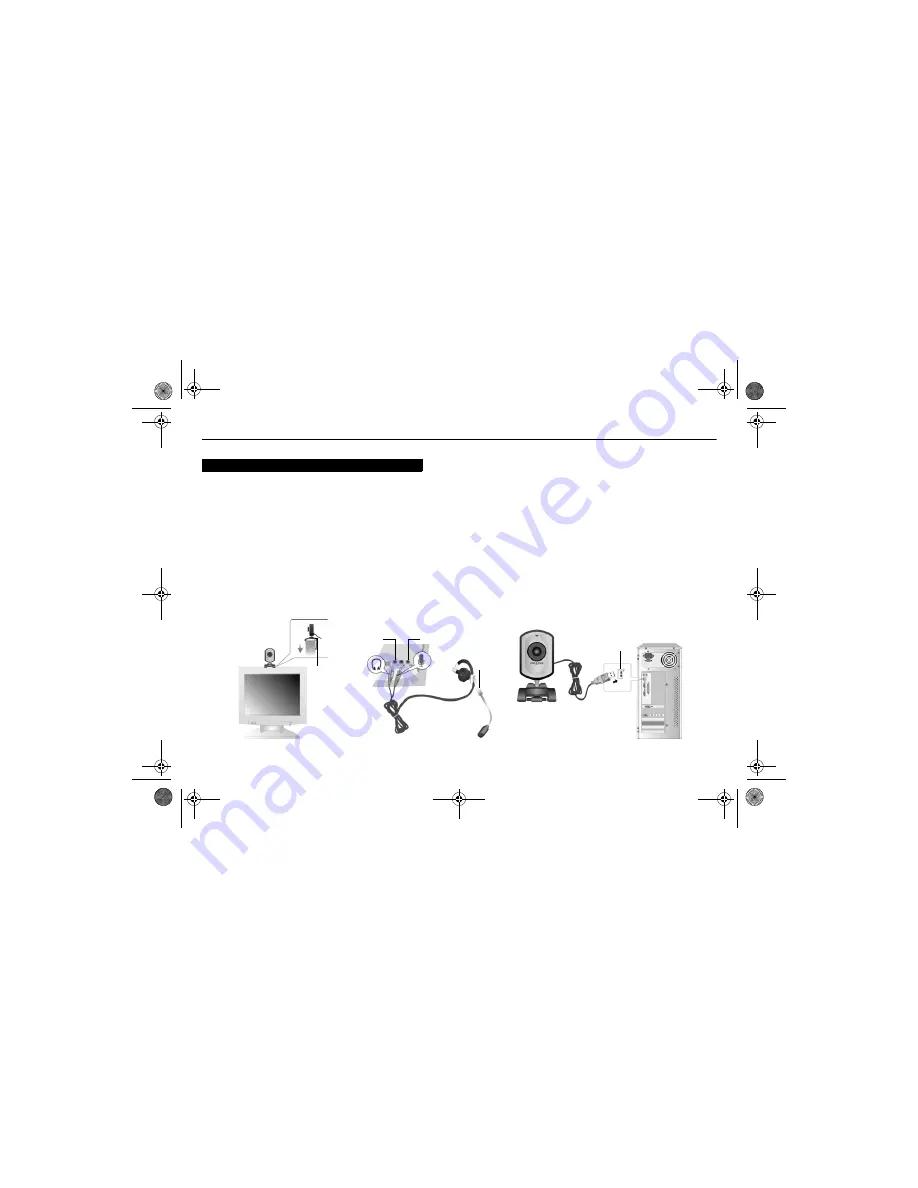
6. Place your Creative WebCam NX Ultra on top of your computer monitor or other flat surface. For LCD flat panel monitors
or notebook computers, use the integrated hinged lever to balance the camera. See Figure 1 below.
7. If you want to connect a microphone for video conferencing, plug it into your computer. See Figure 2 below.
8. Connect your WebCam to your computer. See Figure 3 below.
Figure 1: Placing your WebCam on
your computer
Figure 2: Connecting a microphone to
your computer
Figure 3: Connecting Creative WebCam NX Ultra
to your computer
USB port
Microphone
Microphone
connector
Headphones
connector
Hinged
lever
DO NOT
connect the camera to your computer yet!
WC NX Ultra Eng.fm Page 2 Wednesday, September 3, 2003 2:45 PM


