background image


4. Quick Start Reference 


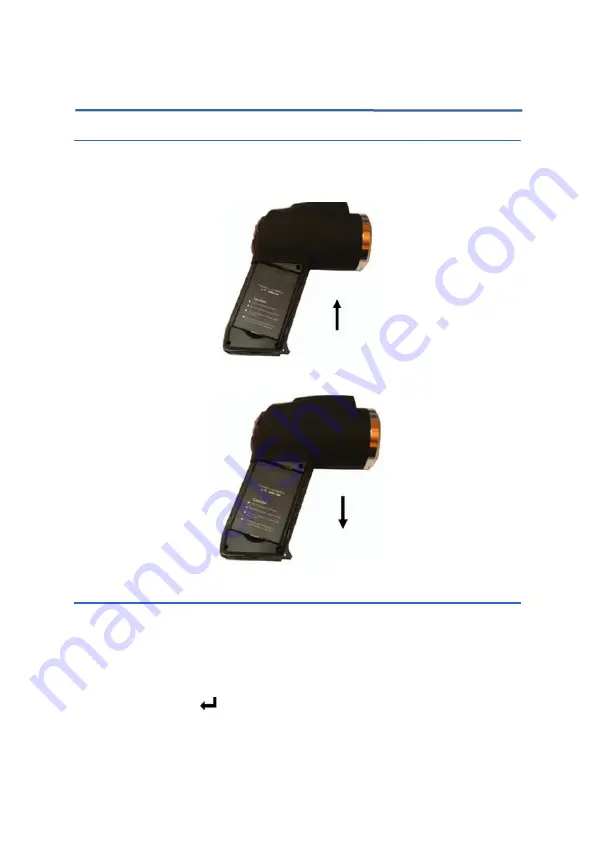
4.1 Battery Setting 


Insert and move the lithium battery in the direction indicated, users can 
easily insert and move the battery. 


Battery Installation 


Battery Removal 

4.2 Quick Operations 


1.  Insert the battery correctly. 
2.  Long press Power button until the LED light is on, and wait until 

system finishes initialization. 

3.  Slide IR Lens lid down, point to target, and adjust focus to get crisp 

thermal image. 

4.  Long press the      

button 

to rectify thermal image. 

Summary of Contents for Artemis TI-CS-T1

Page 1: ...Artemis TI CS T1 Thermal Scanner Product By CreativeStar Solutions 1601 Trapelo Road Suite 260 Waltham MA 02451 Version 1 0 3 Issue Date 20200616 ...

Page 2: ...d 70 C 158 F The device must be kept in original packing case during transport Typical storage place is cool dry ventilated and without strong electromagnetic field Keep the lens surface off grease or any chemical substance which would damage the lens Close the lid after operation Please regularly back up data to prevent potential data loss Please regularly format the internal flash memory to make...

Page 3: ...START REFERENCE 7 4 1 BATTERY SETTING 7 4 2 QUICK OPERATIONS 7 4 3 MEASURE TARGET TEMPERATURE 8 4 4 INFRARED IMAGE AND VOICE ANNOTATION 8 4 5 INFRARED IMAGE PLAYBACK 9 5 OPERATION MENU 10 5 1 DISPLAY SUMMARY 10 5 2 MAIN MENU 11 5 2 1 File 13 Image Management 13 Save 14 Record Play 15 Delete 15 Format 16 5 2 2 Measure 17 Spot Measure 17 Line Measure 19 Vertical Line Measure 20 Area Rect Measure 21 ...

Page 4: ...age Auto Manual Mode 27 5 2 4 Setup 27 System Setup 27 Storage Medium 29 Time Date 30 Factory Default 30 System Information 32 Disc Information 32 6 HUMAN BODY TEMPERATURE MEASUREMENT CASES 33 7 TECHNICAL SPECIFICATIONS 35 8 TECHNICAL SUPPORT 38 APPENDIX EMISSIVITY OF RAW MATERIALS 39 ...

Page 5: ... high temperature tracking fast aiming etc It can be used for human body temperature measurement in public places in order to prevent the spread of disease It is lightweight easy to carry and easy to use Artemis TI CS T1 integrates advanced features such as color thermal imaging multiple measurement methods real time video voice annotation sound and color alarms built in flash memory and SD card s...

Page 6: ...it tightly Connect the charger to an AC power outlet During charging the red LED lights up and after charging the green LED lights up 2 2 Direct Charging You can use the adapter to charge the built in battery It takes about 5 hours to fully charge a dead battery The indicator light is red when charging and remains green after being fully charged 2 3 Attention for Using Battery Charger Battery char...

Page 7: ...he infrared camera is turned on the indicator light will display as a green power indicator if the indicator light displays in orange it means that the battery is being charged 2 HotKey button 1 Press to automatically focus and long press to turn on off the LED light 3 HotKey button 2 Press to switch between measured objects point line and area setting range of thermal superposing temperature colo...

Page 8: ...g Select measured spots press Up Down Left and Right button to move the spot in the samedirection Select the measure line and sampling line press Up Down Left and Right button to move the line in the same direction Select area box in move menu press Up Down Left and Right buttons to move area box and in size menu press Up and Down to resize the vertical direction area box press Left and Right butt...

Page 9: ...CW CCW imaging mode switch Press the button to switch image models among infrared visible WIW 13 Shutter key Press the button to save the voice and image 3 2 Side View 14 Power ON OFF button Long press this button to power on off the device 15 Multifunctional interface for audio output or video output Please insert converter cable It can be connected to headphones to listen the playback audio note...

Page 10: ...erface can be connected to the computer for data transmission 3 3 Bottom View 18 External DC In External DC requirement is DC 5V 19 Screw nut on tripod Size of screw nut on tripod 1 4 _20 3 4 Left Side View 20 3 2 Color 270 tiltable LCD ...

Page 11: ... move the battery Battery Installation Battery Removal 4 2 Quick Operations 1 Insert the battery correctly 2 Long press Power button until the LED light is on and wait until system finishes initialization 3 Slide IR Lens lid down point to target and adjust focus to get crisp thermal image 4 Long press the button to rectify thermal image ...

Page 12: ...temperature measurement or line temperature measurement to analyze if users need to return to real time on the temperature measurement interface just click the button again In the standard temperature range 30 45 i e 86 113 if the target temperature is higher or lower than the upper or lower temperature corresponding to the device s temperature range the device will display 28 82 4 or 47 116 6 to ...

Page 13: ... stored image is displayed then press the Enter button to enter the viewingstate When viewing thermal image press the Left or Right button to switch thermal image in the same folder The icon indicates voice annotation attached to current thermal image Press Enter button to enter File Voice then select Play to play back Long press the Enter button to return the real time imaging mode ...

Page 14: ...ocus 2 Area Measure Box 5 areas can be selected in area measure box enter the Main Menu Measure Rect to operate 3 AF Area objects need focused can be displayed in the area to achieve Auto focusing effect 4 Horizontal measuring line Horizontal sampling line Enter the Main Menu Measure Line to select the function 5 Temperature distribution curve sample temperature distribution curve of the measure l...

Page 15: ...mit temperature the lower and upper limit temperature of the color code at the same time 13 Storage medium IN indicates built in FLASH SD means SD card enter the Main menu Setup System Setup Storage Medium to adjust the storage medium 14 USB symbol USB0 means file transmission enter the Main menu Setup System Setup USB to switch 15 Color Code color palette Any kind of color code is available in th...

Page 16: ... menu is shown in the figure below In infrared real time temperature measurement mode long press to execute manual calibration function instead of entering the mainmenu Main Menu Use or button to select menu item and selected item ishighlighted with white background Press Enter or button to enter sub menu press ...

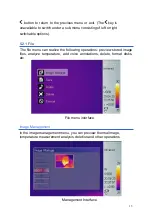
Page 17: ...ptions 5 2 1 File The file menu can realize the following operations preview stored image files analyze temperature add voice annotations delete format disks etc File menu interface Image Management In the image management menu you can preview thermal image temperature measurement analysis deletion and other operations Management Interface ...

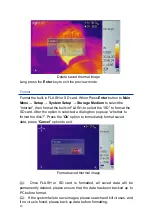
Page 18: ...name created by taking the 131st picture is 00131 In File Manage window press and button to select items Press or button to switch folder or file when highlighted After selecting thermal image press Enter key to Open to view thermal image or press Enter key to delete it and press Exit to exit File Manage window Thermal Image preview At the same time the top left of the screen will be displayed in ...

Page 19: ...ta with current thermal image If voice annotation already exists press Record will record new voice annotation and erase previously saved one Press Cancel first to stop recording then press Save to save Voice Annotation Delete Enter the delete menu a dialog box pops up select the Ok option and press the Enter key to delete the thermal image ...

Page 20: ...mat the SD card After the option is selected a dialog box pops up whether to format the disk Press the Ok option to immediately format saved data press Cancel option to exit Format saved thermal image Once FLASH or SD card is formatted all saved data will be permanently deleted please ensure that the data has been backed up to PC before format If the system fails to save images please search and k...

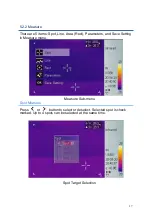
Page 21: ...ms Spot Line Area Rect Parameters and Save Setting in Measure menu Measure Sub menu Spot Measure Press or button to select or deselect Selected spot is check marked Up to 4 spots can be selected at the same time Spot Target Selection ...

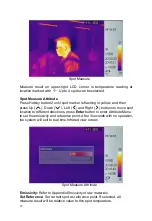
Page 22: ... and Right buttons to move spot location to different directions press Enter button to enter Attribute Menu to set the emissivity and reference point After 3 seconds with no operation the system will exit to real time Infrared view screen Spot Measure Attribute Emissivity Refer to Appendix Emissivity of raw materials Set Reference Set current spot as reference point If selected all measure result ...

Page 23: ... displays temperature measurement reading on vertical cursor line intersection After using HotKey button 2 select line measure press and button to adjust sampling line position and press and button to adjust cursor line position Press Enter button to enter Attribute Menu After 3 seconds with no operation the system will exit to real time Infrared view screen Horizontal Line Measure Attribute ...

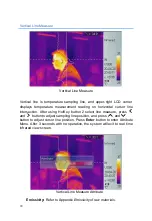
Page 24: ... intersection After using HotKey button 2 select line measure press and button to adjust sampling line position and press and button to adjust cursor line position Press Enter button to enter Attribute Menu After 3 seconds with no operation the system will exit to real time Infrared view screen Vertical Line Measure Attribute Emissivity Refer to Appendix Emissivity of raw materials ...

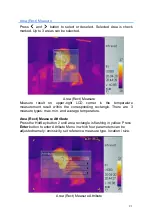
Page 25: ...mperature measurement result within the corresponding rectangle There are 3 measure types max min and average temperature Area Rect Measure Attribute Press the HotKey button 2 until area rectangle is flashing in yellow Press Enter button to enter Attribute Menu in which four parameters can be adjusted namely emissivity set reference measure type location size Area Rect Measure Attribute ...

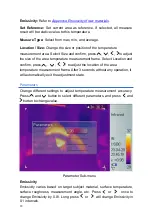
Page 26: ...me Select Location and confirm press to adjust the location of the area temperature measurement frame After 3 seconds without any operation it will automatically exit the adjustment state Parameters Change different settings to adjust temperature measurement accuracy Press and button to select different parameters and press and button to changevalue Parameter Sub menu Emissivity Emissivity varies ...

Page 27: ...al condition Press or once to change Humidity by 1 Long press or will change Humidity in an interval of 10 Adjust Temp Under certain conditions it is necessary to adjust temperature reading by a pre define value Normally this option should be left unchanged Press or once to change 0 1 0 2 Long press or will change this value in an interval of 1 1 8 Save Setting All parameter changes must be saved ...

Page 28: ...n area box has surface temperature over Alarm Temp device will alarm with buzzer sound and mark the high temperature location as Alarm Color if Alarm Color is set Alarm Temp When Alarm Switch is off this option is disabled When Alarm Switch is on Alarm Temp is the desired alarm temperature Press or once to change Alarm Temp 0 1 0 2 Long press or will change Alarm Temp in an interval of 1 1 8 The d...

Page 29: ...arm when temp exceeds the current set range if the alarm is selected to close this setting will be disabled Press or once to change the alarm temp by 0 1 0 2 Long press or to change the alarm temp by 1 1 8 Isotherm Temp Press or once to change Isothermal Temp 0 1 0 2 Long press or will change Isothermal Temp in an interval of 1 1 8 Isotherm Width Adjust Isothermal Width to change the range of Isot...

Page 30: ...emperature Unit from and K Ambient Temp For more accurate measure result set Ambient Temp to correct environmental temperature Press or once to change Ambient Temp by 0 1 0 2 Long press or will change Ambient Temp in an interval of 1 0 1 8 Reference Set reference spot or area to display measure results as relative value Ref Temp Press or once to change Ref Temp by 0 1 0 2 Long press or will change...

Page 31: ...adjust the upper and lower limits of temperature measurement 5 2 4 Setup There are 5 items in Setup menu System Setup Time Date Factory Default System Information and Disc Information Setup Sub menu System Setup There are 10 options in System Setup menu Language Auto Rectify Auto Save Video Transparence Display Device Screen Save Power Save USB and Storage Medium Press and button to switch selecti...

Page 32: ...to perform next auto save Set value between 7 to 3600 seconds Value 0 means disabling auto save feature Press or once to change the value by 1 second Long press or will change the value in 10 intervals Video Select between PAL and NTSC When users connect an external monitor users can set the system correctly so that the monitor can obtain a normal display Transparence Set to enable or disable menu...

Page 33: ... save power Select between 5min 10min 30min and None Power Save Set the number of minutes without operation to trigger power off completely Select between 10min 20min 30min and None Storage Medium Storage Medium includes Internal and SD card press or button to switch options The capacity of Built in FLASH is 256M the capacity of standard SD card is 4GB and the disk format is FAT The device only id...

Page 34: ...lect an item press or button to change its value and press Enter button to confirm If Li Ion battery is removed for a long time it is necessary toreset system time and date Time Setting Factory Default Restore factory default and rectify some improper settings ...

Page 35: ...0 98 6 Alarm color isothermal color Auto Isothermal alarm Disenabled Isothermal temperature 37 0 98 6 Isothermal height 1 0 33 8 Analysis Settings Temperature range 30 45 86 113 Temperature unit Ambient temperature Manual Reference measurement Disenabled Reference temperature 30 0 86 System Settings Language English Automatic correction 120S Automatic storage 0S Video format PAL Menu Transparency ...

Page 36: ...n such as serial number software version and production date etc Disc Information Select to display Disc Information as follows the dialog box can indicate the FLASH s used disc space and free space as well as used space free space of SD card Disc Information ...

Page 37: ...33 6 Human body temperature measurement cases The following pictures show several cases of human body temperature measurement Case 1 Case 2 ...

Page 38: ...34 Case 3 ...

Page 39: ...S module auto focus 1 LED fill light Fill in light 10cd m Display Display 3 2 color digital LCD screen rotatable 800x480 pixel LCD screen Image Display Switchable infrared image and visible light image infrared image and dual windows Color palettes 12 color palettes are available including iron red rainbow black and white black and white inversion etc Amplification 384x288 1X 8X Continuous zoom Me...

Page 40: ...a predefined substance emissivity table Background temperature correction Auto based on the entered background temp Atmospheric transmittance correction Auto based on the input distance relative humidity ambient temperature Storage Storage media 8GB Micro SD card Storage method Manual auto storage single frame infrared storage infrared and visible light associated storage Infrared image format JPE...

Page 41: ...Temp 16 32 60 8 89 6 Storage temperature range 40 70 40 158 Humidity 95 Non condensing Encapsulation IP54 Shock 25G IEC60068 2 29 Vibration 2G IEC60068 2 6 Physical Weight 0 4kg with battery and standard lens Size 128mm 62mm 154mm Tripod 1 4 20 Interface Power interface Yes SD card slot Yes USB interface USB2 0 to transfer images to computer Video output Yes CVBS Audio output Yes ...

Page 42: ... or re install the battery Replace or charge the battery Wait for 5 seconds and then restart it The infrared camera shuts down automatically The battery runs out Replace the battery The battery runs out quickly Ambient temperature is too low or too high The rechargeable battery is not fully charged The life of battery is almost over The battery supports charging and discharging for about 300 times...

Page 43: ...d 100 212 0 21 Wrought Iron Rough 25 77 0 94 Polished 38 100 4 0 28 Nickel Oxidized 200 392 0 37 Stainless Steel Oxidized 60 140 0 85 Steel 800 1472 Oxidized 200 392 0 79 Brick 20 68 0 93 Concrete 20 68 0 92 Glass Smooth flat 20 68 0 94 Lacquer White 100 212 0 92 Natural Black 100 212 0 97 Carbon Smoky black 25 77 0 95 Candle smoke 20 68 0 95 Black lead rough 20 68 0 98 Paint 16 Color average 100 ...

Page 44: ...CreativeStar Solutions Address 1601 Trapelo Road Suite 260 Waltham MA 02451 TEL 1 617 326 5308 E mail info cssinco com Website www cssinco com ...

Reviews: