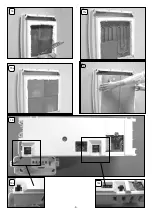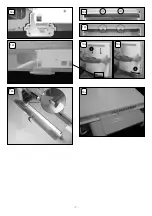
- 10 -
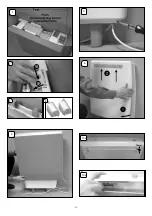
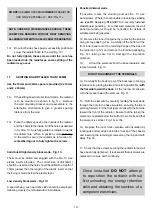
DO NOT
USE 30MM SPACER ON
INSIDE
OF RADIATOR.
USE ONLY EXTERNALLY - SEE FIG. 11
A
.
NOTE: UNDER NO CIRCUMSTANCES SHOULD THESE
SCREWS BE REMOVED WITHOUT FIRST REMOVING
ALL ENERGY RETENTION CELLS FROM THE RADIATOR
10
F
Once both sides have been successfully positioned
screw the radiator
fl
ush to the wall Fig. 10
F
.
Do not fully tighten these screws until the core has
been loaded into the radiator as some settling of the
radiator may occur.
11
B
Place the 30mm spacer to the outside of the radiator
and the 10mm to the inside. Drill the holes as detailed
in Section 10. Carefully guide the radiator towards
the drilled hole. When in position screw
part way
to the wall to secure the radiator as in Section 10,
remembering not to fully tighten the screws.
11.
SKIRTING BOARD TALLER THAN 100MM
Use the 10mm and 30mm spacers provided (2 x 10mm
and 2 x 30mm)
11
A
If the skirting board is taller than 100mm, the radiator
is to be mounted as shown in
fi
g 11
A
. Remove
the wall mounting bracket and reassemble in the
alternative orientation to give a greater spacing
distance from the wall.
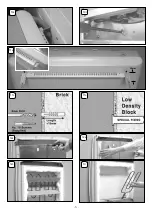
Solid brick/High density block walls - Fig. 11
C
These must be drilled and plugged with the No. 10 size
plastic inserts provided. The correct size of drill (8mm)
should be used and the hole should be drilled to a depth of
15mm greater than the length of the plastic insert so that
the
fi
xing is made below the plaster layer.
Low density block walls - Fig 11d
A special
fi
xing, such as Uni
fi
x LB70 should be employed,
following closely the manufacturers instructions.
12. Remove the inner front panel by removing the screws
along its top edge Fig. 12
A
. Carefully lift the bottom of the
front inner panel out of the retaining
fl
ange at the base of
the radiator, Fig 12
B
and remove the internal packaging,
Fig. 12
C
taking care not to damage the insulation
attached.
13.
Lift out the elements from the base insulation and
rotate forwards. Fig. 13.
DO NOT DISCONNECT THE TERMINALS
14. Carefully
fi
t the bottom row of the back layer of energy
retention cells, placing the two end cells in position
fi
rst
with
the
fl
at side toward the back
. Fit the top row of cells also
with the recess toward the element. Fig. 14
15. Re
fi
t the elements by carefully feeding the tails down
through the hole in the base insulation, ensuring the tab is
pointing forward. Fit the front layer of cells with the
fl
at side
toward the front of the radiator. Ensure that the tab on the
element is captured below the bottom row of cells and that
the element is vertical. Fig. 15
A
& 15
B
.
16. Replace the inner front complete with insulation by
locating its bottom edge behind the front lip of the chassis
and inserting the retaining screws along the top and both
sides. Fig. 16.
17. Check that the screws securing the radiator to the wall
have been fully tightened. It is essential that all screws are
replaced to ensure earth continuity.
Once installed
DO NOT
attempt
to reposition the radiator without
fi
rst unloading the energy retention
cells and obtaining the services of a
competent electrician.
Panelled internal walls
If possible, locate the studding and use No. 10 size
woodscrews. Where it is not possible to locate the studding
use type M5 Rawlplug INTERSETS on securely fastened
plasterboard panelling. For other wall materials the wall
panel manufacturer should be consulted for details of
suitable wall
fi
xing devices.


