background image

28

 Chapter 2 – Getting Started


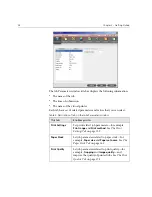
The Job Parameters window title bar displays the following information:

The name of the job

The time of submission

The name of the virtual printer

Each tab has a set of related parameters and values that you can select.

Table 3: Description of tabs in the Jobs Parameters window

This tab

Enables you to

Print Settings

Set print related job parameters—for example, 

Print range 

and 

Print method

. See 

The Print 

Settings Tab

 on page 159

Paper Stock

Set job parameters related to paper stock—for 
example, 

Paper size

 and 

Paper set name

. See 

The 

Paper Stock Tab

 on page 169

Print Quality

Set job parameters related to print quality—for 
example, 

Trapping

 and 

Image quality

—and 

improve the quality of printed jobs. See 

The Print 

Quality Tab

 on page 178

Summary of Contents for CXP6000 Color Server

Page 1: ...www creo com User Guide English Spire CXP6000 Color Server for Xerox DocuColor 6060 5252 2060 and 2045 Digital Color Presses 731 00116A EN Rev D...

Page 2: ...This page is intentionally left blank...

Page 3: ...Spire CXP6000 color server version 4 0 User Guide...

Page 4: ...This page is intentionally left blank...

Page 5: ...or registered trademarks of Microsoft Corp Xerox is a registered trademark of Xerox Corp Other brand or product names are the trademarks or registered trademarks of their respective owners FCC Compli...

Page 6: ...367 360 5 384 648 5 384 899 5 412 491 5 412 737 5 420 702 5 420 722 5 459 505 5 473 733 5 481 379 5 488 906 5 497 252 5 508 828 5 509 561 5 517 359 5 519 852 5 526 143 5 532 728 5 561 691 5 568 595 5...

Page 7: ...ycle Any item that can be recycled should be recycled and any item that can be reused should be reused to reduce the quantities of trash that cities must handle Recycling Used items such as paper plas...

Page 8: ...This page is intentionally left blank...

Page 9: ...20 The Server and Printer Monitors 21 The Settings Window 25 The Resource Center 26 The Job Parameters Window 27 Handling Conflicts 31 Basic Job Workflow 31 Submitting 32 Processing 33 Storage 34 Resu...

Page 10: ...Performance Using the Windows Registry 123 Creating a File name Translation File 124 Configuring NFS Server Settings with SFU 125 Setting Up Windows SFU for Brisque 126 Brisque Workstation Installatio...

Page 11: ...Job Editor 208 Editing RTP Jobs 213 Job Accounting 217 Viewing the Accounting Information 217 Setting the Accounting Message Viewer 220 Printing and Exporting the Accounting Log 220 Managing Virtual...

Page 12: ...00 Color Server 306 Downloading Fonts 307 Substituting Fonts 311 7 Color Workflow 313 Calibration 314 Guidelines for Successful Calibration 315 The Calibration Process 315 Calibrating the DTP34 Densit...

Page 13: ...ng VI Structure to Large Files Split to Booklets 401 10 System Administration 403 Setting Up and Configuring the Spire CXP6000 Color Server 404 Server Setup 404 Network Setup 407 Remote Tools Setup 41...

Page 14: ...ng the Configuration Type 461 Setting the Language 462 Configuring the Host Name 463 Setting the Date and Time 466 Setting the Default Measurement Units 467 Configuring the IP Address 468 Configuring...

Page 15: ...Welcome Welcome to the Spire CXP6000 Color Server User Guide 2 Overview of Guide 3 Overview of Spire CXP6000 Color Server 4...

Page 16: ...nting needs and delivers the best output quality available Throughout this guide we look forward to supporting you all the way from prepress to print This user guide will help you operate the Spire CX...

Page 17: ...e CXP6000 color server such as importing and printing jobs and how to set basic parameters in the Print Settings Paper Stock and Print Quality Tab Chapter 5 Managing Jobs This chapter explains how to...

Page 18: ...DocuColor 6060 Digital Color Press the Spire CXP6000 color server enables you to efficiently print flyers brochures pamphlets dummy catalogs short run trials and print on demand publications When ins...

Page 19: ...tools and special hardware development capabilities with PC architecture Spire CXP6000 color server for Xerox DocuColor 6060 5252 2060 and 2045 Digital Color Presses WARNING A shielded ethernet cable...

Page 20: ...color server graphic user interface has been updated to a new design with new icons and a new feel that is more user friendly New features of the GUI include new options such as user profiles and pre...

Page 21: ...can be imported via Profile Manager Destination profile Mapping to destination profiles according to paper sets Feature Enhancements The following feature enhancements have been added Dynamic page ex...

Page 22: ...the need to re RIP jobs RIP Adobe Postscript Level III and Extreme Certified technologies The Spire CXP6000 color server uses the industry standard Adobe RIP with enhancements for Continuous Tone and...

Page 23: ...bs Color Management The Spire CXP6000 color server has a number of color management tools and utilities that will help you to improve the quality of your jobs The Spire CXP6000 color server enables yo...

Page 24: ...VPS Variable Print Specification VIPP Variable Data Intelligent PostScript Params PPML Personalized Print Markup Language GAP Graphic Art Port files file formats from various prepress systems for exa...

Page 25: ...default Spire color server virtual printers for example ProcessPrint File begins processing according to settings predefined in the file or for the selected virtual printer File is spooled to the Spi...

Page 26: ...stored on an image disk 4 When printing starts the RTP job elements on the disk are decompressed and merged to the correct location on the page This is done using Creo hardware 5 The image delivery s...

Page 27: ...files such as PS PDF VIPP VPS to the spool store not RIPped RTP files ProcessPrint Files sent to this virtual printer are processed and printed directly to the Xerox DocuColor 6060 Digital Color Pres...

Page 28: ...This page is intentionally left blank...

Page 29: ...he Spire CXP6000 Color Server 16 The Workspace 19 The Server and Printer Monitors 21 The Settings Window 25 The Resource Center 26 The Job Parameters Window 27 Basic Job Workflow 31 Turning Off the Sp...

Page 30: ...Workspace From the Start Menu later in this chapter By default the Auto Log On check box is selected in the Settings window This option enables you to open the workspace without having to go through t...

Page 31: ...n the workspace without having to go through the logon process each time If you want each user to have to log on to the Spire CXP6000 color server you need to clear the Auto Log On check box and then...

Page 32: ...color server Guest Enables the user to import a job through an existing virtual printer and view the workspace Logging On as a Different User If you are already working in the Spire CXP6000 color serv...

Page 33: ...P6000 color server workspace Item Name Description 1 Menu Bar Consists of the Job Selection Tools Control View and Help menus Click a menu name to open the corresponding menu 2 Status Panel Contains t...

Page 34: ...Queue and Process Queue 4 Queues Consists of the Process Queue which lists the files to be processed After a file has been processed successfully it moves either to the Print Queue the upper area or t...

Page 35: ...to the printer icon The calibration reminder indicator reminds you to calibrate the printer You can set the reminder in the Settings window Note The CXP6000 Color Server always displays the workspace...

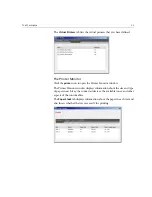
Page 36: ...the DFE Monitor window This window displays information about disk space network details and the virtual printers you have defined The Disk Usage tab shows how much space is available on the user dis...

Page 37: ...to open the Printer Monitor window The Printer Monitor window displays information about the size and type of paper in each tray the connected devices the available toner and other aspects of the cons...

Page 38: ...hapter 2 Getting Started The Finisher tab displays information about finishing devices that are connected to the Xerox DocuColor 6060 Digital Color Press The Toner tab shows whether there is enough to...

Page 39: ...Window 25 The Consumables tab displays the status of other refillables The Settings Window You can set all system preferences in the Settings window To open the Settings window From the Tools menu sel...

Page 40: ...can configure the settings The Resource Center The Resource Center enables you to add remove and manage external resources for the Spire CXP6000 color server To open the Resource Center From the toolb...

Page 41: ...e Managing VI Elements on page 398 Paper Sets see Managing Paper Sets on page 170 Profile Manager see Profile Manager on page 358 The Job Parameters Window The Spire CXP6000 color server enables you t...

Page 42: ...Jobs Parameters window This tab Enables you to Print Settings Set print related job parameters for example Print range and Print method See The Print Settings Tab on page 159 Paper Stock Set job param...

Page 43: ...ee The Imposition Tab on page 233 Services Set job parameters that will assist your job workflow for example APR path and Preflight See Creo APR on page 255 Preflight Check on page 380 Substituting Fo...

Page 44: ...on number Date the version was installed Any updates that were installed on top of the version To open the online help From the Help menu select Topics Note The title in the splash screen varies accor...

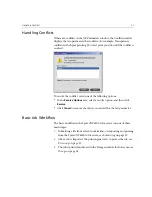
Page 45: ...ns area select a resolve option and then click Resolve Click Cancel to remove the value you selected for the last parameter Basic Job Workflow The basic workflow in the Spire CXP6000 color server cons...

Page 46: ...example ProcessPrint The job is spooled and then processed or printed according to the selected job flow of the virtual printer If you use this method you can print from any application for example Mi...

Page 47: ...that are waiting to be processed The Print Queue lists the job that is currently printing and all the jobs that were processed successfully and are waiting to be printed The Print Queue also lists fr...

Page 48: ...2 Getting Started Storage Note If there are very short jobs in the Print Queue several jobs may be running at the same time The jobs marked as running are listed first and are printed in the order of...

Page 49: ...d edit jobs prior to reprinting You can change job parameters in the Job Parameters window Certain changes to the job parameters require you to re RIP the job The Spire CXP6000 color server automatica...

Page 50: ...n has disappeared from your taskbar 3 From the Windows desktop select Start Shut Down 4 In the shutdown dialog box select Shut down 5 When the Windows shutdown is complete turn off the monitor 6 On th...

Page 51: ...om Macintosh Client Workstations 67 Spire Web Center 78 Using Hot Folders 86 LPR Printing with the Spire CXP6000 Color Server 92 UNIX Connectivity 121 Configuring and Setting up NDS 138 Defining NDS P...

Page 52: ...ments An additional default network printer is provided for Macintosh networks FontDownLoader This is a special network printer that you use with Macintosh client workstations to download fonts The Fo...

Page 53: ...Print window of an application For more information about print settings see Printing From Windows on page 65 and Printing from a Macintosh on page 76 For more information about virtual printers see A...

Page 54: ...s face up on the printer Face Down delivers the pages face down on the printer when printing confidential documents Collation Yes prints a complete copy of the job before the first page of the next co...

Page 55: ...g applies the Creo proprietary smooth scale algorithm which improves the quality of images containing several resolutions such as images taken from the Internet Normal provides standard image quality...

Page 56: ...verride PS Overprint commands from DTP applications For example if PS Overprint was set to Yes in a DTP application selecting PS Overprint No in the Spire CXP6000 color server results in no overprinti...

Page 57: ...Use Spire RGB2 1 Use Spire RGB 2 4 Use sRGB or Use Adobe RGB Gray RGB Select Print grays using CMYK to print grayscale CMYK elements using black toner only Select Print grays in black toner to print...

Page 58: ...u selected an emulation method Preserve Pure Colors Yes to emulate pure CMYK colors No This parameter is available only you selected an emulation method Rendering Intent for CMYK Rendering intent defi...

Page 59: ...tem uses Line type screen of 200 lpi Dot 150 applies Dot type screen of 150 lpi Dot 200 applies Dot type screen of 200 lpi Line 200 applies line type screen of 200 lpi Line 300 applies line type scree...

Page 60: ...deletes pages once they have been successfully printed and thus sustains enough free disk space for the duration of the print run Each successfully printed page of the job is immediately deleted whil...

Page 61: ...the top tray HCS EHCS Stack Tray to print to the stack tray which is the internal tray For the Xerox DocuColor 5252 2060 and 2045 Digital Color Presses select the Bypass Tray option to print to the D...

Page 62: ...t two staples along the right side Landscape Dual Left two staples along the left side Landscape Dual Top two staples along the top Portrait Single TL a single staple in the top left corner Portrait S...

Page 63: ...printer using the Windows Add Printer wizard 1 On your Windows desktop click the Start button and select Settings Printers 2 Double click the Add Printer icon 3 Select Network printer server and then...

Page 64: ...lick Finish to complete the setup The Spire CXP6000 color server network printer is now successfully installed To define a network printer using the network neighborhood 1 Locate the required network...

Page 65: ...t button and follow the path Settings Printers 2 Double click the Add Printer icon The Add Printer wizard appears 3 Click Next Note To install additional network printers repeat the process Note When...

Page 66: ...e queue name of your printer Or If you don t know the exact name click Browse to view the available network printers a Select one of the network printers for example ProcessPrint b Click OK 6 Click Ne...

Page 67: ...ent workstation Defining a Printer Windows 2000 and Windows ME To define a network printer using the Windows Add Printer wizard 1 On your Windows desktop click the Start button and follow the path Set...

Page 68: ...54 Chapter 3 Working From a Client Workstation 3 Click Next 4 Select Network printer 5 Click Next 6 Select Type the printer name or click Next to browse for a printer...

Page 69: ...computer Otherwise select No 11 Click Next 12 Click Finish to complete the setup The Spire CXP6000 color server network printer is now successfully installed To define a network printer using the net...

Page 70: ...ton and select Printers and Faxes 2 In the Printer Tasks area select Add a printer The Add Printer wizard appears Note When you add a new Spire CXP6000 color server network printer to a client worksta...

Page 71: ...Working From Windows Client Workstations 57 3 Click Next 4 Select A network printer or a printer attached to another computer and click Next 5 Select Browse for a printer and click Next...

Page 72: ...ult printer on your computer Otherwise select No 9 Click Next 10 Click Finish to close the wizard The Spire CXP6000 color server network printer is added to your printer list To define a network print...

Page 73: ...edia These files can then be imported to the Spire CXP6000 color server for printing To create a PostScript File 1 Open a job in your DTP application for example Microsoft Word and from the File menu...

Page 74: ...60 Chapter 3 Working From a Client Workstation 3 Read the license agreement and click Accept 4 Select It is directly connected to your computer Local Printer and click Next...

Page 75: ...server PPD file The Spire CXP6000 color server PPD file is located in a shared folder on the Spire CXP6000 color server 6 Click Browse Note The Spire CXP6000 color server uses the following PPD file...

Page 76: ...icon Then double click the Utilities folder 9 Click OK 10 Double click the PPD folder and select the Spire CXP6000 color server PPD file name Note The Spire CXP6000 color server uses the following PPD...

Page 77: ...en click Next 14 Type a name for the printer which you will be able to identify on the client workstation for example CXP6000_ProcessStore 15 Select Yes Recommended if you want to print a test page or...

Page 78: ...figure the printer according to your specifications and then click OK 20 Click Finish to complete the setup The printer appears in the Printers window You are now ready to print ps and prn files Once...

Page 79: ...0 color server station for example V3_DC6060 3 Double click the Utilities folder and then double click the PPD folder 4 Double click the folder for the desired language for example English 5 Copy the...

Page 80: ...pire CXP6000 color server For more information about installing Spire CXP6000 color server network printers on client workstations see Working From Windows Client Workstations on page 48 Notes Unless...

Page 81: ...rinters over a TCP IP protocol This connection enables a significantly higher spooling speed Defining a Printer on Macintosh Client Workstations Copying the Spire CXP6000 color server PPD File for Mac...

Page 82: ...on and then click Connect The corresponding Spire CXP6000 color server window appears 5 Select Utilities and then click OK 6 On the desktop double click the Utilities volume The Utilities window appea...

Page 83: ...e CXP6000 color server network printers Setting the Network Printer for Mac OS 9 1 Make sure that the Spire CXP6000 color server PPD file has been copied to the Printer Descriptions folder on your cli...

Page 84: ...om a Client Workstation 3 Select LaserWriter and then locate the Spire CXP6000 color server on the network 4 Select one of the Spire CXP6000 color server s network printers for example CXP6000_Process...

Page 85: ...top Printer Spooler extension enabled a printer icon appears on the desktop Copying the Spire CXP6000 Color Server PPD File for Mac OS X 10 2 Before you define a network printer you need to install th...

Page 86: ...72 Chapter 3 Working From a Client Workstation The Connect to Server window appears 2 Locate the desired Spire CXP6000 color server and then click Connect 3 Select Guest and then click Connect...

Page 87: ...6 Double click the PPD folder and then double click the folder for the desired language 7 Copy the PPD file from the Spire CXP6000 color server to your Macintosh hard disk Note The Spire CXP6000 color...

Page 88: ...rom the Go menu select Applications 3 Open the Utilities folder and double click the Print Center icon 4 Click Add Printer Tip It is recommended that you copy the PPD file by dragging it from the Spir...

Page 89: ...the PPD file and then select the file Note If you would like to use the LPR protocol instead see the procedure Setting up an LPR Printer in Macintosh OS X 10 2 on page 108 Note The Spire CXP6000 colo...

Page 90: ...ile to the selected Spire CXP6000 color server network printer 9 Click Add to add the new printer to the printer list Printing from a Macintosh 1 Open the file you would like to print in the correspon...

Page 91: ...al and from the pop up menu select one of the Printer Specific Options A window similar to the one shown below appears For more information about installing the Spire CXP6000 color server network prin...

Page 92: ...uch as release notes Spire guides frequently asked questions and answers and other troubleshooting information Find links to related vendors or products To connect to the web center from a client work...

Page 93: ...u can also use the Spire color server IP address for example http 192 168 92 0 Important If you would like to connect to the Spire CXP6000 color server from a Macintosh client workstation contact your...

Page 94: ...at currently appear in the Alerts window This information is important when you print from a client workstation because it enables you to monitor your jobs in the queues and then make any necessary ch...

Page 95: ...Spire Web Center 81 The Storage tab In the Storage tab you can view the Spire CXP6000 color server Storage window and the jobs that reside in this window...

Page 96: ...e Spire CXP6000 color server Alerts window messages For example if a job that you sent to print from your client workstation has failed you can view the message in the Alerts window edit the job param...

Page 97: ...and the printer status The JobList xml file contains information about files in the Print Queue Process Queue and the Storage window To see the Job List view type the following path http ComputerName...

Page 98: ...ation Downloads The Downloads page enables you to access the Spire CXP6000 color server Utilities folder and download available tools and files for Windows and Macintosh client workstations for exampl...

Page 99: ...Spire Web Center 85 Links The Links page enables you to link to related vendors or products...

Page 100: ...me HF_printer s name see the following graphic When you connect from a client workstation to the Spire CXP6000 color server over the network you can use the hot folder to submit PDL jobs to the Spire...

Page 101: ...to a PDF which is displayed in the Spire CXP6000 color server queues The PDF files can then be programmed and printed as any other PDF file Using Hot Folders from Client Workstations You can use hot f...

Page 102: ...u can now drag the required files to the hot folder All the files are processed and printed automatically to the printer according to the hot folder workflow To print a job using a hot folder from Mac...

Page 103: ...click Connect 4 From the list select the required hot folder for example HF_ProcessPrint and then click OK The hot folder icon appears on your desktop You can now drag the required files to the hot f...

Page 104: ...90 Chapter 3 Working From a Client Workstation To print a job using a hot folder from a Mac OS X 1 From the Finder menu bar select Go Connect to Server The Connect to Server window appears...

Page 105: ...n click Connect 4 From the list select the required hot folder for example HF_ProcessPrint and then click OK The hot folder icon appears on your desktop You can now drag the required files to the hot...

Page 106: ...T Windows 2000 Windows XP command Line Mac OS X 10 2 Mac OS 9 using the Choose Spire Over IP utility Linux AIX and UNIX command line Setting up an LPR Printer in Windows NT 4 0 The following procedure...

Page 107: ...ilities PC utilities or you can download the latest version free from http www adobe com support downloads main html 4 Spire CXP6000 color server PPD file copied to your client workstation the PPD fil...

Page 108: ...er 3 Working From a Client Workstation 2 From the File menu select Server Properties 3 Click the Ports tab and then click Add Port 4 In the Available Printer Ports list select LPR Port and then click...

Page 109: ...twork printer from which you want to print To view the exact name of the printer on the Spire CXP6000 color server select Resource Center Virtual Printers In this example the Printer name is OPAL5_Pro...

Page 110: ...es PC utilities or you can download the latest version free from http www adobe com support downloads main html 2 In the Welcome window click Next 3 The End User License Agreement window appears read...

Page 111: ...pire CXP6000 color server on your network 7 In the Select Printer Model window click Browse The Browse for Printer window appears 8 Locate and select the Spire CXP6000 color server PPD file 9 Click OK...

Page 112: ...3 To set this printer as the default printer on your computer select Yes Otherwise select No 14 Select Yes Recommended if you want to print a test page Otherwise select No 15 Click Next 16 In the Setu...

Page 113: ...rver using the LPR Setting up an LPR Printer in Windows 2000 and Windows XP The following procedure describes how to configure an LPR printer in Windows 2000 and Windows XP for printing to the Spire C...

Page 114: ...is located on the Spire CXP6000 color server in the D utilities PPD folder To define an LPR Printer 1 From the Start menu on the Windows desktop select Settings Printers The Printers window appears 2...

Page 115: ...ter wizard screen appears 5 Click Next The Add Port screen appears 6 In the Printer Name or IP Address box type the exact name of the Spire CXP6000 color server this box is case sensitive for example...

Page 116: ...Working From a Client Workstation The Additional Port Information Required screen appears 9 In the Device Type area select Custom and then click Settings The Configure Standard TCP IP Port Monitor sc...

Page 117: ...XP6000 color server under Resource Center Virtual Printers In this example the Printer name is OPAL5_ProcessPrint LPR Byte Counting Enabled Select this check box 11 Click OK and then click Next 12 Cli...

Page 118: ...nd then click Accept 4 Select Install a new PostScript Printer and then click Next 5 In the Printer Connection Type window select It is directly connect to your computer Local Printer and then click N...

Page 119: ...or the printer that you will be able to identify on your computer for example OPAL5_ProcessPrint LPR You can also keep the original name of the printer 13 Select Yes if you want to set this printer as...

Page 120: ...o configure the printer click Yes 18 Click Next 19 In the Printer Configuration window select Yes when prompted to configure the printer 20 Click Next The CXP6000 Properties window appears 21 Configur...

Page 121: ...u want to print 4 Type the following in the command line lpr S server name P virtual printer name ol file name and then press ENTER For example lpr S OPAL3 P OPAL3_ProcessPrint ol brochure ps Your fil...

Page 122: ...R Printers using IP as the connection type 3 In the LPR Printer s Address box type the TCP IP address or hostname of the Spire CXP6000 color server for example 10 4 18 169 4 Clear the Use default queu...

Page 123: ...he folder to which you have copied the PPD file 8 Click Choose to assign the CXP6K604 ppd file to the selected Spire CXP6000 color server network printer Note This box is case sensitive Note The Spire...

Page 124: ...ou to submit jobs from a Macintosh client workstation using the Spire CXP6000 color server virtual printers over a TCP IP protocol This connection provides a significantly higher spooling speed Note B...

Page 125: ...loads main html If you do not have a compatible LaserWriter application installed you can download this application from the Spire CXP6000 color server D Utilities Mac utilities folder To install the...

Page 126: ...tion 3 Select Guest and click Connect The corresponding Spire CXP6000 color server dialog box appears 4 Select the Utilities folder and then click OK 5 The Utilities folder icon appears on your deskto...

Page 127: ...e CXP6000 Color Server 113 6 Double click the Choose Spire Over IP Installer icon 7 Click Install After the installation is complete a message appears 8 Click Quit The Choose Spire Over IP option is n...

Page 128: ...of the Spire CXP6000 color server double click Local Services and then double click the Spire CXP6000 color server icon for example FALCON_COLOR 11 To create a desktop printer for a specific print que...

Page 129: ...the printer name if you want Otherwise click OK The desktop printer is created and configured and the following progress indicator appears Note The Spire CXP6000 color server uses the following PPD fi...

Page 130: ...CXP6000 color server using the command line or by defining a printer using the Linux user interface in this case Red Hat Linux Linux Command Line 1 Select System Tools Terminal Window to open a Termi...

Page 131: ...TER Your file is printed to the CXP6000 Color Server Linux User Interface The following procedure reflects Red Hat Linux version 8 0 1 Select System Settings Printing 2 Click New to setup a new LPR LP...

Page 132: ...example OPAL3_LPR 5 Click Forward The Configure a Unix Print Queue dialog box appears 6 In the Server box type the Spire CXP6000 color server name for example OPAL3 7 In the Queue box type the exact n...

Page 133: ...r and then click Forward The Finish and Create the New Print Queue screen appears 10 Click Apply 11 In the Red Hat Printer Config dialog box click Apply 12 When prompted click OK The new LPR LPD print...

Page 134: ...defined on the remote server for example ProcessPrint 5 Click OK Printing from a UNIX Client Workstation To print from a UNIX client through LPR 1 Type the following lpr space P space local UNIX prin...

Page 135: ...window click Next 3 Click in the User name box and type your name 4 In the CD Key boxes type the product key number that is located on the back of the CD ROM s case and then click Next 5 Read the End...

Page 136: ...Server for NFS Authentication Authentication tools for NFS User Name Mapping When you have finished specifying all the components to install click Next 8 Click Next A dialog box appears stating that...

Page 137: ...ite chaching is enabled the speed of NFS file write operations is increased You can expect NFS file write performance to be in the range of 5 7 MB second You can download a special registry file that...

Page 138: ...txt translation text file to import into SFU To download the translation text file and import it into SFU 1 From the TechPlanet location http techplanet creo com pos entry_production nav index htm rig...

Page 139: ...rvices for UNIX Services for UNIX Administration The SFU 3 0 application starts 2 In the navigation pane select the Server for NFS icon 3 In the Server for NFS on local computer pane select the Server...

Page 140: ...The Run dialog box appears 2 In the Run text box type cmd and click OK A command line prompt window appears 3 At the command line prompt type ftp Brisque IP address and press ENTER For example type ft...

Page 141: ...ppears 3 Click the Settings tab 4 In the User Name Mapping Server area check that the name displayed in the Computer name text box is the same as the name of the local Windows system being used 5 In t...

Page 142: ...om Brisque via FTP Then click Open 8 In the Group file path and name text box click Browse and select the group file that you copied from Brisque via FTP Then click Open 9 From the menu bar at the top...

Page 143: ...scitex 13 Click Add A dialog box appears 14 Click OK The mapping appears in the Mapped users list area A message appears Are you sure you want to set advanced mapping for this account 15 Click Yes 16...

Page 144: ...17 Click Apply 18 Click in the Windows group list area and select Administrators 19 Click in the UNIX groups list area and select scitex 20 Click Add A dialog box appears 21 Click OK The mapping appea...

Page 145: ...my My Computer 2 Right click the desired folder or volume and select Properties Or Right click the icon that represents the disk s volume and select Properties The NFS Share Properties dialog box app...

Page 146: ...sions button The NFS Share Permissions dialog box appears 9 Click the Type of access list box and select Read Write 10 Select the Allow root access check box 11 Click OK The shared folder appears in t...

Page 147: ...ars 2 In the navigation pane select the Services and Applications icon 3 Select the Services icon A list of services that are currently running is displayed in the adjacent pane 4 From the list of ser...

Page 148: ...dure describes how you add the Windows 2000 computer as a Brisque host by editing the etc hosts file To add the Windows system as a Brisque host 1 From the Brisque Launch Pad open the Services panel a...

Page 149: ...ation 9 Click in the COMMENT text box and type NT 10 Click OK 11 From the Exit menu click Exit Mounting the Windows NFS Volume This procedure describes how you mount the Windows 2000 volume on Brisque...

Page 150: ...and select the desired volume to mount 6 From the Permission list select Read Write 7 Click OK Note This step is only required if you are running Brisque version 3 x and Brisque version 4 0 Brisqueve...

Page 151: ...he Windows NFS volume is mounted correctly 1 From the Brisque File Manager right click on Brisque job page or file and select Send The Send Job dialog box appears 2 Click in the Destination text box a...

Page 152: ...e NDS 4 Verify the connection information 5 Configure the IPX Printing parameters Tree and Context using the Spire CXP6000 color server Settings window Network Setup IPX Printing in the Spire CXP6000...

Page 153: ...nd Print Queues using the NetWare Admin application 1 Define the NDS Print Server Printer and Print Queue in the NDS Tree 2 Assign the printer to the Print Server and the Print Queues to the printer 3...

Page 154: ...ware Administrator Application Open the Netware Administrator Application provided by your Novell Administrator The NetWare Administrator window appears and displays the NDS window The following examp...

Page 155: ...he Create Print Server dialog box appears 5 In the Print Server name box type nwprintserver Note Before performing the following procedure check the Novell Server window and if the nwprintserver alrea...

Page 156: ...orking From a Client Workstation 6 Click Create The NDS nwprintserver printer is created and appears in the NDS window To define an NDS printer 1 From the Object menu select Create The New Object dial...

Page 157: ...print queues 1 From the Object menu select Create Note In Novell version 5 0 NDS and later the words Non NDPS also appear Notes Both hostname_ProcessPrint and hostname_ProcessStore queues should be d...

Page 158: ...Class Of New Object list select Print Queue 3 Click OK 4 Verify that Directory Service Queue is selected 5 In the Print Queue name box type the exact case sensitive virtual printer name hostname_Proc...

Page 159: ...9 Click OK The print queue volume name appears in the Print Queue Volume box 10 Click Create The print queue is now added to the NDS window along with the nwprintserver and the printer name Spire_Pri...

Page 160: ...virtual printer name hostname_ProcessStore for example Spire7_ProcessStore 14 Click the Print Queue Volume icon The Select Object dialog box appears 15 Select any existing volume 16 Click OK The prin...

Page 161: ...es in the NDS Tree 147 2 Click Assignments to open the Assignments tab 3 Click Add The Select Object dialog box appears 4 From the printers select the printer name you have defined for example Spire_P...

Page 162: ...ient Workstation The printer appears in the Printers list 5 Click OK To assign a print queue to the printer 1 In the NDS window double click the printer name you have defined for example Spire_Printer...

Page 163: ...DS Printer Queues in the NDS Tree 149 2 Click Assignments to open the Assignments tab 3 Click Add The Select Object dialog box appears 4 Select the queue name hostname_ProcessStore you have defined an...

Page 164: ...Workstation 5 Click Add and select hostname_ProcessPrint Both printer queues now appear in the Print queues list 6 Click OK To verify the new NDS layout 1 In the NDS window double click nwprintserver...

Page 165: ...printers can be defined as NDS printer queues at the NDS Server using the NDS PConsole This procedure includes the following stages 1 In the Spire CXP6000 color server verify that the two virtual pri...

Page 166: ...ull context path name in the Spire CXP6000 color server Settings window see Configuring IPX Printing on page 152 Restart the Spire CXP6000 color server application 4 Install the Novell Printer Queue o...

Page 167: ...rea click Change Settings next to the Tree parameter 4 Type the exact Tree parameter and the full containers path of the Context parameter in their respective boxes You can also click Browse and brows...

Page 168: ...erver Utility folder 2 In the Adobe PostScript Wizard verify that you have selected the Novell printer queue from the NetWare Network and not the Spire CXP6000 color server virtual printers See the fo...

Page 169: ...Basic Workflows Importing and Printing Jobs 156 Reprinting Jobs 158 Basic Settings 159...

Page 170: ...s created on a client workstation that is not connected to the Spire CXP6000 color server When a PDL file is located on an external medium such as a CD ROM When the required file resides locally on th...

Page 171: ...Click Import All files currently listed on the lower list are sent to the Spire CXP6000 color server to be processed and printed as defined in the selected virtual printer To check the status of impor...

Page 172: ...All Jobs to stop importing all the files Click Close to close the Importing Retrieving window Reprinting Jobs Submitting an RTP Job Requiring no Changes Select the job in the Storage window and from...

Page 173: ...t Settings Tab The Print Settings tab enables you to set print related job parameters such as the print range the number of copies you would like to print the print method and order In addition you ma...

Page 174: ...160 Chapter 4 Basic Workflows No of Copies Enter the Number of Copies to be printed Print Range...

Page 175: ...Pages Booklets and specify the pages or booklets to be printed as follows Type one or several numbers separated by commas and no spaces For example 1 3 5 Type a range of pages or booklets with a hyph...

Page 176: ...t the Print method to one of the following Simplex for single sided printing Duplex Head to Toe for calendar style hard copies usually used with landscape jobs Duplex Head to Head for printing book st...

Page 177: ...Basic Settings 163 Print Order Set the print order to From 1 to N front to back or From N to 1 back to front...

Page 178: ...t Face Up or Face Down as the delivery option Tip Use Face Down when printing confidential documents Note When you collate a document select Face Down or Face Up and From N to 1 in the Print order par...

Page 179: ...xt copy is printed No prints all copies of each page before going on to the next page For example if you have a 20 page job and you select Yes all 20 pages will be printed before the next copy of the...

Page 180: ...ad the edge of a sheet at which printing begins The page s Lead and Rear edges are determined just after the page is printed out before making any change in the page orientation To adjust the image po...

Page 181: ...om arrows for positive negative values toward away from the rear edge Image Scale Select the desired Image scale option 100 prints at 100 of the original size default Fit to Paper for the image to fit...

Page 182: ...168 Chapter 4 Basic Workflows Rotate 180 To rotate your job by 180 select Yes Gallop...

Page 183: ...of pages to RIP before starting to print The Paper Stock Tab The Paper Stock tab enables you to set paper stock related job parameters The Spire CXP6000 color server uses multiple paper stock paramet...

Page 184: ...et values Paper Size Type Weight and Coating appear in the corresponding parameters in the Paper Stock tab Managing Paper Sets The Spire CXP6000 color server is provided with predefined paper sets for...

Page 185: ...ties window appears 3 Enter the following parameters Name enter the new paper set name It is recommended that the name is as descriptive as possible for example Letter90gsmuncoat From the Size Color W...

Page 186: ...ow appears 3 Modify the required properties of the paper set 4 Click OK To delete a paper set 1 In the Resource Center window with the Paper Sets option selected select the paper set you would like to...

Page 187: ...size options are displayed as follows 2 Type the required Height and Width 3 Select the required Feed Direction LEF Long Edge Feed SEF Short Edge Feed Note Units of measurement mm or inches reflect s...

Page 188: ...from the list Or Use the default Same as job Or Click the browse button and add a new paper set For more information about adding a paper set see Managing Paper Sets on page 170 Notes Slip sheets and...

Page 189: ...be used Weight From the Weight list select the required stock weight Note If you are using the Xerox DocuColor 5252 Digital Color Press or Xerox DocuColor 2060 and 2045 Digital Color Presses you can s...

Page 190: ...176 Chapter 4 Basic Workflows Coating Select Coated to print on coated paper...

Page 191: ...will be used Notes The Auto tray option uses the paper in the selected tray only if it complies with all the other paper stock parameters If the paper stock in the assigned tray mismatches with any J...

Page 192: ...the overprint information by setting the PS overprint and set the image noise level Text Line Quality Text Line Quality refers to the Creo anti aliasing algorithm for superior text quality Text Line Q...

Page 193: ...de superior text quality Normal default to provide regular text quality Normal with jaggies High Notes Anti aliasing is used to avoid or minimize jaggies rough edges which are the result of the limite...

Page 194: ...s several images at different qualities for example images that were scanned at different resolutions were rotated or downloaded from the internet To select the image quality select one of the followi...

Page 195: ...e accuracy of the printing device and results in white lines around objects on top of a background in a knock out procedure and also between adjacent colors The solution is to extract the element and...

Page 196: ...ess box select the default 0 08 for the thickness of the trapping frame or type the required value Select the Protect Small Text check box so that any text that is smaller or equal to 12 pt is not fra...

Page 197: ...only the topmost color This results in lesser color density and can cause misregistration if separations are not perfectly aligned When Black Overprint is active there are no knock outs under the bla...

Page 198: ...erprint option to No the result is no overprinting The Spire CXP6000 color server can t create PS Overprint that is not pre defined in the file If you select the Yes option default for a file that has...

Page 199: ...pping a cyan circle selecting No results in the cyan background being knocked out so only the yellow is printed To set the PS overprint select one of the following options Select Yes to use the overpr...

Page 200: ...er 4 Basic Workflows To set the image noise level 1 In the Image noise options select Yes 2 Change the image noise level if required by moving the slider the higher the level the smoother the vignette...

Page 201: ...Managing Jobs Managing the Job Queues 188 Managing the Storage Window 200 Job Editor 207 Job Accounting 217 Managing Virtual Printers 222 Job Flow 226...

Page 202: ...es window which includes both the Process Queue and Print Queue or in the Storage window depending on the selected job flow The Process Queue lists all the jobs that are waiting to be processed and th...

Page 203: ...hile all others are Waiting jobs If required you can change the order of Waiting jobs in the queues or view edit the parameters of a job To close the Queues window Click the Close button on the window...

Page 204: ...e being processed Status indicators indicate the status of each job Table 5 describes the status indicators used in both the Process Queue and Print Queue For more information about operations on the...

Page 205: ...job for example PS PDF VPS Title Name of the file to be printed If you submit a file whose name already exists in the Spire CXP6000 color server a sequential number is automatically added to the file...

Page 206: ...e Paper set name or stock name Media Size Paper size Media Weight Paper weight Media Type Paper type Media Coat Paper coating File Size File size of the job Account Account name taken from the Job inf...

Page 207: ...saves printing time especially for a large number of short small jobs The following job types cannot be combined to one batch Collated and uncollated jobs Jobs with different output trays Jobs with d...

Page 208: ...r a job in the Queues window Right click a job and select one of the following options Promote To move the selected job one step up in the queue Promote to top To move the selected job to the top of t...

Page 209: ...n switches to resume mode The top job in the queue starts processing printing Handling Jobs in the Queues You can perform the following tasks from the Process Queue and the Print Queue Abort a running...

Page 210: ...e or the Print Queue and from the menu select Abort The job is removed from the queue to the Storage window and the Alerts window is updated The Aborted status is assigned to the job and the next job...

Page 211: ...Select one or several jobs in the Process Queue or Print Queue 2 Right click the job and select Move to storage The job s are removed from the Process or Print Queue to the Storage window The Held sta...

Page 212: ...the required job in the Queues or Storage window and from the menu select Job Parameters Or Double click the required job in the Queues or Storage window The Job Parameters window appears Note Once a...

Page 213: ...the currently printing job will preserve its Running job status but its printing will be paused while the rush job takes priority and is printed After the rush job has finished printing the paused job...

Page 214: ...directly from the client to the Storage window that is using the Spool Store workflow To close the Storage window Click the Close button on the window s title To open the Storage window From the View...

Page 215: ...he Storage window is assigned one of the following statuses By default the Storage window lists jobs of all statuses all status indicators are selected By selecting one or more status types you can fi...

Page 216: ...199 Preview and edit a job using the Job Preview Editor See Job Editor on page 207 View and modify the parameters of a job See Viewing and Editing the Job Parameters on page 198 Archive a job See Arc...

Page 217: ...he Job Parameters window click Submit RTP Jobs are submitted to the Print Queue all other jobs are submitted to the Process Queue Duplicating Jobs 1 Right click a job and from the menu select Duplicat...

Page 218: ...eved with the job To archive and retrieve VI elements select Resource Center Cached VI Elements To archive retrieve a VI job first archive retrieve the VI elements You can also set a default archiving...

Page 219: ...w verify that a completed processing of archive message appears 4 You can now delete the job from the Storage window To retrieve an archived job 1 From the Job menu select Retrieve from Archive Notes...

Page 220: ...Failed Held or Aborted it had when it was stored 3 In the Alerts window verify that a completed processing of restore message appears Note Find the job using the archived job name Notes If required yo...

Page 221: ...click any RTP job in the Storage window and from the menu select Job Preview Editor The Job Editor window appears displaying the first page of the selected job Navigation buttons The Navigation button...

Page 222: ...w of the job in its actual size If you navigate to another page the view retains the Actual Size mode The Fit to page button click this button to preview full pages If you navigate to another page the...

Page 223: ...s highlighted The Thumbnails tab The Thumbnails tab displays the thumbnails of the selected booklet To display a job in thumbnails view 1 Select the Thumbnails tab A small and approximate version of t...

Page 224: ...able only for imposed RTP jobs This tab displays the imposed sheets along with the number of pages on each sheet and was designed to enable you to view and check your imposition parameters Therefore y...

Page 225: ...lect the required page thumbnail 3 Select the Imposed sheets tab The imposed job appears Notes In VI jobs the booklet number appears in addition to the page number For example Booklet 1 Page 15 In dup...

Page 226: ...margins gutters and spine trim size The related imposition information appears 5 To close the imposition information click the Show Info button again 6 If you want to edit the job select the Booklets...

Page 227: ...oving Pages Within a Job If required you can change page positions within the job for example switch pages 2 and 3 To move pages within a job 1 Click on the page you would like to move 2 Drag the page...

Page 228: ...You can copy a page from a job into the job to be edited or copy all the pages from a job and append them to the job to be edited To merge jobs 1 In the Job Editor window open the job that appears fir...

Page 229: ...ng a Page From a Second Job Once the thumbnails of the second job are displayed you can copy a page insert it into the first job To copy a page from the second job 1 From the second job select the pag...

Page 230: ...d you may copy all pages of the second job and insert them at the end of the first job To copy all the pages of the other job Once the thumbnails of the second job are displayed click the Merge Jobs b...

Page 231: ...t or print the list or export the report into a spreadsheet application for example Microsoft Excel where you can manipulate the data as required Viewing the Accounting Information At any stage of wor...

Page 232: ...ings window under Preferences Messages you can specify how long information remains before being overwritten In addition you can remove all the information from the window whenever required Table 8 De...

Page 233: ...r Uncoated Sets Actual number of printed copies Job B W Pages Number of black and white pages in the original PDL file Inserts Number of pages inserts Job Color Pages Number of color pages in the orig...

Page 234: ...Accounting Log You can save the Accounting information to an ASCII Tab delimited file To export the accounting information 1 Filter the information as required 2 Click Export Page Exceptions Existenc...

Page 235: ...any connected printer To print the accounting log 1 Filter and sort the report as required 2 Click Print List Notes The log includes all the columns even those that were hidden listed in the original...

Page 236: ...arameters set for processing and printing on the Spire CXP6000 color server The Spire CXP6000 color server contains a mechanism that automatically installs the published virtual printers on your clien...

Page 237: ...ded to a particular virtual printer contains preset parameters from the PPD these options overwrite the parameters set in the virtual printer for that job The Printer Default options defined in the PP...

Page 238: ...dd button The Add New Virtual Printer dialog box appears 4 In the Name box type a name for the new printer you want to add Or From the Based on list may select an existing printer with similar setting...

Page 239: ...ptions check box 9 Edit the Job Parameters of your new virtual printer 10 Click OK in the Add New Virtual Printer dialog box The new printer appears in the Printer list Editing an Existing Printer To...

Page 240: ...rinter 1 In the Virtual Printers window select a printer from the list and click the Delete button Or Right click the printer and select Remove 2 In the message that appears click Yes to delete the de...

Page 241: ...re them in the Storage window unless the Job Deletion parameter is set to Delete after Complete Process Store to RIP the PDL files and move them to the Storage window as RTP jobs 3 Click Save Note The...

Page 242: ...ed or printed as a hard copy This feature is useful for Updating the Hot Line service on Job Ticket Report data when a question arises Retaining job parameters when the same job is planned to be re pr...

Page 243: ...Job Ticket Report 229 2 You can export or print the report by clicking Print or Export The Job Ticket Report is exported as a text file...

Page 244: ...This page is intentionally left blank...

Page 245: ...Production Printing Imposition Workflow 232 High Resolution Workflow 254 PDF Workflow 264 Page Exceptions 270 Dynamic Page Exceptions 284 The Finishing Tab 294 Fonts 302...

Page 246: ...u should define imposition settings before RIPing a job Changing key imposition settings for example template settings post RIP may result in inefficient re RIPing of your job In the Spire CXP6000 col...

Page 247: ...inished You to choose a method according to the finished format that you need In the Imposition method options area select one of the following options None This is the default option If you select No...

Page 248: ...ets or books are sorted in a Z shape In other words each stack of pages is sorted in consecutive order When stacks are piled one on top of another the entire job is already sorted up or down Notes Whe...

Page 249: ...attached through stitching or stapling in the spine fold for example brochures Perfect Bound Use this option for a book finishing technique where the pages of a book are attached through trimming of t...

Page 250: ...n adjust your page size by adjusting the trim size Orientation specifies the orientation Portrait or Landscape for the trim size If the wrong orientation is specified an unsuitable template might be s...

Page 251: ...late The Template parameter includes a list of available templates and their layout options Each imposition method has its own specific template choices For example if you change your imposition metho...

Page 252: ...the layout Previewing the Template Layout When you choose a template you need to account for other job parameters for example Trim Size Bleed Margin Gutters and Paper Size In the Template Options are...

Page 253: ...licting trim size settings for example A3 trim for Step Repeat 2x2 Duplex template and template settings Margins The Margins parameter enables you to adjust the spaces between the outside edges of pag...

Page 254: ...between adjacent pages on a printed sheet When the sheet is folded into a signature booklet this space allows you to roughen the edges for perfect binding To set the margins In the Margins options ar...

Page 255: ...trim setting will not leave an undesired white space at the edge of the page The bleed options produce sharp page boundaries with color that extends all the way to the edge of the page To select marks...

Page 256: ...arks and 10 mm for fold marks If your job already includes crop marks incorporated in the DTP application you do not need to add crop marks here If you do add crop marks both sets of crop marks can be...

Page 257: ...mount of movement towards the spine applied to the center two pages and their backs in other words the pages that require the most amount of compensation An ever decreasing amount of movement is autom...

Page 258: ...select Auto to automatically set the Creep in based on paper stock weight Or Type the required amount for Creep in 2 In the Creep out area type the required amount Imposition Templates There are three...

Page 259: ...tes The Spire CXP6000 color server uses the following predefined imposition templates Note DUP refers to Duplex and SIM refers to Simplex Table 9 Predefined imposition templates Step Repeat Cut Stack...

Page 260: ...ted 2 1 DUP HTH Rotated 2 1 DUP HTT 2 1 DUP HTT 2 1 DUP HTT Rotated 2 1 DUP HTT Rotated 2 1 SIM 2 1 SIM 2 1 SIM Rotated 2 1 SIM Rotated 2 1 North South 2 1 North South 2 2 DUP HTH 2 2 DUP HTH 2 2 DUP...

Page 261: ...TH 3 1 DUP HTH Rotated 3 1 DUP HTH Rotated 3 1 DUP HTT 3 1 DUP HTT 3 1 DUP HTT Rotated 3 1 DUP HTT Rotated 3 1 SIM 3 1 SIM 3 1 SIM Rotated 3 1 SIM Rotated 3v2 DUP HTH 3 2 DUP HTH 3 2 DUP HTH Rotated 3...

Page 262: ...DUP HTH 3 8 DUP HTH Rotated 3 8 DUP HTH Rotated 3 8 DUP HTT 3 8 DUP HTT 3 8 DUP HTT Rotated 3 8 DUP HTT Rotated 3 8 SIM 3 8 SIM 3 8 SIM Rotated 3 8 SIM Rotated 3 9 SIM 3 9 SIM 3 9 SIM Rotated 3 9 SIM...

Page 263: ...UP 4 4 DUP HTH Rotated 4 4 DUP HTH Rotated 4 4 HTT DUP 4 4 HTT DUP 4 4 DUP HTT Rotated 4 4 DUP HTT Rotated 4 4 SIM 4 4 SIM 4 4 SIM Rotated 4x4 SIM Rotated 4 5 SIM 4 5 SIM 4 5 SIM Rotated 4 5 SIM Rotat...

Page 264: ...HTT 5 5 DUP HTT 5 5 DUP HTT Rotated 5 5 DUP HTT Rotated 5 5 SIM 5 5 SIM 5 5 SIM Rotated 5 5 SIM Rotated 5 6 SIM 5 6 SIM 5 6 SIM Rotated 5 6 SIM Rotated 5 6 DUP 5 6 DUP 5 6 DUP Rotated 5 6 DUP Rotated...

Page 265: ...e Ultimate inSpire To import a user defined imposition template 1 On the toolbar click the Resource Center button 8 3 DUP HTT 8 3 DUP HTT 8 3 DUP HTT Rotated 8 3 DUP HTT Rotated 8 3 SIM 8 3 SIM 8 3 SI...

Page 266: ...252 Chapter 6 Production Printing 2 In the Resource list select Imposition Templates 3 Click Import 4 In the Open dialog box locate the user defined template you want to import...

Page 267: ...rom the list and click Rename 4 Type a new name for the user defined imposition template 5 Click OK The renamed user defined imposition template appears in the imposition template list To delete a use...

Page 268: ...g the design and page layout process can often times be long and inefficient Processing and manipulating large files and graphics can be very time consuming To speed up production it is common to work...

Page 269: ...es to RIP The instructions specify the type size position rotation cropping and location of the high resolution images themselves When you send your PostScript file to be processed the Spire CXP6000 c...

Page 270: ...r 2 In the APR options area select one of the following options Print with high res Use this option to replace low resolution images in your job with high resolution images that are located in a speci...

Page 271: ...s for high resolution images Search in the input folder The Spire CXP6000 color server first searches for high resolution images in the same folder as the PDL file D Shared High Res If you want to sav...

Page 272: ...258 Chapter 6 Production Printing To add a high resolution path 1 Under the APR path box click Add The HiResPath dialog box appears 1 Click Add The Open dialog box appears...

Page 273: ...PostScript file as it goes to RIP The instructions specify the type size position rotation cropping and location of the high resolution images themselves When you send your PostScript file to be proc...

Page 274: ...OPI area select Enable OPI Spire Support Creo APR and OPI File Formats Creo APR and OPI function identically on the Spire CXP6000 color server Creo APR low resolution files have an eps extension in W...

Page 275: ...r positioning rotating scaling and cropping Note You can use the PS Image Exporter Plug In in Adobe Photoshop to create Photoshop Image APR low resolution files You can either install the PS Image Exp...

Page 276: ...lution files 2 Double click the job in the Spire CXP6000 color server workspace 3 Select the Print Quality tab in the Job Parameters window 4 Adjust the job parameters 5 Set other high resolution job...

Page 277: ...le Brochure The picture used in the sample brochure is a high resolution file called milkmaid In this example it is assumed that you already created the low resolution file milkmaid e and that your br...

Page 278: ...6000 color server The job is processed on the Spire CXP6000 color server and then sent to the Xerox DocuColor 6060 Digital Color Press for printing PDF Workflow When you print PDF jobs with repeated e...

Page 279: ...application installed on your client workstation you may use the Adobe Acrobat Distiller 5 0 application located on the Spire CXP6000 color server To distill a PostScript file on the Spire CXP6000 col...

Page 280: ...k the Start button and select Programs Acrobat Distiller 4 From the Settings menu select Job Options 5 In the General tab verify that Optimize for Fast Web View is selected and click Cancel If this op...

Page 281: ...ring export The Spire CXP6000 color server is capable of exporting jobs that are standard PDF files both before and after processing For an exported RTP job the PDF file includes the rasterized data o...

Page 282: ...ight click a file in the Storage window and from the menu select Export PDF2Go 2 Select the Print Optimized option to generate a high resolution PDF file in 300dpi The Screen Optimized option default...

Page 283: ...folder in which to save the file and then click Export The file is saved as a PDF file under the job s name in the selected location Note When you export PDL files as PDF the file is converted to PDF...

Page 284: ...e you can choose to assign a different paper stock for each chapter within a book Inserts are blank pages of a selected paper stock that are assigned to a job after a specified number of pages For exa...

Page 285: ...print a page divider on heavy paper in the From box type 15 and in the To box type 15 3 In the Paper set list select the required paper set If you need to add a new paper set click the browse button F...

Page 286: ...f these steps Click the arrows to shift the image on both sides Type a value in the Rear and Lead boxes d To set the values back to 0 0 click Center Image e Click Save 6 Click Apply The exception is a...

Page 287: ...de the insert 3 In the Quantity box type the number of inserts that you want 4 In the Paper set list select the required paper set If you need to add a new paper set click the browse button Insert are...

Page 288: ...tions within a job and also add inserts interleaves in imposed jobs You set these exceptions and inserts in the Exceptions tab If the selected imposition method is Saddle Stitch or Perfect Bound the e...

Page 289: ...ss and the tabs were designed in Microsoft Word Xerox DocuColor 6060 Digital Color Press Setup In this example you can print the PDF file on the following types of stock Text pages on US Letter 8 5 11...

Page 290: ...d requires straight edges on both right and left sides Load the stock with the tabs pointing to the rear end of the tray Although the text and tab media can be different weights on the tray controls y...

Page 291: ...the tab pages The job prints face up Important If you are using a Xerox DocuColor 5252 2060 or 2045 Digital Color Press load the tab stock in Tray 3 Notes It is essential that you load the tab stock i...

Page 292: ...the custom size for any job through the Xerox DocuColor 6060 Digital Color Press Access Panel 1 On the Access Panel press the Access button and enter the password 11111 2 Navigate to Tools Pathway Non...

Page 293: ...you can view the paper sets that are loaded in the paper tray To create paper sets 1 On the toolbar click the Resource Center button 2 In the Resource list select Paper Sets 3 Click Add The Paper Set...

Page 294: ...280 Chapter 6 Production Printing 4 Set the parameters for the Text stock 5 Click OK 6 Click Add and set the parameters for the Tab stock 7 Click OK...

Page 295: ...he job parameters for a job with two media trays 1 In the Job Parameters window click the Print Settings tab and set the following parameters Print Method Duplex head to head Delivery Face Up Rotate 1...

Page 296: ...ters Paper set name Undefined Paper size SEF Letter Weight 106 135 gsm 3 On the Exceptions tab click Add and use Table 10 to add page exceptions Table 10 Sample Page Exceptions Pages Use Paper Set Tra...

Page 297: ...view MP6 active active promoID Laser_Printer_ Template_tabs Xcntry USA Xlang en_US Design Hints Some good design hints for printing tabs are available on the following Web site http www xerox com go x...

Page 298: ...required paper sets for the job The Spire CXP6000 color server supports dynamic page exceptions for the following file formats PostScript Variable Print Specification VIPP PDF Setting the Spire CXP60...

Page 299: ...amically change the media at a page level Dynamic page exceptions are set through the standard PostScript setpagedevice command and embedded in the PostScript file In the setpagedevice command the med...

Page 300: ...e exceptions The Spire CXP6000 color server reads these three comments The comments are XRXbegin and XRXend which encapsulate the XRX block and XRXpageExceptions which defines the page exceptions attr...

Page 301: ...and opaque Finish not supported The third word multiword specifies the preprocessed finish of the page exception media The value can be one of the standard defined finishes or a custom user defined f...

Page 302: ...type requirements for subsequent pages The Spire CXP6000 color server mapping is similar to the mapping of PostScript and Variable Print Specification file formats The MediaType value is mapped to th...

Page 303: ...dobe 3 0 Title newVItest_US dbm XGFdict STARTBOOKLET known STARTBOOKLET ifelse Page1 Front Side SPD Type Drilled Color blue Weight 98 Drilled blue 98 SETMEDIA 1_newVItest_US ps CACHE SETFORM 0 NL Run...

Page 304: ...k types but each booklet has a different number of pages and the tabs are inserted in different places in each booklet Perform the following steps to set up the workflow 1 Load the stock types in the...

Page 305: ...elected 7 On the Print Settings tab set the following parameters Print Method Duplex head to head Delivery Face Up Rotate 180 Yes 8 On the Paper Stock tab set the Paper set name to Text Or Set the fol...

Page 306: ...aper set names that you created for example Text and Tab In the Exception Type column select Exception Click Save 11 In the Edit Virtual Printer dialog box click OK 12 In the Resource Center click Clo...

Page 307: ...at support dynamic page exceptions should not be used for other jobs Virtual printers that support dynamic page exceptions do not support page exceptions and imposition In addition the paper stock sel...

Page 308: ...tains job related information such as the job title page size number of pages or sets and the sender name The Administration page is printed in the same order as the job for face down printing the pag...

Page 309: ...elect the required tray Tray 1 The specific paper stock should be loaded in this tray Tray 2 The specific paper stock should be loaded in this tray Auto Any tray with the specific paper stock will be...

Page 310: ...eed to add a new paper set click the browse button 3 In the Tray list select the required tray Tray 1 The specific paper stock should be loaded in this tray Tray 2 The specific paper stock should be l...

Page 311: ...r set If you need to add a new paper set click the browse button 3 In the Tray list select the required tray Tray 1 The specific paper stock should be loaded in this tray Tray 2 The specific paper sto...

Page 312: ...c Print on both sides Use this option to print the first two pages of the job as the cover page Back Cover By default your job is printed without a back cover However you can choose to print a back c...

Page 313: ...printing area select one of the following options a None Use this option to print a blank back cover b Print on back side Use this option to print the last page of the job as the back cover c Print on...

Page 314: ...OCT Offset Catch Tray This is the default option HCS EHCS High Capacity Stacker or Enhanced High Capacity Stacker Note The available stapling methods for PostScript files depend on the page orientati...

Page 315: ...printing output sequence is as follows Page1 Page1 Page1 Offset Page2 Page2 Page2 Offset and so on DFA Document Finishing Architecture Note If two HCS devices are chained to the printer two top trays...

Page 316: ...dition you can download Windows fonts from a client workstation to the Spire CXP6000 color server This is done by dragging the fonts to the HF_Fontdownloader hot folder Font List Table 11 lists the st...

Page 317: ...rCE CourierCE Bold CourierCE BoldOblique CourierCE Oblique EuroMono Bold EuroMono BoldItalic EuroMono Italic EuroMono Regular EuroSans Bold EuroSans BoldItalic EuroSans Italic EuroSans Regular EuroSer...

Page 318: ...h BookOblique LubalinGraph Demi LubalinGraph DemiOblique Marigold Monaco MonacoCE MonaLisa Recut NewCenturySchlbk Bold NewCenturySchlbk BoldItalic NewCenturySchlbk Italic NewCenturySchlbk Roman NewCen...

Page 319: ...s Univers Bold Univers BoldExt Univers BoldExtObl Univers BoldOblique Univers Condensed Univers CondensedBold Univers CondensedBoldOblique Univers CondensedOblique Univers Extended Univers ExtendedObl...

Page 320: ...onts from a Macintosh client workstation The Fontdownloader functions as a communications port and sends messages between the Fontdownloader program and the Spire CXP6000 color server You cannot send...

Page 321: ...Select AppleShare and browse the network to where the Spire CXP6000 color server is configured 3 Select the Spire CXP6000 color server for example CXP6000 and then click OK The Login dialog box appear...

Page 322: ...er window appears 5 Select the Utilities folder and then click OK 6 Double click the Adobe Downloader 5 0 5 folder 7 Copy the Adobe Downloader 5 0 5 to your desktop 8 From the Apple menu select Choose...

Page 323: ...ownloader 10 Click Create 11 Double click the Downloader 5 05 on your desktop 12 On the File menu select Download Fonts 13 In the font area select the required font directory 14 Verify that Disk 0 is...

Page 324: ...r to install new or missing fonts to the Spire CXP6000 color server fonts dictionary The hot folder is located with the other hot folders on your client workstation and can be used with the following...

Page 325: ...n to substitute a missing font with the default font that is set in the Settings window No Use this option if the required font is missing and you want to stop processing the job Note If a font is sub...

Page 326: ...This page is intentionally left blank...

Page 327: ...Color Workflow Calibration 314 Default Color Flow 340 Color Tools 358...

Page 328: ...target density You should perform calibration in the following instances When you use a new paper stock When you use a different screening method At least once every eight hour shift for every combin...

Page 329: ...the final job Prepare the calibration pad to measure the calibration charts If a calibration pad is not available set a white media at least 200 gsm or two sheets of lighter paper on the surface Read...

Page 330: ...reports densitometer and dot data Perform the following steps before first time use of the X Rite DTP34 QuickCal Densitometer Familiarize yourself with the X Rite DTP34 QuickCal Densitometer Operation...

Page 331: ...Cal Densitometer communication cable Configuring the X Rite DTP34 QuickCal Densitometer The LED indicates a variety of instrument operation conditions such as calibration mode and operation PC Db9 MAC...

Page 332: ...any time See the following procedure for information about the calibration process Positioning the Instrument on the Calibration Reference Handle the reflection reference by the edges Make sure that t...

Page 333: ...flashing amber LED verify that the strip is clean and re read 3 Place the reflection reference in its protective envelope and store the envelope away from light and heat Full Calibration 1 To manuall...

Page 334: ...density values The purpose of this color calibration method is to ensure consistency over time Auto Adjusted Calibration This calibration method enables you to calibrate the Xerox DocuColor 6060 Digit...

Page 335: ...n method of the Spire CXP6000 color server is target calibration You can change the setting if necessary before calibrating the Spire CXP6000 color server To specify the calibration method 1 In the Se...

Page 336: ...e or edit an existing calibration table The Color Calibration Wizard analyzes the measurements and creates calibration tables Using these tables the Spire CXP6000 color server compensates for the diff...

Page 337: ...calibration table as default As a result your calibration table is saved as the Normal look up table Saturated Initially the Normal look up table is identical to the SpireSaturated look up table This...

Page 338: ...Editing Calibration Tables on page 332 Click Delete to delete the calibration table Click Info for the Density Graph see Reading Color Density Data on page 337 Click Close to end a test job and close...

Page 339: ...ct that tray in the wizard 3 Select the required screening method from the Select screening method list 4 Select the required Paper Weight from the list 5 From the Paper coating options select Coated...

Page 340: ...own the button on the X Rite DTP34 align the X Rite DTP34 s head with the cyan arrow s tip The arrow is to the left of the cyan column on the Image Density Calibration Curve Its tip intersects the sem...

Page 341: ...y scanned a check mark appears next to all icons Note Ensure that the separation columns on the Continuous Tone Chart are scanned in the order they appear in the icons Cyan Magenta Yellow Black Notes...

Page 342: ...hart s from the printer Note If you selected automatic screening in Step 1 of the wizard the Xerox DocuColor 6060 Digital Color Press prints two charts an Image Density Calibration Chart and a Text Li...

Page 343: ...Density Calibration Chart and follow the scan sequence as prompted A beep sounds when the scan is complete A check mark appears next to the cyan icon and instructions appear for scanning of the next c...

Page 344: ...he wizard you selected Auto from the Select screening method list you are now required to sweep the Text Line Art Chart Follow the same scan sequence Begin each chart with the cyan column Note Ensure...

Page 345: ...ine Art separation columns have been successfully measured a check mark appears next to all icons Step 5 of the Color Calibration Wizard appears Note If at any stage the scanning has not been complete...

Page 346: ...turated A table that is the same as the normal table for 80 of the color range but from that point on each color has a greater density You can use this table when you need dark colors that are more in...

Page 347: ...raph displays cyan magenta yellow and black separations You can see information about each separation by selecting it from the list Value Table You can change the separation values by adjusting the Fi...

Page 348: ...3 Select the required values from the File and Printer lists 4 Click OK The value table is updated and the calibration graph is adjusted To change an existing value table 1 Highlight a row and double...

Page 349: ...put data after applying the calibration table that is sent to the printer During printing the Spire CXP6000 color server automatically replaces the CMYK values in the RTP file with new values that com...

Page 350: ...og box adjust calibration table values and parameters as required 2 Click Save As The Save As dialog box appears 3 In the File Name box type the new calibration table name 4 Click OK The calibration t...

Page 351: ...bration ColorCalibrationDB 2 Open the ColorCalibrationDB folder 3 Copy the required calibration table files to your backup location Reading Color Density Data To view the Density Graph 1 In the Calibr...

Page 352: ...wing data Calibration name Measured D Max values for each separation Target D Max values for each separation Minimum accepted density values for each separation Xerox values View options filtering by...

Page 353: ...created for the particular stock from which you printed 6 In the Color tab select the screening method you used for the selected calibration 7 Set all other desired parameters and then click OK to cl...

Page 354: ...rver to re RIP the jobs The color tools Destination Rendering Intent Emulation RGB Workflow and Spot Color Editor should be applied prior to initial RIPing or your job will need to be re RIPed The Spi...

Page 355: ...ofiles There are three CSA profiles with gammas of 1 8 2 1 and 2 4 The higher the gamma the darker the RGB appears This workflow should be used when you have images from different sources such as digi...

Page 356: ...to the closest possible color within the output color space When using this method some closely related colors in the input color space can be mapped to a single color in the output color space This r...

Page 357: ...fault for RGB a rendering intent method which preserves the visual relationship among the colors as they are perceived by the human eye In other words all colors are proportionally scaled to fit the o...

Page 358: ...lar to the CMYK grayscale image To set the color mode 1 Select Grayscale to print the job as black and white using Black K toner only Or Select Color to print the job in color using CMYK Note When you...

Page 359: ...or to achieve better color results import your own custom profile via the Profile Manager Note Grayscale images created in RGB applications such as PowerPoint should be specified as Monochrome or subm...

Page 360: ...select the profile name from the list 2 In the Rendering intent list select the required option 3 Select the Print grays using black toner check box if you want RGB gray text and graphics to be print...

Page 361: ...a color needs to be output and is outside the gamut of the output device it must be mapped or approximated to some other color which exists within the gamut Rendering Intent enables you to compress o...

Page 362: ...box to preserve pure cyan magenta yellow and black during transformation 3 In the Rendering intent list select the required option Note The system emulates the selected option during the RIP process...

Page 363: ...nary for the correct value each time there is a spot color with a recognized name To ignore the spot color dictionary In the Spot workflow options area clear the Use Spire spot color dictionary check...

Page 364: ...0_DC2000 COM and DC6060_DC2000 GA If you map or link a profile to a specific paper color the same profile will always be used for that paper set To set the destination profile In the Profile list sele...

Page 365: ...ting dots in numerous shapes or lines in an evenly spaced pattern The distance between the screen dots or lines is fixed and determines the quality of the image Printers can work with even amounts of...

Page 366: ...een of 200 lpi The screen of each separation is printed at a different angle Line 300 applies Line type screen of 300 lpi All separations are printed at 90 degrees screen angle Line 600 applies Line t...

Page 367: ...color density The Spire CXP6000 color server Calibration tool enables you to create and edit calibration tables either through an automatic process or by editing an existing calibration table The ava...

Page 368: ...ponent Replacement parameter enables you to conserve toner by replacing the gray component CMY of pixels with black toner The gray component replacement also prevents the consequences of excessive ton...

Page 369: ...he following options None When this option is selected no GCR is performed on the file and the printer applies maximum dry ink coverage Select the required amount of CMY dry inks to be replaced by the...

Page 370: ...fic settings for brightness contrast and color balance When you select your predefined gradation table your job is adjusted according to the specific table s settings To select a gradation table In th...

Page 371: ...ove the Brightness slider to the required brightness level the range starts from Light which applies 15 to Dark which applies 15 Contrast Adjusting the Contrast option enables you to control the diffe...

Page 372: ...w Emulation depending on the profile you imported Destination profiles define the color space of your printer and are based on the combinations of paper and toner that you are using For different pape...

Page 373: ...y select the correct profile for your job This is useful for example in jobs that have mixed paper types Select Linked from Color Destination profile Managing Device Link Profiles To import a source I...

Page 374: ...hange the name you may do so 5 Click Import The new source ICC profile is added to the Emulation Device Link list in the Job Parameters window in the CMYK Workflow parameter or to the RGB workflow par...

Page 375: ...e the required source profile and then click Open The new emulation name is displayed in the Emulation name box if you would like to change the name you may do so 4 Click Import 5 If you would like to...

Page 376: ...In the Add New Color box type the name of the new color and then click OK e To delete a paper color select the required paper color and click the delete button f In the message that appears click OK...

Page 377: ...ut affecting the CT or LW page elements It also enables you to create custom spot colors and to define fixed CMYK values for those spot colors The Spire CXP6000 color server supports HKS and PANTONE 2...

Page 378: ...the right hand side of the Spot Color Editor window 5 Change the CMYK values as required 6 Click Apply The new color is added to the Custom color dictionary Note Under Color you cannot perform an exac...

Page 379: ...equired 4 Click OK The new color is added to the Custom dictionary To delete a spot color from the custom dictionary only 1 From the Spot dictionary list select Custom Dictionary 2 From the list of cu...

Page 380: ...nting With Spire CXP6000 color server Gradation you can apply the default gradation table or another pre configured gradation table to a job You can also edit an existing table and save your changes G...

Page 381: ...hanges with changing Gradation tables or Gradation adjustments Notes Gradation is an interactive function Gradation changes are automatically applied to the displayed image The gradation table created...

Page 382: ...Click Preview to expand the Gradation dialog box 2 Click Browse to select a job for display in the Preview window The RTP Jobs window appears The displayed jobs are the RTP jobs listed in the Storage...

Page 383: ...you wish to view from their lists at the top of the Preview window The selected page appears Gradation Table Box Upon opening the Gradation dialog box the default gradation table DefaultGradTable is s...

Page 384: ...Selecting a specific separation and a specific gradation control enables you to change the color balance for a specific tonal range The Gradations window appears with all separations selected This too...

Page 385: ...ical curves the graphs appear as if there is only one curve Gradation Controls The gradation controls are used to adjust brightness in specific tone ranges Click the arrow buttons to increase or decre...

Page 386: ...long the horizontal or vertical axis This affects the image file from 0 dot to 100 dot where the greatest change is at 0 dot Highlight Changes brightness mainly in the highlights This affects the imag...

Page 387: ...is affects the image file from 15 dot to 85 dot where the greatest change is at 50 dot Shadow Changes brightness mainly in the shadows This affects the image file from 50 dot to 100 dot where the grea...

Page 388: ...t slider controls are active only when all of the separations are selected Brightness Brightness increases or decreases the luminance of the image Increasing brightness brightens the image and results...

Page 389: ...slider Or Set the Contrast Center slider to the right to enhance contrast in highlights or to the left to enhance contrast in shadows Or Click the arrow button to increase or decrease the Contrast Ce...

Page 390: ...s with new names To create a new gradation table 1 In the Gradations window modify your gradation table as required 2 Click Save As The Save As dialog box appears 3 In the File name box type the requi...

Page 391: ...Graphic Arts Workflow Printing PrePress Files GAP Files 378 Preflight Check 380 Export as Creo Synapse InSite Job 385...

Page 392: ...a specific job import the assigned file for the specific job Supporting GAP Files The Spire CXP6000 color server can import and convert the following file types Brisque jobs TIFF TIFF IT CT LW The sy...

Page 393: ...of a Brisque job and TIFF IT are CT LW and TIFF and can be imported and printed separately to the Spire CXP6000 color server Rasterized Brisque Jobs All rasterized Brisque jobs have a typical structur...

Page 394: ...High resolution images or the wrong links to the high resolution images folder Missing fonts Spot colors that are not defined in the Spire CXP6000 color server spot color dictionary Dynamic exception...

Page 395: ...box You can review the report and handle the missing components and thus save inefficient printing time with constant error or failed messages If you run a preflight check and all key components are...

Page 396: ...d this will be indicated by the missing indicator next to the HiRes Spot Colors and Fonts report options If you did not select a preflight option for the preflight check the not preflighted indicator...

Page 397: ...spot colors which were found in the spot color dictionary The C M Y K columns display the spot color CMYK equivalences If the status is missing the Spire CXP6000 color server used the original CMYK va...

Page 398: ...name of the missing fonts that are not embedded in the file and do not exist in the Font Library and also the found fonts The Source column indicates whether the font is embedded in the file or was f...

Page 399: ...obs and receive approvals remotely If your site includes a Creo Synapse InSite server exporting your job as InSite from the Spire CXP6000 color server allows you and your customers to proof online wit...

Page 400: ...r can measure color density make annotated comments and approve pages The online proofing cycle is shortened and accurate and consequently the need for reprints is reduced To export as InSite 1 Select...

Page 401: ...VI Workflow VI Overview 388 VI Document Formats 389 Using Creo Variable Print Specification to Print a VI Job 394 Managing VI Elements 398 Applying VI Structure to Large Files Split to Booklets 401...

Page 402: ...elements in VI jobs Unique elements are used only once for a specific individual or purpose An individual s name is an example of a unique element Reusable VI elements can be used more than once in d...

Page 403: ...d each authoring program does so in a slightly different manner The format you choose can be a stand alone format that covers all aspects of document design data management and text capture or it can...

Page 404: ...r efficient implementation fast and efficient data processing and storage prior to printing A Variable Print Specification job consists of the following components Booklet A personalized copy of a doc...

Page 405: ...itional runs of sub jobs Inline Elements Unique information is drawn from a database and is embedded in the sub job This data prints only once for individual booklets VIPP The VIPP format was develope...

Page 406: ...e Description File PS The PostScript Master Form which holds all of the fixed elements from the original document File JDT The Job Descriptor Ticket which holds header and setup information for the jo...

Page 407: ...er and submit them for pre cache View VI elements in their structural hierarchy Both PPML and VIPP 2001 have a hierarchical structure Document components are separated from their submission file and c...

Page 408: ...rupted from the printer disk Booklets are compiled concurrently while the printer prints As pages are sent to the print engine they are assembled from the various inline and reusable elements on the f...

Page 409: ...tarts to print As soon as these pages are processed printing starts while the rest of the job is streamlined through the Spire CXP6000 color server The Xerox DocuColor 6060 Digital Color Press continu...

Page 410: ...pire CXP6000 color server after printing is completed select Delete after complete To remove failed jobs while processing or printing from the Spire CXP6000 color server select Delete on job failure 5...

Page 411: ...booklet is printed beside the first After the sheets are cut the booklets are aligned with their pages in the proper order Note The above example uses the step and repeat method There are no special...

Page 412: ...the VI elements on your system and to perform the following tasks Delete VI elements Archive VI elements Retrieve VI elements Deleting VI Elements VI elements that are no longer in use take up valuab...

Page 413: ...idea to archive the VI elements and retrieve them when needed You can archive your VI job folder in a location that you specify 1 On the toolbar click Resource Center 1 In the Resource list select Cac...

Page 414: ...Open dialog box appears 2 Select the folder in which your VI elements are archived 3 Select the required file and then click the add button 4 Click Retrieve The Spire CXP6000 color server retrieves th...

Page 415: ...r booklet is a more efficient way to manage your job Duplex printing will automatically insert blank pages if the number of pages per booklet is an odd number To split a job to booklets 1 In the Split...

Page 416: ...This page is intentionally left blank...

Page 417: ...System Administration Setting Up and Configuring the Spire CXP6000 Color Server 404 System Messages 431 Reinstalling the System 436...

Page 418: ...s The Settings window appears The settings are divided into two lists Administration and Preferences Both lists are explained in the following sections Administration items can be viewed by users of a...

Page 419: ...hanging the Server Name 1 In the Settings window select Administration Server Setup 2 In the Server Name area click Change The System Properties dialog box appears 3 In the Network Identification tab...

Page 420: ...take effect 8 Click No if you want to change other system parameters or click Yes and reboot your computer Changing the Date and Time 1 In the Settings window select Administration Server Setup 2 In...

Page 421: ...e Spire CXP6000 Color Server 407 4 Select the Time Zone tab and set the correct time zone 5 Click OK Network Setup The IPX Printing settings TCP IP settings and the Apple Talk Setup settings are set i...

Page 422: ...rameter 1 In the Settings window select Administration Network Setup 2 In the IPX Printing area click Change Settings next to the Tree parameter The Local Area Connection Properties dialog box appears...

Page 423: ...nistration Network Setup 2 In the TCP IP area click Change Settings next to the IP Address parameter The Local Area Connection Properties dialog box appears followed by the Internet Protocol TCP IP di...

Page 424: ...leTalk zone in which your Spire CXP6000 color server is located To change the Apple Talk network settings 1 In the Settings window select Administration Network Setup 2 In the Apple Talk Setup area cl...

Page 425: ...tion and in DFE Monitor window The following graphic shows the DFE and Printer Animation as it is presented when the remote session is active To secure the remote connection a password should be assig...

Page 426: ...oad and launch the Remote Admin Client application 1 From the System Administrator workstation connect to the required Spire CXP6000 color server and from the Utilities folder related to your computer...

Page 427: ...d you have previously created in the Remote Tools Setup window 5 Click OK The Spire CXP6000 color server workspace appears on your screen and you can perform any required action Web Connect Setup The...

Page 428: ...ea select Enable Web Viewer Security The user Passwords and Disk Wipe settings are set in Security User Passwords To set Password settings 1 In the Settings window select Administration Security 2 Sel...

Page 429: ...he contents of your deleted files by scanning all of the empty sectors on the disk and replacing them with zeros Nonempty sectors are left untouched This feature enables you to work in a more secure e...

Page 430: ...when the Norton Utilities application is installed Before you activate the Disk Wipe utility make sure that Norton Utilities is not installed on the Spire CXP6000 color server In rare cases the proce...

Page 431: ...Disks 2 In the System Disks area set the minimum free disk space required for RIP Backing up the Configuration The Configuration Backup item enables you to backup your Spire CXP6000 color server confi...

Page 432: ...tem Administration Configuration Backup To backup the configuration of your Spire CXP6000 color server 1 In the Settings window select Administration Configuration Backup 2 In the Configuration Backup...

Page 433: ...nistration Configuration Backup 2 In the Restore Configuration area click Browse and locate a different directory path in which to restore the configuration Note You can also backup to an external med...

Page 434: ...e the restored files to replace the current ones Click No if you do not want the restored files to replace the existing files Note When restoring the configuration all the custom tables sets are added...

Page 435: ...zation Measurement 1 In the Settings window select Preferences Localization 2 In the Localization area select Millimeters or Inches as required Setting the Language 1 In the Settings window select Pre...

Page 436: ...window select Preferences Pre RIP Preview 2 In the PS Preview area select your choice Save as PDF to save the file as PDF Return to original PS file to return to the original PS file 3 In the VI Job P...

Page 437: ...ect Preferences General Defaults 2 In the Default Paper Size area select the Size 3 Select the required OPI setting 4 Select the Default Archive Path For more information about setting the OPI see OPI...

Page 438: ...down and consequently save production time To set the required job batching option 1 In the Settings window select Preferences Print Queue Manager 2 Select Enable Job Batching to print jobs with the...

Page 439: ...in the In Print queue Or Select Don t Bypass held jobs to stop the printing from the queue when a job is assigned a frozen status Color The Calibration Method Emulations Automatic Screening Color conv...

Page 440: ...or parameter of the Settings window By default Automatic applies two types of screens For CT Continuous Tone The system uses Dot type screen of Dot 200 For text line art elements LW Line Work The syst...

Page 441: ...rsion color tables are selected To apply the previous version color tables select Previous version color tables The following message appears 3 Click OK Calibration Reminder Set the Calibration Remind...

Page 442: ...les you to select whether the Alerts window will open automatically or not when an error occurs To set the Alerts window settings 1 In the Settings window select Preferences Messages 2 In the Alert Me...

Page 443: ...ndows whenever desired click Clear Log Now Message Viewer Log Setup By default all the jobs that were handled during the past 90 days are listed in the Spire CXP6000 color server Message Viewer This u...

Page 444: ...r Spire CXP6000 color server In addition you can save the configuration in the network or export it to an external media as a text file To view the configuration 1 In the Settings window select Prefer...

Page 445: ...rts window The Alerts Window By default the Alerts window is open in the Spire CXP6000 color server workspace Any time the system emits an Error type message the message appears in the Alerts window T...

Page 446: ...threshold usually of 256 MB RIP is suspended and the system provides a warning message The RIP resumes automatically only after disk space is available In this case you may increase the System Disk th...

Page 447: ...selected job The Job History window indicates the job title and the sender name the user name of the system from which the job originated Message Information For each message the following informatio...

Page 448: ...the list by one of the column headers In addition you may print the list of messages If required you may reorder and resize columns filter the list or sort the list by one of its column headers For mo...

Page 449: ...messages By default all message types are listed in the Message Viewer The list updates accordingly Printing the Message List You can print the information as it is presented in the Message Viewer as...

Page 450: ...plication and to configure the system using the Configuration Wizard This section also describes how to back up and restore the Creo system partition and the Job List database Notes System Partition O...

Page 451: ...disk configuration Reinstalling Overview It may however become necessary for example after a system crash to reinstall the system at the customer s site The reinstallation is mostly unattended User in...

Page 452: ...ating system partition Creo application and user partition partitions C and D A complete overwrite should be performed only when you are upgrading the operating system Creo Software Preservation Insta...

Page 453: ...t Notes To enable the restoration of customer settings and job data we recommend that you back up the Spire CXP6000 color server configuration and other information before loading the operating system...

Page 454: ...e Windows desktop follow the path Start Shut Down Restart OK Wait until the PC DOS 7 1 Startup Menu appears If your Spire Color Server is off a Press the Power On Off button on the front panel b As so...

Page 455: ...6 In the Computer Name and Administrator Password screen type the name for the Spire CXP6000 color server for example CXP6000_1 7 Click Next The installation process begins Note If the Norton Ghost L...

Page 456: ...orrect CD ROM 2 for your printer type 2 Insert the CD ROM into the DVD ROM drive and close the DVD ROM drive 3 In the SPIRE application splash screen that appears click Start The Adobe Acrobat setup b...

Page 457: ...ce the Spire CXP6000 color server reboots the Wrong Disk Configuration message appears This message indicates that the disks need to be striped Initial Disk Striping Procedure 1 Click OK The Disk Mana...

Page 458: ...Striping Dynamic Disks on page 445 2 If you have replaced a disk or low level formatted any disk the disk will be labelled Unknown Once you have low level formatted both disks a required procedure se...

Page 459: ...ea where the disk is designated Dynamic Right click and select Import Foreign Disk The following window appears 2 Verify that Foreign disk set 2 of 2 disks selected is selected and click OK Foreign di...

Page 460: ...446 Chapter 10 System Administration The following window appears 3 Click OK The Dynamic disks are striped as shown in the following window...

Page 461: ...System 447 4 Position the mouse pointer in the white area to the right of the first disk and right click Select Change Drive Letter and Path The following window appears 5 The drive letter is preselec...

Page 462: ...oved 8 Close the Disk Management window 9 The Image Disks File System is not Formatted message appears Click OK 10 You have completed Disk Striping If configuration recovery information is available p...

Page 463: ...disks Allocating a Write Signature 1 Position the mouse pointer in the area where the disk is designated Unknown Right click and select Write Signature The following window appears 2 Check the Disk 1...

Page 464: ...disk is designated Basic Right click and select Upgrade to Dynamic Disk The following window appears 2 Check the Disk 1 and Disk 2 check boxes and click OK Disks 1 and 2 are image disks and Disk 0 re...

Page 465: ...g the System 451 Creating a Striped Volume 1 Position the mouse pointer in the cross hatched area to the right of the first disk Right click and select Create Volume The Create Volume Wizard appears 2...

Page 466: ...452 Chapter 10 System Administration The following window appears 3 Select Striped volume and click Next The following window appears...

Page 467: ...lling the System 453 4 Select Disk 2 and click Add 5 Disk 1 and 2 are listed under Selected dynamic disks The Total volume size has increased from 35001 MB to 70002 MB Click Next The following window...

Page 468: ...System Administration 6 Select Do not assign a drive letter or drive path Click Next 7 Select Do not format this volume and click Next The following window appears 8 To complete the Create Volume Wiza...

Page 469: ...appears Click OK 4 To make sure that the changes take effect restart the Spire CXP6000 color server On the Windows desktop follow the path Start Shut Down Restart OK You have completed Disk Striping...

Page 470: ...pears after the installation is complete Follow the steps of the wizard to complete the Spire CXP6000 color server configuration recovery Restoring the Configuration 1 Select DFE Configuration recover...

Page 471: ...iguration select Default Configuration 3 If you received the message Error in default configuration or if you want to use a different configuration file than the default choose Select Configuration an...

Page 472: ...ick OK The following message appears 8 Click Yes After the recovery is complete the following confirmation message appears 9 Click OK Note When restoring the configuration all the custom tables sets w...

Page 473: ...Reinstalling the System 459 10 Click Next in Step 2 Recovery window The View Configuration window appears 11 Click Close...

Page 474: ...hat any you made changes take effect restart the computer 13 Close all open applications and on the Windows desktop click Start Shut Down Restart OK 14 If you want to change the administrator name and...

Page 475: ...guration in your system you need to perform the following steps to configure your system Choosing the Configuration Type The Spire CXP6000 color server Configuration Wizard automatically appears the f...

Page 476: ...462 Chapter 10 System Administration Setting the Language Select the required interface language and click Next...

Page 477: ...ry Check with your System Administrator if the computer s name needs to be changed 1 Verify that the correct host name is displayed and click Next Otherwise click the Change button Note The Hostname i...

Page 478: ...464 Chapter 10 System Administration The System Properties dialog box appears 2 Click the Properties button The Identification Changes window appears...

Page 479: ...that changes will take effect only after restarting the computer 4 Click OK 5 In the System Properties dialog box click OK 6 Click Next to continue Note Do not change the Workgroup or Domain unless i...

Page 480: ...466 Chapter 10 System Administration Setting the Date and Time 1 Check that the Date and Time are set correctly and click Next Otherwise click Change 2 Set the Date and Time correctly...

Page 481: ...Reinstalling the System 467 3 Select Time Zone 4 Set the Time Zone click OK 5 Click Next Setting the Default Measurement Units Select the default measurement unit you require and click Next...

Page 482: ...CXP6000 color server is set to DHCP server configuration Click Next to continue 2 If you would like to specify a specific IP address click the Change button The Local Area Connection Properties dialog...

Page 483: ...click OK 6 Click Next Configuring the Apple Talk Zone This option enables you to change the AppleTalk network zone that your Spire CXP6000 color server will appear in 1 Click the Change button For mo...

Page 484: ...e Local Area Connection Properties dialog box appears followed by the AppleTalk Protocol Properties dialog box 2 Select the required zone from the list and click OK 3 In the Local Area Connection Prop...

Page 485: ...Reinstalling the System 471 Completing the Configuration After the configuration is complete the View Configuration window appears 1 Click Close...

Page 486: ...workspace appears on your screen 4 If you want to change the administrator name and password a On the Windows desktop right click My Computer and select Manage b Expand the Local Users and Groups tre...

Page 487: ...erver Technical Manual Backing Up the Creo System Partition If you want to back up the Creo system partition proceed to Backing Up the Creo System Partition on page 474 and then to Configuring the McA...

Page 488: ...Turn on your computer 2 Place CD ROM 1 Windows 2000 Fast Install in the DVD ROM drive 3 Restart the computer 4 If you are already logged on to your system on the Windows desktop follow the path Start...

Page 489: ...y logged on to your system on the Windows desktop follow the path Start Shutdown Restart 5 Wait until the PC DOS Start Up Menu appears The following choices are available Creo Software Complete Overwr...

Page 490: ...ppears Please remove the CD ROM and floppy from the drive and press CTRL ALT DELETE to reboot the computer 11 Remove the CD ROM from the DVD ROM drive and press CTRL ALT DELETE to reboot You have comp...

Page 491: ...continue You have completed Backing Up the Job List Database Restoring the Job List Database 1 Turn on your computer 2 Exit the Spire application 3 On the Windows desktop double click My Computer and...

Page 492: ...478 Chapter 10 System Administration 4 In the D Backup Scripts window double click Restore_Joblist bat The following message appears 5 Press Y to continue...

Page 493: ...Reinstalling the System 479 The following window appears 6 Press any key to continue You have completed Restoring the Job List Database...

Page 494: ...This page is intentionally left blank...

Page 495: ...ck inks 8 bit 1 byte image An image limited to 256 tones of one color or 256 different colors Since 1 byte contains 8 bits and each bit has two choices 1 byte equals 28 choices or 256 possibilities Se...

Page 496: ...d An extra amount of printed image which extends beyond the trim edge of the sheet or page Booklet VI jobs are composed of booklets which are personalized copies of a document A booklet can consist of...

Page 497: ...white photographic images with tones that change gradually from dark to light unlike the abrupt changes in linework DCS Abbreviation for Desktop Color Separation an EPS format containing 5 files Four...

Page 498: ...ich may include procedures such as laminating perforating and varnishing Font A complete assortment of letters numbers punctuation marks characters etc of a given design and size Frame A color overlap...

Page 499: ...tness Image area Portion of a negative or plate corresponding to inking on paper The portion of paper on which ink appears Imposition The arranging of pages in a press form to ensure the correct order...

Page 500: ...trying to match proofs to press sheets under different lighting conditions Midtones Density values of an image original or reproduction between the highlights and the shadows In the reproduction midt...

Page 501: ...misregistration PDL Printer Description Language files for example PostScript PDF EPS VPS VIPP The CXP6000 Color Server processes image files in PDL formats converting them into a suitable Ready To P...

Page 502: ...Crosses or other targets applied to original copy prior to printing Used for positioning films in register or for register of two or more colors in process printing Resolution The number of pixels poi...

Page 503: ...e other separations See also Moir Screen rulings The number of rows of printing dots per inch on a halftone film A 150lpi screen ruling provides much better quality than 65lpi SEF A printer page orien...

Page 504: ...ate moir and improve picture detail and sharpness in high end color printing Subtractive color model A color process in which the red green and blue components of the original subject are reproduced a...

Page 505: ...able Information VI Variable information VI jobs are jobs in which the printed materials are individualized for specific recipients or purposes These materials can include bills targeted advertising a...

Page 506: ...This page is intentionally left blank...

Page 507: ...nts 398 Calibration 45 314 auto adjusted calibration 320 backing up tables 337 creating a table 324 editing tables 332 frequency 318 full calibration 319 graph 335 guidelines 315 methods 320 organizin...

Page 508: ...or Server 284 tips and limitations 293 viewing preflight report 385 E Editing calibration tables 332 CMYK values 363 imposition jobs 254 pantone colors 363 separations 370 virtual printers 225 Emulate...

Page 509: ...ming 253 user defined 251 Improving quality of images 180 Initial creep out 244 Ink saving 45 354 Inline elements 391 Inserts 270 Interleave 174 Internet Explorer 78 IPX printing 408 configuring 151 1...

Page 510: ...istrator opening 139 Novell NetWare Administrator application using 139 Number of copies 160 O Online help 30 Open Prepress Interface 259 file formats 260 preparing to print 261 printing with 262 Oper...

Page 511: ...bs 379 Realistic images 343 Rear 166 Red corners 239 Reinstalling methods 438 Reinstalling the System 436 Relative colorimetric 43 342 Remote Admin 411 Remote Admin Client 412 Remote connection 411 Re...

Page 512: ...on CXP6000 Color Server 16 Type 174 U UNIX 10 defining a printer 120 printing from 120 UNIX connectivity checking NFS 133 configuring NFS server settings 125 creating file name translation file 124 in...

Page 513: ...XP setting up an LPR printer 99 Windows 98 defining a printer 51 Windows NT 4 0 defining a printer 49 printing using commands 107 setting up an LPR printer 92 Windows XP defining a printer 56 definin...

Page 514: ...This page is intentionally left blank...

Reviews: