background image

Advanced Scanning

Smart Scanner

s

14

15

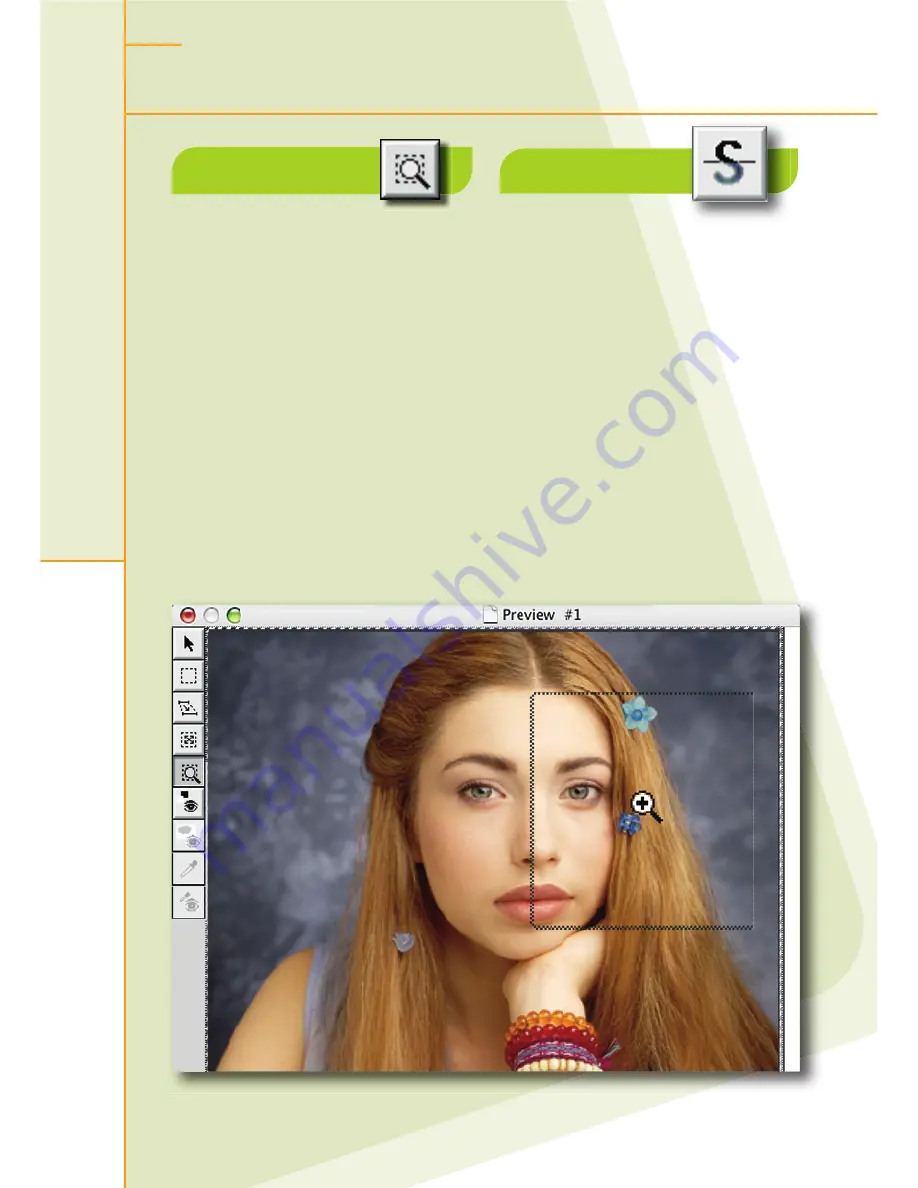
Sharpness

Max Detail

Use 

Max Detail

 to perform a scan 

of an enlarged area. Such an 

enlargement is useful for examining 

the results of sharpening as 

well as for editing the sharpness 

parameters at the actual scan scale. 

In the Sharpness dialog box, 

you can sharpen an image to 

compensate for quality lost during 

scanning or printing. The default 

sharpness table produces good 

results in most cases. Adjusting the 

Intensity

 value can also provide 

satisfactory results. In general, it 

is recommended that you change 

the sharpness settings in the 

enlargement that you produce 

using 

Max Detail

, and then keep 

additional changes to a minimum.

Summary of Contents for Smart Scanners

Page 1: ...Creo Smart Scanners Quick Reference Guide...

Page 2: ...just image luminance and saturation Sharpen image Set white and dark points Adjust image brightness and contrast Follow these steps to produce a high quality high resolution scan Prepare to scan Set g...

Page 3: ...n guide Turn on the scanner and then turn on the computer Clean the originals and clean the base glass Mount the originals emulsion side down on the mask Place the mask over the registration pins Make...

Page 4: ...Smart Scanners 4 2 3 4a 5 6 1 4b Basic Scanning...

Page 5: ...yout Display window you can manually adjust a selected format 4Original s with mask a Select a format according to the mask you are using b In the Layout Display window you can select the image s in t...

Page 6: ...Smart Scanners 6 2c 2b 3 2a 1 Basic Scanning...

Page 7: ...e in one of the following ways 4In the Crop Size area enter height and width values 4In the Image Display window use the Crop tool to manually crop the image b In the Resolution area select a scan res...

Page 8: ...Smart Scanners 8 1 2 3 4 5 6 Basic Scanning...

Page 9: ...ialog box opens Enter a name for the scan file Specify a file destination From the File Format list select a file format Select the Embed ICC Profile check box to attach the color profile of the scann...

Page 10: ...ore After Use the End Points dialog box to produce tonal changes During preview the scanner performs an image analysis of each crop and then automatically selects its whitest and darkest points These...

Page 11: ...End Points dialog box Negative End Points A negative original requires special care because it has a built in orange layer that produces a yellowish cast This cast differs depending on the type of fi...

Page 12: ...After setting the whitest and darkest points you can use the Gradation dialog box to enhance image brightness and contrast You can adjust each color channel separately or multiple channels simultaneou...

Page 13: ...he image using HSL CMYK or RGB controls You can also control the range of hues affected by color corrections In the LS Curves dialog box you can adjust the luminance curve to make an image brighter or...

Page 14: ...he actual scan scale In the Sharpness dialog box you can sharpen an image to compensate for quality lost during scanning or printing The default sharpness table produces good results in most cases Adj...

Page 15: ...can or Max Detail modes Split Screen Before After DT Files A DT file is a raw data 16 bit file You can open a DT file with oXYgen Scan software or with oXYgen Open software and a dongle and then set p...

Page 16: ...mpany brand product and service names are for identification purposes only and may be trademarks or registered trademarks of their respective holders Data subject to change without notice 653 00869B E...

Reviews: