background image


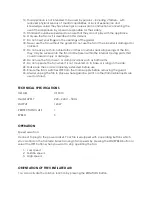
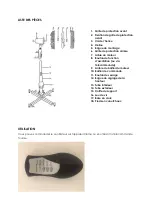
The remote has 5 operating buttons: 

1.


ON/SPEED. With this button you switch ON the fan. By pressing repeatedly you can 
select the fan speed. 

4.


OFF. With this button you switch OFF the fan. 

5.


ROTATION. With this button you enable or disable the rotation function of the fan. 

6.


TIMER. With this button you can set the timer function. Pressing the button once it will 
program to switch off in half an hour. You can select in steps of 30 minutes to operate 
the fan up to 4 hours. 

7.


AUTO. By pressing this button the fan will randomly change its speed. 

Except the AUTO button you will find the remaining 4 mentioned buttons also on the front side 
of the appliance.


CLEANING AND STORAGE. 


Be sure your fan is in the OFF position, preferably unplugged from the socket 


Use only a soft cloth to gently wipe the fan clean 


Do not immerse the fan in water and never allow water to drip into the motor housing 


Do not use gasoline, paint thinner or other chemicals to clean the fan 


For storage, clean the fan carefully as instructed and store the fan in a coo -l, dry 
place. 


ENVIRONMENT FRIENDLY DISPOSAL 

The European Directive 2002/96/EC on Waste Electrical and Electronic Equipment 

 WEEE 


requires that old household electrical appliances should not be disposed of in the normal 
unsorted municipal waste stream. Old appliances should be collected separately in order to 
optimize the recovery and recycling of the materials they contain and reduce the impact on 
human health and the environment. 

The c

rossed out “wheeled bin” symbol on the product reminds you of your 

obligation that when you dispose of the appliance, it should be separately collected. 
Contact your local authority for information concerning the correct disposal of your old 
appliance. 


PRINTING ERRORS AND MODIFICATIONS RESERVED 

Summary of Contents for CFP410

Page 1: ...CFS610 NL VENTILATOR GEBRUIKSAANWIJZING EN FAN INSTRUCTION MANUAL FR VENTILATEUR MODE D EMPLOI DE VENTILATOR BEDIENUNGSANLEITUNG...

Page 2: ...ns wilt doorlezen 1 Sluit u dit product uitsluitend aan op een 220 240 Volt 50 Hz wisselstroom netwerk 2 Plaats het apparaat niet in de nabijheid van warmte bronnen Let erop dat het apparaat of het sn...

Page 3: ...rdijnen tafelkleden en andere stoffen op veilige afstand van de ventilator De ventilator heeft een aanzuigende werking hetgeen tot lichamelijke en product schade kan leiden 20 Gebruik de ventilator ni...

Page 4: ...roef het statief op de standaard Schuif de afdekkap over het statief naar beneden Plaats tot slot de rubber voeten in de standaard in de openingen aan het eind van de standaard DEEL 2 Draai de hoogte...

Page 5: ...Draai de plastic montage ring weer met de klok mee op het motorhuis Draai dit niet te strak vast Druk de ventilatorbladen op de motor as Draai de ventilatorbladen borg tegen de klok in vast op de as M...

Page 6: ...hermkap 7 Motor as 8 Zwenk instelknop of via afstandbediening 9 Achterzijde motor huis 10 Schakelkast 11 Montage schroef 12 Hoogte instelring 13 Binnenbuis 14 Buitenbuis 15 Standaard afdekkap 16 Set s...

Page 7: ...mten bijvoorbeeld in de keuken omdat de openingen hierdoor vervuild kunnen raken Reinig de kunststof onderdelen met een zachte zeep en vochtige doek Gebruik geen wasbenzine thinner of andere scherpe o...

Page 8: ...liance and cable away from sources of heat sharp objects or anything that may cause damage to the appliance 3 Do not place the cord under a carpet Do not cover the cord with small clothes shirts or ot...

Page 9: ...parts that could cause an injury or damage 20 Do not use the fan in wet or damp locations such as bathrooms 21 Do not operate the fan when it is not mounted on its base or is lying on the side 22 Make...

Page 10: ...rative Cap down to the bottom of the outer pipe Make sure the 4 screws are tightly secured Insert the rubber feet into the holes of the cross bars then finish the assembly PART 2 Loosen and remove the...

Page 11: ...y in the holes of the rear guard Tighten the rear guard Mounting Nut clockwise DO NOT OVERTIGHTEN IT Push the fan blades onto the motor shaft Tighten the blade cap or nut by turning it anti clockwise...

Page 12: ...tion knob alternative 9 Rear Motor House 10 Switch box 11 Tighten screw 12 Height Adjustment collar 13 Inner pipe 14 Outer pipe 15 Base decorative cap 16 Set screws 17 Cross base 18 Rubber feet OPERAT...

Page 13: ...ipe the fan clean Do not immerse the fan in water and never allow water to drip into the motor housing Do not use gasoline paint thinner or other chemicals to clean the fan For storage clean the fan c...

Page 14: ...ce produit uniquement un r seau de courant alternatif 220 240 V 50 Hz 2 N installez pas l appareil proximit de sources de chaleur Veillez ce que l appareil et le cordon d alimentation ne soient pas e...

Page 15: ...eur peut provoquer des dommages physiques et mat riels 20 N utilisez pas le ventilateur dans des pi ces humides 21 N utilisez le ventilateur que lorsqu il est solidement fix sa base 22 Le cordon d ali...

Page 16: ...ins rez les pieds en caoutchouc l extr mit des barres du support PARTIE 2 D vissez la bague de r glage de la hauteur qui tient le tube int rieur Tirez le tube int rieur vers le haut jusqu la hauteur s...

Page 17: ...moteur dans les ouvertures de la grille Revissez la bague de montage en plastique sur le bo tier du moteur Ne serrez pas trop fort Placez l h lice du ventilateur sur l arbre du moteur Vissez le capuch...

Page 18: ...Bouton de fonction d oscillation ou via t l commande 9 Arri re du bo tier du moteur 10 Bo tier de commande 11 Bouton de serrage 12 Bague de r glage de la hauteur 13 Tube int rieur 14 Tube ext rieur 1...

Page 19: ...toyez les pi ces en plastique avec un d tergent doux et un chiffon humide N utilisez pas d essence nettoyer de solvant ou d autres d tergents mordants ou abrasifs N immergez pas le ventilateur dans l...

Page 20: ...or der erstmaligen Verwendung die Bedienungsanleitung genau durch selbst wenn Sie bereits mit derartigen Produkten vertraut sind Sie enth lt Tipps wie Sie das Produkt optimal verwenden k nnen Bewahren...

Page 21: ...bewusst sind 15 Verwenden Sie das Ger t ausschlie lich gem den Anweisungen in dieser Bedienungsanleitung 16 Greifen Sie niemals durch das Schutzgitter und stecken Sie auch keine Gegenst nde hindurch 1...

Page 22: ...ICHTUNG DES LUFTSTROMS ber den Schalter ROTATION k nnen Sie die Drehfunktion des Ventilatorkopfes ein und ausschalten MONTAGE 1 Schritt Entfernen Sie die vier Schrauben aus den Fu streben und legen Si...

Page 23: ...use Achten Sie darauf dass die F hrungsnasen am Geh use ordnungsgem in den zugeh rigen ffnungen am Schutzgitter sitzen Schrauben Sie die Befestigungsmutter im Uhrzeigersinn wieder fest Ziehen Sie sie...

Page 24: ...utzgitter 7 Motorwelle 8 Arretierknopf Drehfunktion 9 Motorgeh use 10 Schaltgeh use 11 Befestigungsschraube 12 Schraubmanschette 13 Innenrohr 14 Au enrohr 15 Zierkappe 16 Sockelschrauben 17 Kreuzfu 18...

Page 25: ...orgung getrennt ist Verwenden Sie zum Abwischen des Ger tes lediglich ein weiches Tuch Tauchen Sie das Ger t nicht in Wasser und achten Sie darauf dass keine Feuchtigkeit in das Motor und Schaltgeh us...

Reviews: