© RESQ RED Pro III
6
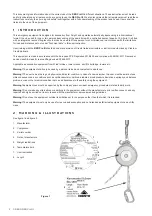
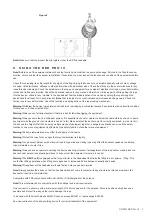
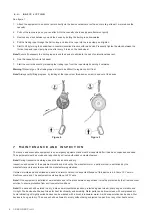
6 . 4 . B A S I C L I F T I N G
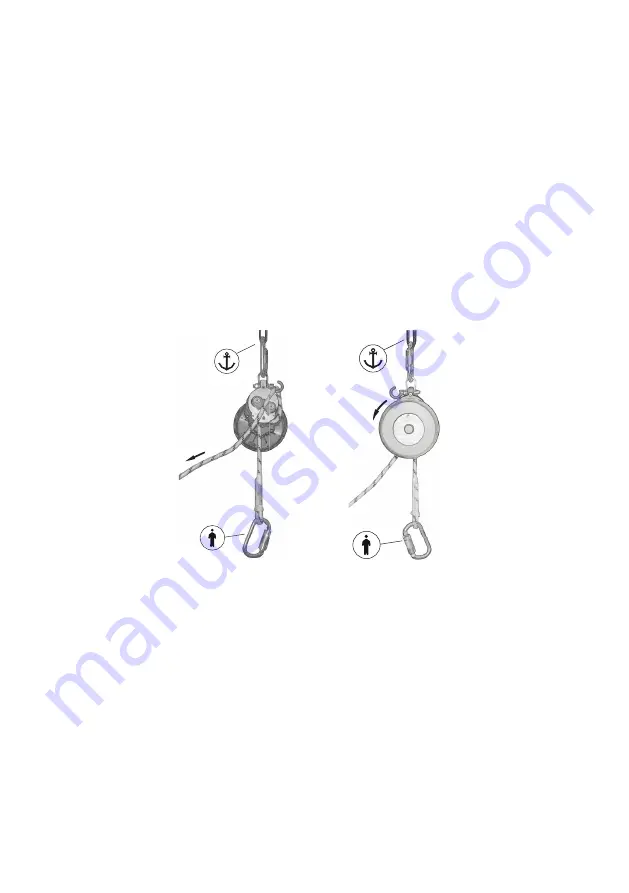
See figure 7.
1. Attach the equipment to an anchor point directly via the device carabiner or with a anchor sling at least 1 meter above the
casualty.
2. Pull out the rescue rope so you can attach it to the casualty’s harness (upper attachment point).
3. Remove any slack between you and the device by pulling the trailing rope downwards.
4. Pull the trailing rope through the friction loop and insert the rope into the rope clamp and tighten.
5. Start to lift by turning the handwheel in counterclockwise direction with two hands. Frequently tighten the slack between the
friction loop and rope clamp. Approx. after every 5 turns on the handwheel.
Note!
Secure if necessary the trailing rope around the device to eliminate the risk of unintentional descent.
6. Free the casualty from its fall arrest
7. Start the control descent by releasing the trailing rope from the rope clamp by pulling it outwards.
Warning!
Never let go of the trailing rope as it could be difficult to regain control if lost.
Note!
Always verify lifting progress by looking at the rope colour threads movement in and out of the device.
7 M A I N T E N A N C E A N D I N S P E C T I O N
The rescue and evacuation equipment is an emergency equipment and must be inspected after it has been unpacked and used.
The equipment must be service and repacked by a Cresto authorized competent person.
Note!
During transport and storage, keep the device dark and dry.
Inspection and service of the equipment must be carried out by the manufacturer or a partner whom is authorized by the
manufacturer and in accordance with the manufacturers guidelines.
If stored, maintained as described and used in normal condition, the expected lifespan of this device is 4-6 Years. 10 Years in
ResQ vacuum pack. The equipment is serviceable up to 20 Years.
Note!
If the equipment is installed at a workstation and left in place between inspections it must be protected by the Cresto vacuum
solution to ensure protection from environmental conditions.
Note!
The device shall be stored in a dry, dark and well-ventilated location, protected against steam, sharp edges, vibration and
UV-light. The device shall be kept clean for best functionality and durability. Metal parts can be blown clean with compressed air.
Avoid lubricating oil! Lightly soiled devices can be washed with a brush in lukewarm water. A mild soap solution can be used. Wet
devices is hung up to dry. The device shall be allowed to air-dry without being subjected to open fire or any other heat source.
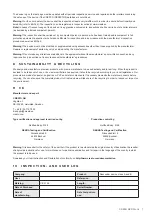
Figure 8
Figure 9
Summary of Contents for RESQ RED Pro III
Page 11: ......
Page 21: ......
Page 31: ......
Page 41: ......
Page 51: ......
Page 61: ......
Page 71: ......
Page 81: ......
Page 91: ......
Page 96: ...RESQ RED Pro III 5 6 2 1 A 2 4 8 8 8 6 3 5 1 A 6 2 11 4 5 6 7...
Page 97: ...RESQ RED Pro III 6 6 4 7 1 1 2 3 4 5 5 6 7 7 Cresto 4 6 ResQ 10 20 Cresto 8 9...
Page 101: ......
Page 111: ......
Page 121: ......
Page 131: ......
Page 141: ......
Page 151: ......
Page 161: ...CRESTO AB L gatan 3 SE 302 63 Halmstad Sweden Tel 46 0 35 710 75 00 support cresto se...


