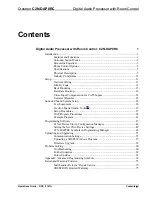
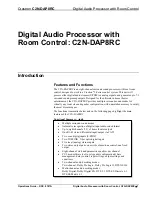
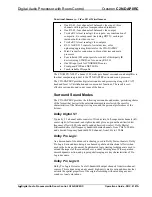
background image


Crestron

 C2N-DAP8RC 

Digital Audio Processor With Room Control 

Operations Guide


Summary of Contents for C2N-DAP8RC

Page 1: ...Crestron C2N DAP8RC Digital Audio Processor With Room Control Operations Guide ...

Page 2: ... Pro Logic II Dolby Digital Dolby Digital 5 1 and the double D symbol are trademarks of Dolby laboratories Manufactured under license from Digital Theater Systems Inc DTS DTS Digital Surround Sound DTS ES Extended Surround DTS Virtual 5 1 NEO 5 and Neo 6 are trademarks of Digital Theater Systems Inc All other brand names product names and trademarks are the property of their respective owners 2004...

Page 3: ...ts 23 Universal Remotes 23 Surround Sound System Setup 26 Test Equipment 26 Crestron Digital Audio Tools 27 Setup Procedures 27 DAT Program Procedures 28 Example Program 41 Programming Software 47 C2Net Device Slot in Configuration Manager 48 Setting the Net ID in Device Settings 49 C2N DAP8RC Symbols in Programming Manager 49 Uploading and Upgrading 55 Communication Settings 55 Uploading a SIMPL ...

Page 4: ......

Page 5: ...y the most discerning ear The functional summaries below and on the following page highlight the main features of the C2N DAP8RC Functional Summary Audio Multiple surround sound modes Automatic recognition of digital input audio coded format Up to eight channels 7 1 of home theater outputs One RJ 45 stereo differential input output via CAT5 Two coax digital inputs S PDIF Two TOSLINK fiber optic di...

Page 6: ...y Pro Logic As a descendent of the advanced technology used in Dolby Stereo theaters Dolby Pro Logic Surround decoders give enhanced spatial and directional effects when used in the home environment Sophisticated logic steering techniques are used to extend the impact of the soundtrack over a wider listening area Wide separation smooth dynamic action and proper spatial imaging are key characterist...

Page 7: ...e the sound toward the surrounds Panorama This control extends the front stereo image to include the surround speakers for an exciting wraparound effect with side wall imaging It is particularly effective for recordings that have strong left or right channel elements in the mix since these are detected and accentuated by the Panorama process All three of the above controls may be used alone or in ...

Page 8: ...S signals so the effect of the Matrix 6 1 format can be achieved even with 5 1 channel signal sources When DTS ES Discrete 6 1 or Matrix 6 1 encoded sources are decoded with a DTS ES decoder the format is automatically detected upon decoding and the optimum playing mode is selected However some Matrix 6 1 sources may be detected as having a 5 1 channel format so the DTS ES Matrix 6 1 mode must be ...

Page 9: ...igital audio and analog audio from local sources via standard RCA connections The unit s built in audio video matrix switcher distributes these inputs to local outputs One bi directional RS 232 and four IR ports are provided A current sensor input accepts power status feedback from the optional CNXRMCS current sensor available separately In addition a powered IR input allows connection of the opti...

Page 10: ...o 3 VIDEO OUT VIDEO IN 5 to 16 VIDEO OUT Video Specifications RJ 45 CAT5 input cable length compensation on 3 of the 4 signals RJ 45 4 channels of balanced video output 12 RCA connectors for video input any combination of composite S or component including HDTV with built in 75 Ohm termination and built in video sensor 12 RCA connectors for video output Active switching circuitry full 16X16 crossp...

Page 11: ...sult the latest Crestron Product Catalog for a complete list of 2 Series control systems 3 Ports can also support one way RS 232 Can not combine IR and RS 232 on same port NOTE Crestron software and any files on the website are for Authorized Crestron dealers and Crestron Authorized Independent Programmers CAIP only New users may be required to register to obtain access to certain areas of the sit...

Page 12: ... OPTICAL 4 AUDIO IN 5 6 R R A L L B SURROUND SOUND OUT SURROUND AUDIO OUT BACK CENTER SUBWOOFER FRONT PWR NET Input and Output Ports VIDEO OUT The RJ 45 VIDEO OUT port can be used to send up to four baseband balanced video signals out of the unit and back to the head end A Crestron video receiver such as the CNX PBVR4 or CNXRMCLV must be used to convert the signals to single ended RCA for input to...

Page 13: ...ptional Crestron equipment such as the STIRP ST MB and ST SPL NOTE IR and one way RS 232 outputs cannot be combined on a single port NOTE One way RS 232 communication supports baud rates up to 9600 Hz Hardware software handshaking is not supported NOTE Transmission levels on the infrared serial output connectors are in the 0 to 5VDC range which may not be compatible with all RS 232 devices SENS Th...

Page 14: ...ort supports baud rates up to 115K and RTS CTS hardware handshaking Data Set Ready DSR and Data Terminal Ready DTR are not supported The pins are configured as shown in the following table PIN FUNCTION 1 CTS Clear to Send 2 GND 3 RXD Receive 4 TXD Transmit 5 RTS Request to Send 6 Not connected NET This four pin terminal block connector is used to supply unit power 24 VDC and for connection to othe...

Page 15: ...ovide sufficient power to the system Insufficient power can lead to unpredictable results or damage to the equipment Please use the Crestron Power Calculator to help calculate how much power is needed for the system http www crestron com dealer tech_resources power_calculator asp NOTE When installing network wiring refer to the latest revision of the wiring diagram s appropriate for your specific ...

Page 16: ...nition of Viewport The Net ID of the C2N DAP8RC has been factory set to 50 The Net IDs of multiple C2N DAP8RCs in the same system must be unique Net IDs are changed from a personal computer PC via the Crestron Viewport NOTE For detailed information on establishing communication between the PC and control system refer to Communication Settings on page 55 If communication cannot be established refer...

Page 17: ...evices window verify the new Net ID code The Net ID can also be verified from the Diagnostics menu Select the Report Network Devices command 9 In the Set Network ID window click Close NOTE The new Net ID code may also be verified by selecting Diagnostic Report Network Devices in the Viewport alternately select F4 10 Repeat this procedure for each C2N DAP8RC to be added to the system Method B Touch...

Page 18: ...he list scrolls to and highlights the device listing The listing should show the device s current Cresnet ID 6 Enter the Cresnet ID that the device should be set to and click OK The number you enter should appear on the list CAUTION This function does not prevent you from setting duplicate IDs Be sure to check current assignments before entering the desired Cresnet ID number Serial Number to TSID ...

Page 19: ...re your safety If the rack is provided with stabilizing devices install the stabilizers before mounting or servicing the unit in the rack When mounting this unit assembly in a partially filled rack load the rack from the bottom to the top with the heaviest component at the bottom of the rack NOTE If rack mounting is not required rubber feet are provided for tabletop mounting or stacking Apply the ...

Page 20: ...he unit with the three screws from step 1 3 Repeat the procedure to attach the remaining ear to the opposite side Hardware Hookup In addition to its capabilities as a surround sound processor the C2N DAP8RC provides tremendous flexibility in audio and video signal distribution Refer to Audio Video Distribution below for detailed information Refer to the basic hookup diagram following this paragrap...

Page 21: ...connections over CAT5 refer to the latest version of the Crestron CAT5 Wiring Reference Guide Doc 6137 which is available from the Downloads Product Manuals section of the Crestron website www crestron com NOTE The coax connection to audio inputs A and B and the optical connection to inputs C and D carry the same signal type S PDIF but Toslink cabling is only good up to a maximum of 10 meters the ...

Page 22: ...d Digital Audio from the Head End The C2N DAP8RC also allows the user to choose digital audio as a video source from the head end In the room the digital audio is supplied to the C2N DAP8RC surround sound decoder passed through the CNAMPX 7X200 amplifier and distributed to the local speakers The listener can only select digital or analog audio at any given time Audio Routing ...

Page 23: ...Crestron C2N DAP8RC Digital Audio Processor with Room Control Operations Guide DOC 8187A Digital Audio Processor with Room Control C2N DAP8RC 19 Video Routing ...

Page 24: ...Digital Audio Processor with Room Control Crestron C2N DAP8RC 20 Digital Audio Processor with Room Control C2N DAP8RC Operations Guide DOC 8187A Typical Surround Sound Configuration ...

Page 25: ... Y Component Pr 4 Composite 4 S Video 2 C Digital Audio Refer to the diagram below and make the appropriate connections between the C2N DAP8RC surround sound outputs and the CNAMPX 7X200 surround sound amplifier and speakers NOTE Each of the CNAMPX 7X200 amplifier s seven channels is functionally identical and can be connected to the surround sound processor in any convenient arrangement NOTE Matc...

Page 26: ...ications and speaker localization becomes the most difficult This type of speaker is not recommended for front channels Subwoofers Subwoofers are specially designed to reproduce the lowest ranges of audible sound usually from 120 Hz down to 20 Hz These speakers are either powered or non powered Non powered subwoofers require an external amplifier and power supply Subwoofer output typically include...

Page 27: ...the following figure NOTE For S video and component video sources be sure to adjust the pot for luminance compensation first VIDEO INPUT COMP 1 The pots for chrominance compensation should be adjusted last 3 While the pattern is being displayed on the monitor use the screwdriver to adjust the VIDEO INPUT COMP 1 compensation pot until the line intensity on the monitor appears uniform Note the numer...

Page 28: ...ected to CNXRMIRD PC running the Crestron Viewport The Crestron Viewport is available as a pull down command from SIMPL Windows or Crestron VisionTools Pro e VT Pro e or as a standalone utility Crestron control system connected to the PC the control system should be running a valid SIMPL Windows program so that the C2N DAP8RC can be polled The procedure is completed as follows 1 From the Viewport ...

Page 29: ...transmitter is assigned a decimal Button ID These button presses must be mapped to commands that will be programmed in SIMPL Windows This is accomplished simply by pressing each button and taking note of its Button ID via the Transmitter Identification window 1 Click Clear in the Transmitter Identification window 2 Press a button on the transmitter and manually record its Button Action name and Bu...

Page 30: ... other words the C2N DAP8RC actually stores these parameters as opposed to a CNXVTC 3 or ST VC where the value is stored solely in the control system If you were to just use an Analog RAMP symbol and send the output of the RAMP to the Volume input and jam it with the Volume_FB output of the C2N DAP8RC Oscillations might result between the RAMP and the actual Volume_FB value from the C2N DAP8RC Thi...

Page 31: ...round sound processor consists of a number of steps that need to be accomplished in the order presented here 1 Place an SPL meter at the designated sweet spot location in the room Measure the distance to the nearest half foot from the SPL meter to each speaker in the room including the subwoofer 2 Launch the DAT program and set communications parameters as described in Communications on page 31 3 ...

Page 32: ...tal Audio Tools Realtime Mode permits all changes to be transferred to the device immediately This is especially useful during calibration of the room To select Realtime Mode click the Realtime Mode icon on the Digital Audio Tools toolbar or select Tools Realtime Mode The system displays the following message As suggested in the message synchronize the application and the device by performing a Se...

Page 33: ... may instead select an external audio source from any of the ports and select a speaker for the left channel of that audio source to be routed to You would use this if you wanted to calibrate your system using an external noise source i e a CD or DVD or calibration tool or with a specific music or movie track View Error Log Clicking this button displays the error log if one exists as shown in the ...

Page 34: ...u the function of each type of noise and its intended use for system calibration The Source Noise Steering feature should be used with an SPL Meter and or a Real Time Analyzer RTA for the best possible calibration of the room Pink Noise Pink noise is sound that is comprised of a random signal with all audio frequencies present over time and at various signal levels It provides equal energy per oct...

Page 35: ...vides equal energy per Hz which will give a 3 dB per octave increase starting from the lower frequency range 20 Hz to the upper frequency range 20 000 Hz Refer to Graph 2 after the next paragraph for a visual reference CAUTION White noise is used to calibrate electronic equipment It provides a signal to measure levels and drives the circuitry at all signals simultaneously IT SHOULD NOT BE USED TO ...

Page 36: ...tton to display the Port Settings window Select RS 232 as the connection type Verify that an available COM port is selected and that all communication parameters and necessary options from the Port Settings window are selected as shown in the illustration on the next page Click the OK button to save the settings and close the window 3 Synchronize communication between the PC and the device by clic...

Page 37: ...N DAP8RC 33 Port Settings Window Speaker Sizes Bass Management This screen lets you specify the room speaker arrangement and set the crossover frequency for the subwoofer Click on the appropriate buttons to identify the existing speaker arrangement use the Crossover Frequency drop down list to specify the crossover frequency for the ...

Page 38: ...s done to ensure that the sound from all speakers reach the listener s ears at exactly the same time Measure the distances and enter the values to the nearest half foot or nearest 0 15 meter the software will calculate any necessary delays Enter distances as accurately as possible You may also enter the delays in milliseconds by using a Real Time Analyzer RTA equipped to give a millisecond value f...

Page 39: ... 85 dB when playing Dolby Noise and all speakers are adjusted to the same level The zero button to the left of the Front Left slider resets all speaker sliders to 0 00 dB the Master Volume and LFE settings are not affected Input Settings This screen allows you to set the input levels for analog audio sources Using the Input Level Gain dB adjustment properly lets you compensate for analog sources w...

Page 40: ...of the input modes and corresponding available decoding modes NOTE The availability of decoding modes depends on your primary configuration mode 5 1 6 1 7 1 and your speaker configuration settings The available decoding modes listed in the above table are based on a 7 1 primary configuration with all speakers selected as Large and the subwoofer selected as Present NOTE For configuration settings o...

Page 41: ...t settings The Panorama Center Width and Dimension values are only available for Dolby Prologic II Music decoding Center Gain is available only for DTS NEO 6 decoding and is used to adjust the gain of the center channel Refer to DTS Neo 6 Cinema and DTS Neo 6 Music on page 4 Panorama This control extends the front stereo image to include the surround speakers for an exciting wraparound effect with...

Page 42: ...forward and steps 1 through 7 move the sound toward the surround speakers NOTE The Panorama Center Field and Dimension settings are only used in Prologic II music mode Graphic EQ This tab lets you specify how many 0 3 or 5 of the six available filters for each speaker will function like a standard graphic equalizer with fixed frequencies and settable gain attenuation only and how many the remainde...

Page 43: ...the response at up to six different frequencies In general a flat room response is not pleasing to most ears The purpose of achieving a flat response is to remove all unwanted audio conditions in the equipment and listening environment before making adjustments to satisfy the user s personal listening preferences For each speaker in the system up to eight you can set the gain bandwidth and filter ...

Page 44: ...8RC 40 Digital Audio Processor with Room Control C2N DAP8RC Operations Guide DOC 8187A The screen can also be set to display two equalizers at the same time Select Options Number of Equalizers and click on 1 or 2 as desired Refer to the following illustration ...

Page 45: ...sic Example zip The program is supplied designed to work with a Crestron TPS 4500 touchpanel and a 2 Series processor If your system uses a different touchpanel convert the program for that touchpanel Preparation In preparation for running the Example Program do the following 1 Verify that all the necessary procedures detailed in Setup on page 11 have been completed 2 Verify that communication set...

Page 46: ...TD and MAX shown in the illustration apply the indicated amount of compression for Dolby Digital sources as follows MIN provides the highest compression ratio bringing dynamic range close to that of a TV broadcast STD provides the dynamic range recommended by sound engineers for general home viewing MAX provides the full dynamic range of a cinema System Setup To begin select SYSTEM SETUP The displ...

Page 47: ...guration Select the AUDIO CONFIG button The screen displays the AUDIO CONFIG window Use this screen to set up the volume trims the delays and the noise generator settings These settings are used together during room calibration AUDIO CONFIG Window Use the VOLUME TRIMS settings to specify the relative gain for each speaker in the room Settings range from 12 dB to 12 dB in 0 5 dB increments Use the ...

Page 48: ...hrough 6 3 Press the FILTER TYPE SELECT button to select the filter type EQ BASS SHELF TREB SHELF LOW PASS HIGH PASS or BANDPASS 4 Press the GAIN k and j buttons to set the gain from 20 dB to 20 dB in 0 5 dB increments 5 Press the FREQ k and j buttons to set the center frequency to 20 Hz 40 Hz 80 Hz 160 Hz 320 Hz 640 Hz 1280 Hz 2560 Hz 5120 Hz or 10 kHz 6 Press the B WIDTH k and j buttons to set t...

Page 49: ... section affects only the signals to OUTPUT B The BASS TREBLE and BALANCE controls are initially set to their middle positions the VOLUME control is set to its zero position The three buttons at the bottom provide both electronic and relay mute control of all outputs and a standard loudness selection that provides emphasized treble and bass The electronic mute reduces the level of the output to 80...

Page 50: ...rces After performing all the system setup procedures press RETURN to display the default main screen Use the SOURCE SELECT buttons to choose the desired audio source In the above illustration CAT5 AUDIO is selected as the input source and DOLBY PROLOGIC II MUSIC is the selected analog decoding mode The TONE CONTROL setting area changes to provide controls for WIDTH DIMENSION and ...

Page 51: ...C developed for specific control system types smw projectname smw source file spz projectname spz compiled file for 2 series umc projectname umc SIMPL Windows user macro ush projectname ush compiled for SIMPL usp projectname usp source code module for SIMPL daf projectname daf DAT program output SIMPL Symbol Intensive Master Programming Language is an easy to use programming language that is compl...

Page 52: ...in Configuration Manager To incorporate a C2N DAP8RC into the system drag the unit s symbol from the Cresnet Control Modules Cresnet Audio Modules folder of the Device Library and drop it in System Views The PRO2 system tree displays the unit in Slot 9 with a default Net ID of 50 as shown in the following illustration NOTE The first C2N DAP8RC in a system is preset with a Net ID of 50 when its sym...

Page 53: ...ken up into slots In Program Manager expand the C2N DAP8RC to view the individual slots then drag the desired symbol to Detail View The C2N DAP8RC slots sub slots and corresponding symbols are described in the following paragraphs Because of their complexity the description of the symbols for the Surround Sound Decoder symbol Slot 08 the Speaker Settings symbol Slot 09 Sub Slot 1 the Full Parametr...

Page 54: ... mapping the buttons on the third party transmitter a list was developed refer to Map the Universal Remote on page 25 for the actual procedure That list needs to be transcribed to this symbol Match the button ID numbers from the list to the numbered press These outputs are the driving source for the IR devices Pronto RC5 Universal Remote Symbol Slot 03 DAP8 Video Switch The DAP8 Video Switch is a ...

Page 55: ...ovides one CAT5 video output labeled VIDEO OUT for distribution of up to four video sources and 12 RCA video outputs labeled A through L any of the video outputs can carry digital audio Video Switch Symbol To select a source each Video_Out analog is initialized using decimal format to a value that corresponds to the source as shown in the table on the next page ...

Page 56: ...y used when the C2N DAP8RC communicates with a serial device The bidirectional port supports baud rates up to 115K baud N81 and has RTS CTS handshake signals The tables below and on the next page list the inputs outputs and their functional description Input and outputs enclosed by brackets are optional Two Way Serial Driver Symbol Built in RS 232 Symbol Input Descriptions INPUT S FUNCTION S tx Mo...

Page 57: ... carries stereo audio to the unit and the other twisted pair carries stereo audio from the unit The remaining audio inputs are RCA left right connectors labeled AUDIO IN 2 through 6 In addition to the CAT5 audio output the C2N DAP8RCprovides two left right RCA outputs labeled A and B Output A flows directly from the crosspoint with no additional processing Output B is passed through a volume tone ...

Page 58: ... tone controller The symbol is shown below Audio Output B Controls Digitals The Mute On and Mute_Relay_On inputs cuts audio for as long as their respective signal remains high The Loudness On input activates the loudness function for as long as the input remains high while the Mono On input switches the audio setting from stereo to mono Analogs The Volume analog input sets the volume level from 0 ...

Page 59: ...ransfer All of these functions are accessed through the commands and options in the Viewport menus Therefore for its effectiveness as a support and diagnostic tool the Crestron Viewport may be preferred over development tools when uploading programs and projects The following sections define how one would upload a SIMPL Windows program or upgrade the firmware of the C2N DAP8RC However before attem...

Page 60: ...t Tools Viewport 2 Refer to the figure after this step From the Viewport menu select Setup Communications settings alternatively press Alt D to open the Port Settings window Setup Communications Settings Command 3 Select RS 232 as the connection type Verify that an available COM port COM 1 is shown after this step is selected and that all communication parameters and necessary options from the Por...

Page 61: ...ng Communications section in the respective Operations Guide for the control system Uploading a SIMPL Windows Program A control system source file has the extension smw A compiled SIMPL Windows file has the extension spz for a 2 Series control system The SIMPL Windows file can be uploaded to the control system using SIMPL Windows or via the Crestron Viewport Upload via SIMPL Windows 1 Start SIMPL ...

Page 62: ... not contain any SIMPL modules only the SIMPL Program check box will be enabled If it does contain SIMPL modules then the SIMPL Program s check box will also be enabled Select one or both check boxes and then click Send Program to begin the transfer NOTE Refer to the respective Operations Guide for the control system for details about the other fields shown on the Send Program window Send Program ...

Page 63: ...te the following steps 1 Make sure that Communication Settings that begins on page 55 has been performed NOTE It is possible to communicate with the C2N DAP8RC directly from a PC using the Viewport and an STCP 501 interface cable DB9 to RJ11 Use this method if you are uploading upgrading only to a C2N DAP8RC that is already installed and you do not need to communicate to any other devices on the n...

Page 64: ...us one or more DSP files The uploading process would be the same except that it will be important to load the accompanying upg file first and then upload the DSP files Problem Solving Troubleshooting The following table provides corrective action for possible trouble situations If further assistance is required please contact a Crestron customer service representative C2N DAP8RC Troubleshooting TR...

Page 65: ...is properly placed on or near the IR window of the equipment Improper connections to the VIDEO OUT ports on the C2N DAP8RC Review the combination of acceptable video formats delivered via the VIDEO OUT ports on the C2N DAP8RC Refer to Hardware Hookup in this Operations Guide The C2N DAP8RC Video Matrix Control symbol has been improperly programmed Review the combination of acceptable video formats...

Page 66: ...99 50 In Asia call Crestron Asia at 852 2341 2016 In Latin America call Crestron Latin America at 5255 5093 2160 In Australia and New Zealand call Crestron Pacific at 613 9480 2999 Future Updates As Crestron improves functions adds new features and extends the capabilities of the C2N DAP8RC additional information may be made available as manual updates These updates are solely electronic and serve...

Page 67: ...ware to configure these modules However they are described in this Appendix for those advanced programmers who wish to program them in SIMPL Windows Slot 08 Surround Sound Decoder The Surround Sound Decoder is a digital signal processor DSP built into slot 08 of the C2N DAP8RC surround sound processor The DSP can be programmed via SIMPL Windows and or Crestron s Digital Audio Tools software The Su...

Page 68: ...gital Audio Processor with Room Control Crestron C2N DAP8RC 64 Digital Audio Processor with Room Control C2N DAP8RC Operations Guide DOC 8187A C2N DAP8RC Surround Sound Decoder Digital Inputs and Outputs ...

Page 69: ...restron C2N DAP8RC Digital Audio Processor with Room Control Operations Guide DOC 8187A Digital Audio Processor with Room Control C2N DAP8RC 65 C2N DAP8RC Surround Sound Decoder Analog Inputs and Outputs ...

Page 70: ...revious source needs to be manually re selected after noise generation is complete Mode_Trim I When high this function stores the volume volume trims and LFE trim values such that they are applied only to whichever decoding mode is currently running This allows the volume and gain settings for a CD source for example to differ from those for a Dolby Digital DVD If unused or set to zero the trim va...

Page 71: ... When high indicates the presence of a signal coming in to the decoder on the corresponding channel This does not necessarily correspond directly to the physical outputs of the C2N DAP8RC Surr_Active refers to the presence of a surround channel such as with a Pro Logic Encoded source while Back_Active indicates a 6 1 or 7 1 encoded signal that will drive one or both of the back surround channels D...

Page 72: ... be used since the DYN_Range inputs described before offer adequate control of compression ratios Sub_Limit Sub_Limit_FB I O Sets the peak limit or maximum output level of the subwoofer The peak level is adjustable within a range of 25 dB to 0 dB Values more negative than 24 0 dB disable peak limiting the default setting LFE_Trim LFE_Trim_FB I O Sets the amount of gain to the LFE or Low Frequency ...

Page 73: ... mode and that the user interface should use the feedback from the C2N DAP8RC to indicate the current mode PL2_Width PL2_Dimension I In Dolby Pro Logic II Music Mode and only in that mode several options may be selected PL2 Width PL2 Dimension and Panorama Valid values for PL2_Width range from 0 to 7 Valid values for PL2_Dimension range from 0 for 3 to 6 for 3 Panorama is defined within the list o...

Page 74: ... size of the system speakers as well as the LFE crossover frequency the digital output signals report the selections Alternatively the speakers can be configured via Crestron s Digital Audio Tools software with no programming in SIMPL Windows C2N DAP8RC Speaker Settings Module Slot 09 Sub Slot 2 Full Parametric EQ Controls Symbol The Full Parametric EQ Controls symbol allows you to define the char...

Page 75: ... to the outputs Recall_PRE1 through Recall_PRE5 DI These inputs offer a simpler way to recall a preset directly Preset _FB will be updated thus Store_PRE will store the last preset recalled Filter_Channel AI Selects the digital output channel as follows Filter_Channel Value Left Front 1 Right Front 2 Left Surround 3 Right Surround 4 Left Back 5 Right Back 6 Center 7 Subwoofer 8 No channel 0 Filter...

Page 76: ...dth of a given filter and is expressed in octaves Although bandwidth applies only to the EQ filters the CN2 DAP8RC can derive Q or slope from bandwidth to control the sharpness of high pass low pass and shelf filters Use of uniform units permits clean transitions between filter types such as from EQ filter to lowpass For EQ lowpass and highpass bandwidths in the range of 0 02 to 2 0 are appropriat...

Page 77: ...lters and presets The symbol s input and output signals are as follows Preset store recall signals Digital inputs Store_EQ Recall_EQ Recall_EQ1 through Recall_EQ10 Analog input Preset Analog output Preset _FB Trim Values Analog inputs EQ_1 through EQ_6 Analog outputs EQ_1_FB through EQ_6_FB Operation of the module is described following the symbol illustration C2N DAP8RC Graphic EQ Controls Module...

Page 78: ...lues than the inputs Alternatively a rising edge of a Recall_EQ 1 through 10 input will recall that trim preset The EQ inputs adjust the gains of the 6 filters thus EQ_1 corresponds to filter 1 EQ_2 corresponds to filter 2 and so forth The gains are adjustable within a range of 10 dB to 5 dB and are applied equally to 7 of the 8 channels the subwoofer channel is excluded All trim band values propa...

Page 79: ...een display and overlay components are covered for 90 days batteries and incandescent lamps are not covered This warranty extends to products purchased directly from CRESTRON or an authorized CRESTRON dealer Purchasers should inquire of the dealer regarding the nature and extent of the dealer s warranty if any CRESTRON shall not be liable to honor the terms of this warranty if the product has been...

Page 80: ...Crestron Electronics Inc Operations Guide DOC 8187A 15 Volvo Drive Rockleigh NJ 07647 05 04 Tel 888 CRESTRON Fax 201 767 7576 Specifications subject to www crestron com change without notice ...

Reviews: