3
quickstart guide
CBLR Series
www.crestron.com
888.273.7876
201.767.3400
Specifications subject to
change without notice.
CBLR Series
QUICKSTART DOC. 7245C (2032356, Sheet 2 of 2) 02.14
Cable Retractors for FlipTops™
The specific patents that cover Crestron products are listed at patents.crestron.com.
Crestron, the Crestron logo, FlipTop, and FlipTops are either trademarks or registered trademarks of Crestron Electronics,
Inc. in the United States and/or other countries. Other trademarks, registered trademarks, and trade names may be used
in this document to refer to either the entities claiming the marks and names or their products. Crestron disclaims
proprietary interest in the marks and names of others.
Crestron is not reponsible for errors in typography or photography.
This document was written by the Technical Publications department at Crestron.
©2014 Crestron Electronics, Inc.
Attach the Horizontal Mounting Bracket (Non-FlipTop 600 Series)
CBLRA-BRKT-3-FT CBLRA-BRKT-4-FT
CBLRAI-BRKT-4-FT
6506161
6506162
6506188
FT-PWR-D
C2N-FTR-TPS4
FTI-PWR-D
QM-FTCC
FT-PWR-D-LG
QMI-FTCC
QM-FTCC-NB
C2N-FT-TPS4-U
QMI-FTDC
QM-FTDC
QM-FTCC-TPS4
QMI-FTMC
QM-FTDC-NB
QMI-FTCSC
QM-FTMC
Applicable
FlipTop
Models
Mounting Bracket
Assemblies
INTERNATIONAL
DOMESTIC MODELS
MODEL
(3-POSITION)
(4-POSITION)
(4-POSITION)
FlipTop Mounting Brackets
Spacer Inserts (Used to fill unpopulated retractor slots)
CBLRA-INSERT-BLANK, Part No. 6506163
CBLRA-INSERT-2 WIRE, Part No. 6506164
Horizontal Mounting Brackets (Used to support retractor arms in horizontal orientation)
CBLRA-BRKT-3H, Part No. 6506159
CBLRA-BRKT-4H, Part No. 6506160
Available Accessories (For Non-FlipTop 600 Series)
4
For regulatory compliance information, refer to Doc. 7475.
Horizontal
Mounting
Bracket
Screws
Clevis Pin
Retractor
Tighten screws in neck
assemblies so they are
just snug against the
clevis pin. Do not over
tighten.
Screw
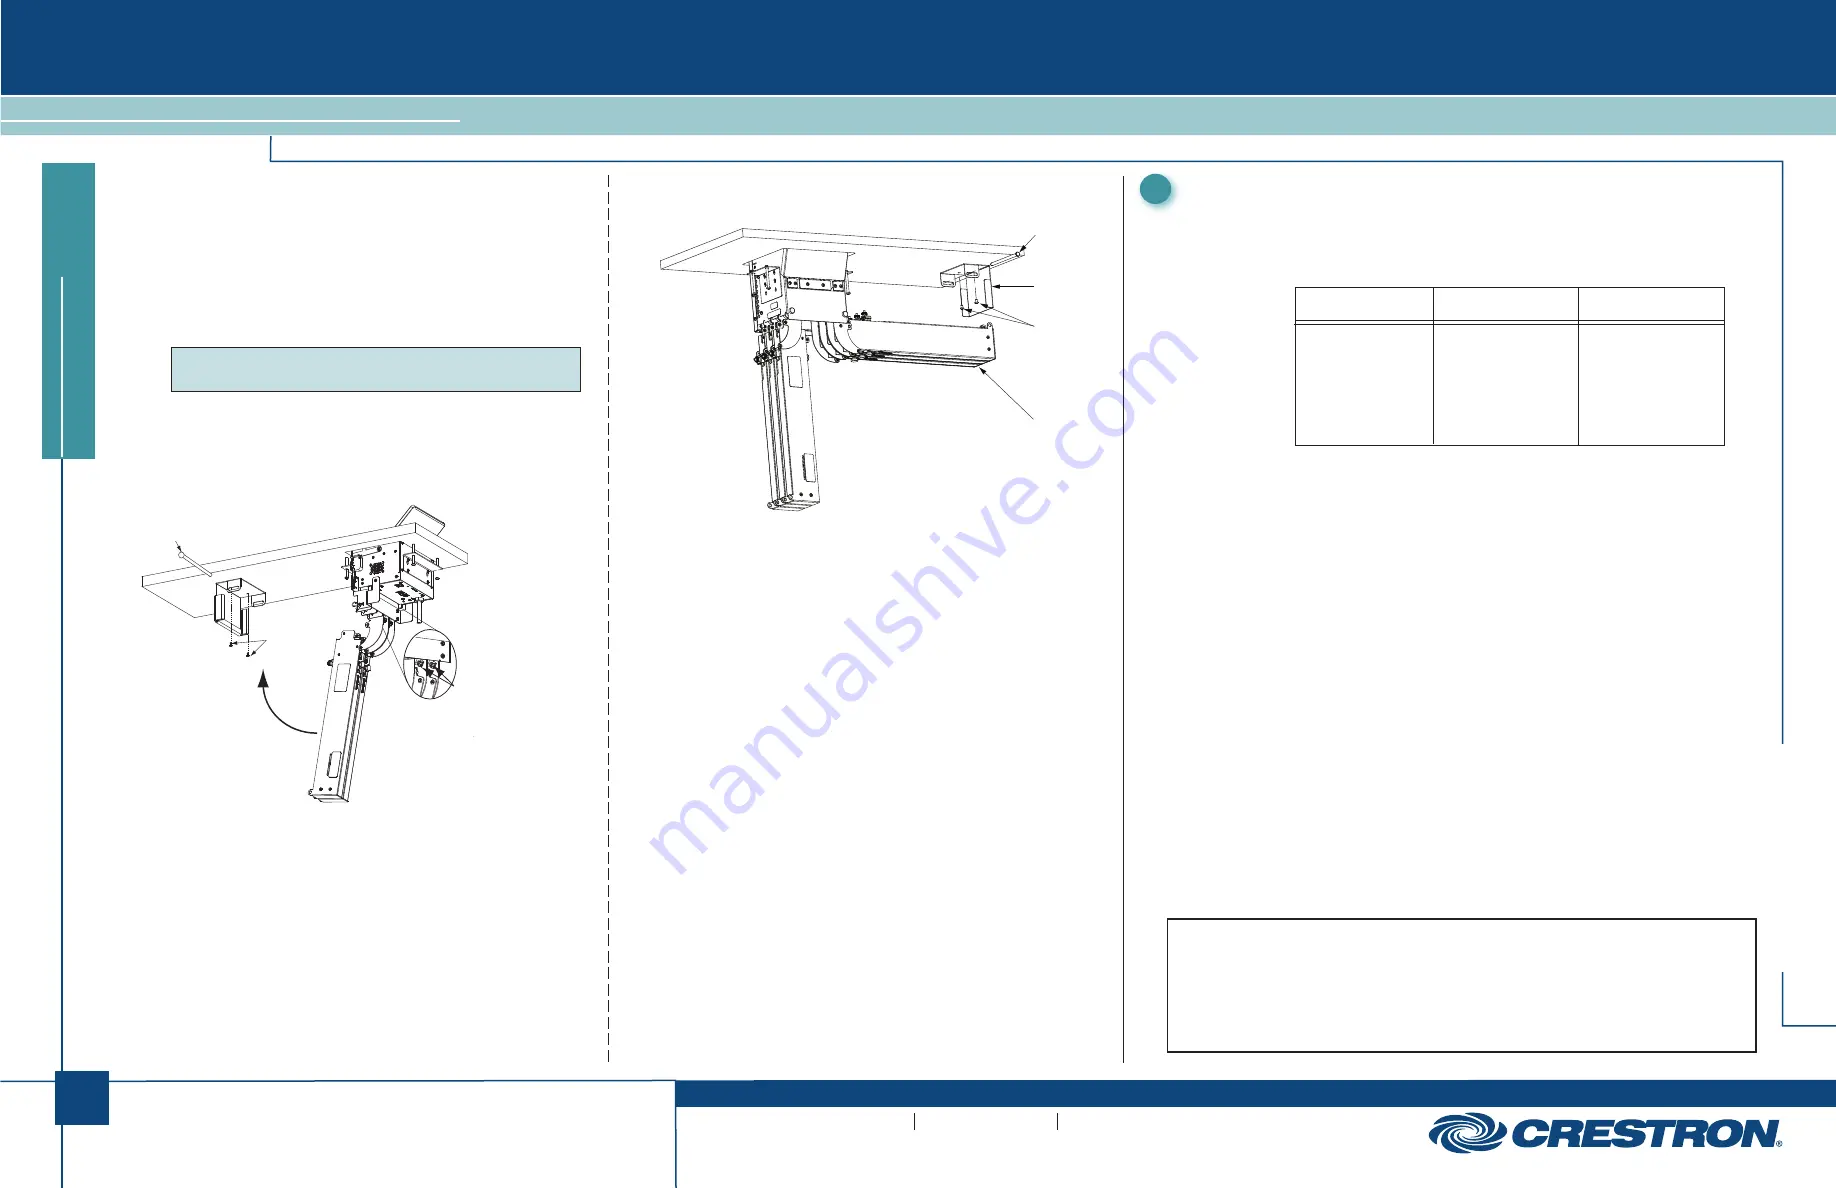
Attach the Horizontal Mounting Bracket
1. Rotate the retractor arms up to the underside of the table, and
position the horizontal mounting braket so the slots are aligned with
the attachment holes in the retractor arms. Carefully use the
horizontal mounting bracket as a template to mark the position of
the two screw holes.
2. Drill starter holes for the screws, and use the two screws provided to
attach the mounting bracket to the table.
NOTE:
Make certain the provided screws are not longer than
the thickness of the table top. If necessary, use shorter screws.
3. Rotate the retractor arms into position and insert the supplied clevis
pin through the horizontal mounting bracket and the holes in the
retractor arms. Insert the supplied hairpin cotter pin into the hole in
the clevis pin to secure it.
Attach the Horizontal Mounting Bracket (FlipTop 600 Series)
Horizontal
Mounting
Bracket
Screws
Clevis Pin
Retractor
Arms


