Crestron
CEN-NVS100
Network Video Streamer
4. In
the
Priority:
drop-down list, select the priority of the recording:
High,
Normal,
or
Low.
The recording with the highest priority is executed first.
5. In
the
Source:
drop-down list, select the source of the video stream:
Stream1
or
Stream2.
6. In
the
Recording Schedule
pane:
a. Select the day(s) of the week that the recording is to occur.
b. Select the time of the recording:
Always
or enter the desired time interval in
hh:mm format.
7. In
the
Destination
pane, do the following:
a. In
the
Server Settings:
drop-down list, select
Network storage
(configured
in the
Server Settings
pane of the “Events and Servers” configuration page).
b. In
the
Max recording capacity:
text entry box, enter the maximum
recording capacity in Kbytes. Valid values range from 1000-200000000
Kbytes.
NOTE:
Old files are overwritten after the maximum recording capacity is
reached.
c. In
the
File size for each recording:
text entry box, enter the maximum file
size of each recording in Kbytes. Valid values range from 200-6000 Kbytes.
d. In
the
File name prefix:
text entry box, enter the prefix to be added to the
file name of the recording.
9. Click
Save
to save the settings.
The recording name, status, weekly schedule, time schedule, source and
destination are displayed in the
Recording Settings
pane of the “Recording”
configuration page.
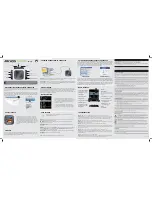
“Recording” Configuration Page – Sample Recording Settings Pane
To view all .mp4 files on the destination server, click the server setting in the
Destination
column of the
Recording Settings
pane. You can then delete some or
all files as desired.
To delete a recording listed in the
Recording Settings
pane, select the recording
in the drop-down list and click
Delete.
Operations & Installation Guide – DOC. 6873A
Network Video Streamer: CEN-NVS100
•
61