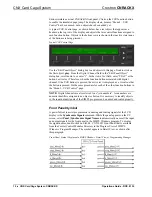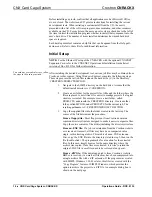
CNX Card Cage System Crestron
CNRACKX
18
••
CNX Card Cage System: CNRACKX
Operations Guide - DOC. 8133
Touchpanel Directory
- The files in this subdirectory contain touchpanel projects
(for example, “Vt3501” and “Vt3502” in the previous illustration titled “Possible
Subdirectory Structure”). Each project describes the exact graphical nature of the
panel to which it uploads.
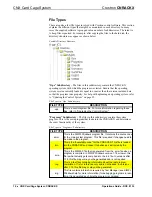
File Types in Touchpanel Subdirectory
FILE TYPE
DESCRIPTION
.vtp
This is the only VisionTools Pro (VTPro) file required for a given
project. It replaces the .prj, .pgf, and graphic (.bmp, .pcx, etc.) files
that were part of VisionTools for Windows (VTW) projects.
.hex
This is the compiled touchpanel project file. This file is uploaded
to the panel itself.
.lgc
Logic files for existing SmarTouch products, like ST-1500/1500C,
that use VTW.
.vti and .vtl Logic files for existing SmarTouch products, like ST-1500/1500C or
ST-1550/1550C that use VTPro.
.bmp, .pcx, These are graphic files that are needed by VTW for recompiling
or .dib
touchpanel projects.
NOTE:
In this example, the “Vt3501” and “Vt3502”directories represent two
touchpanels that are part of the entire remote control system. Please consult the
connection sheets or other supplied information to determine which directory
corresponds to a given touchpanel.
Obtaining Communications
NOTE:
If the optional CNXENET Expansion Card is installed, communications
can be obtained with the CNRACKX over TCP/IP. The CNXENET Operations &
Installation Guide explains how to set up the control system for communications
over Ethernet as well as communicating with the CNRACKX. Refer to the
CNXENET Operations & Installation Guide (latest revision of Doc. 8129) for further
information.
Before attempting to upload the program files into the CNRACKX, it is necessary to
first establish communication between the CNRACKX and a PC. There are two
ways of communicating with the CNRACKX, either via the COMPUTER port
(RS-232 serial communications) or via Ethernet if the optional CNXENET
Expansion Card is installed. Prior to completing the following steps, be sure the
communication cable is properly connected as described in “Loading Crestron
Control Software” on page 13.
1.
Make sure that no programs accessing the COM port of the PC to be
used are running.
2.
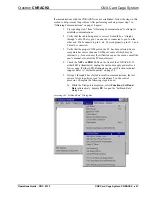
Select
Start | Programs | Crestron
| SIMPL Windows
to start SIMPL
Windows.
3.
SIMPL Windows responds with an opening splash screen and may
display the “What do you want to do?” dialog box. Click on the ‘x’ in
the upper right-hand corner of the dialog box to close it.

