Isys™ Touchpanels Crestron
FSKTPS-5000/6000
2
••
Field Service for Isys™ TouchPanel: FSKTPS-5000/6000
Field Service Guide - DOC. 5956
4.
To prevent scratching of the screen, place the touchpanel facedown onto a
padded surface.
5.
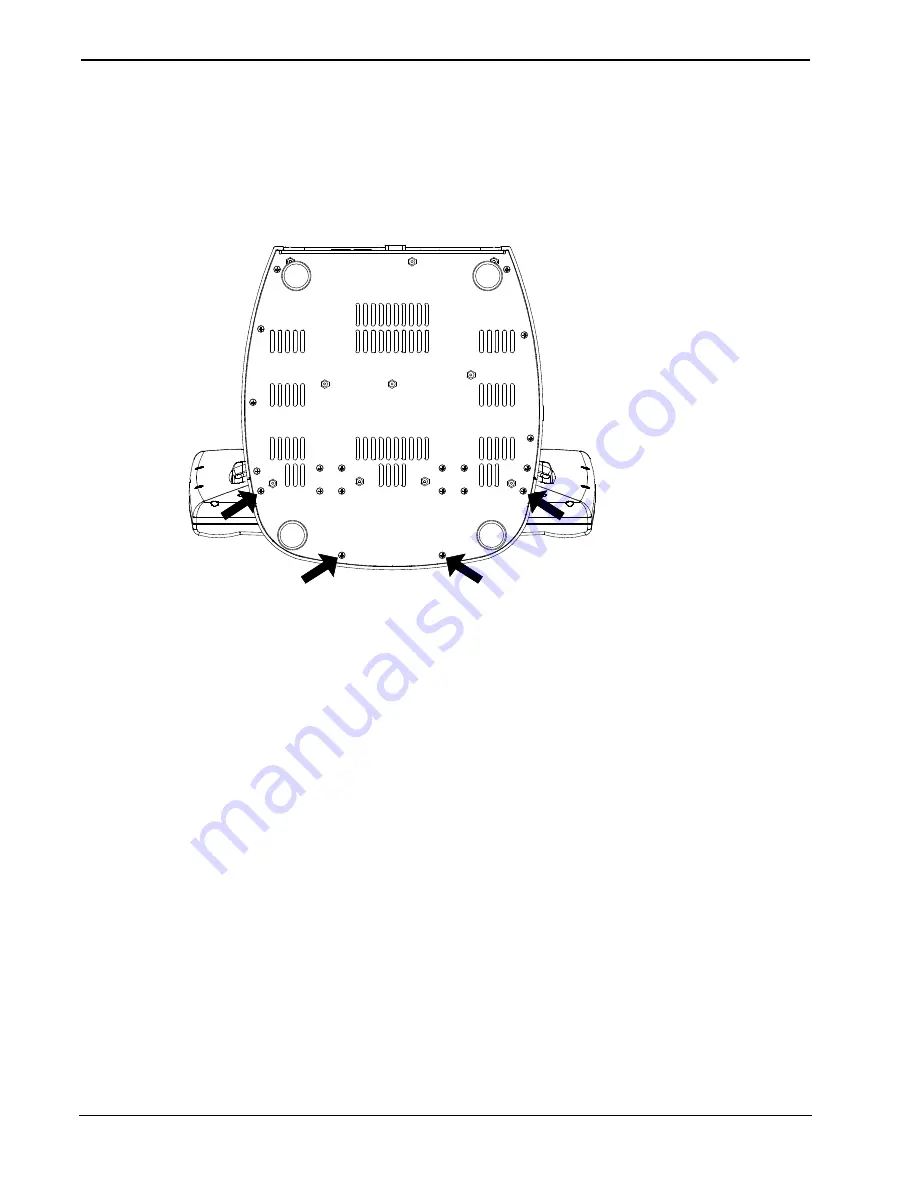
While holding the touchpanel nose in place, use a #1 Phillips screwdriver to
loosen and remove the
four
screws that secure the touchpanel nose. Refer to the
diagram below.
Remove Touchpanel Nose Screws
6.
Place the touchpanel upright on the work surface.
7.
As shown on the next page, slide the nose forward to expose the three connectors
and grounding strap that connects the nose to the motherboard.
8.
Carefully disconnect three cables.
9.
Use the touchpanel position lock buttons to adjust the touchscreen to the
minimum (most horizontal/down) angle.
10.
Use the flexible tip Phillips screwdriver to loosen and remove the grounding
strap secured by the grounding screw.
11.
Re-install the grounding screw.


