
TSW-UMB-60/-60-PMK/-560P-PMK
Touch Screen Mounting Bracket/Kits
Installation Guide
Additional Resources
Visit the product page on the Crestron website
(www.crestron.com) for additional information and the
latest firmware updates. Use a QR reader application
on your mobile device to scan the QR image.
TSW-UMB-60
TSW-UMB-60-PMK
TSW-UMB-60 Installation
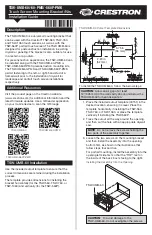
Use the included cutout template to ensure that the
correct dimensions are retained during the installation
process.
The template provides dimensions for installing the
bracket horizontally (for the TSW-560, TSW-760, or
TSW-1060) and vertically (for the TSW-560P).
3.75 in
(96 mm)
2.20 in
(52 mm)
TSW-UMB-560P-PMK
Description
The TSW-UMB-60 is a universal mounting bracket that
can be used with the Crestron
®
TSW-560, TSW-760,
and TSW-1060 touch screens, as well as with the
TSW-560P portrait touch screen. The TSW-UMB-60 is
designed for postconstruction installation in existing
drywall or paneling. The bracket is also suitable for use
in a lectern or a podium.
For preconstruction applications, the TSW-UMB-60 can
be installed along with the TSW-UMB-60-PMK or
TSW-UMB-560P-PMK preconstruction mounting kits.
The TSW-UMB-60-PMK and TSW-UMB-560P-PMK
permit fastening to the left- or right-hand stud of a
framed wall prior to the installation of drywall for
landscape and portrait touch screen installations,
respectively.
To install the TSW-UMB-60, follow the below steps:
CAUTION
: Allow an air gap of at least
12" (305 mm) in the wall cavity above and below the
TSW-UMB-60 for heat dissipation.
1. Place the included cutout template (40151) in the
desired location, ensuring it is level. Place the
template horizontally if installing the TSW-560,
TSW-760, or TSW-1060, or place the template
vertically if installing the TSW-560P.
2. Trace the cutout all the way around the opening,
and then cut the hole with an appropriate drywall
saw.
NOTE
: Do not remove the screws holding the
two parts of the assembly together.
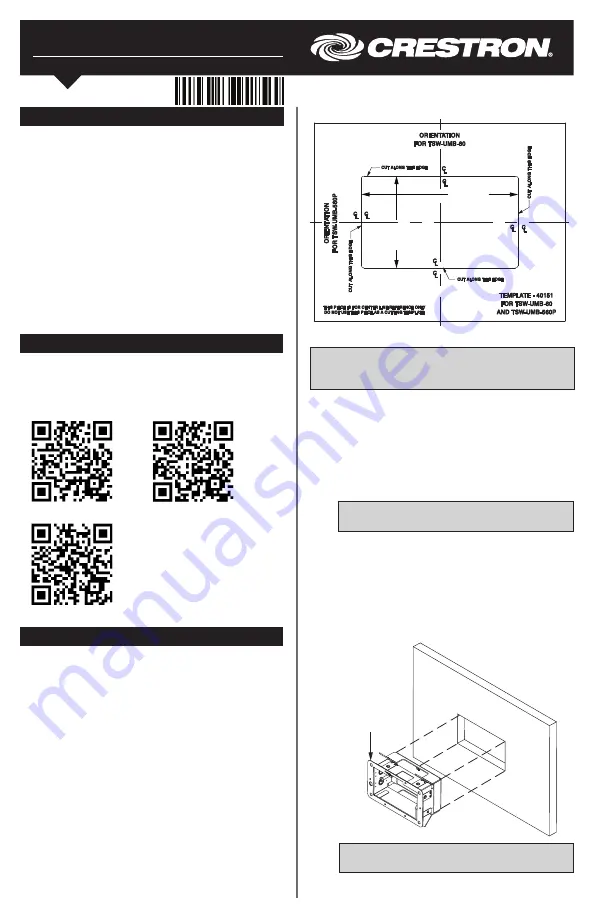
3. Loosen the two screws on the mounting bracket,
and then install the assembly into the opening,
bottom first, as shown in the illustrations that
follow steps four and five.
For portrait mounting, install the assembly into the
opening left side first so that the “TOP” text on
the inside of the back box is facing to the right.
Installing the Assembly into the Opening
CAUTION
: To avoid damage to the
TSW-UMB-60, do not overtighten the screws.
TSW-UMB-60
TSW-UMB-60 Cutout Template Dimensions


