background image

14

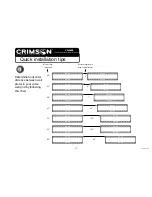
Quick installation tips

www.crimsonav.com                 support@crimsonav.com

Full motion Articulating Wall Mount

VW4600

TM

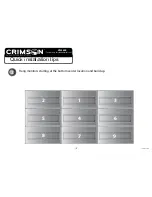
Hang monitors starting at the bottom center location and build up.

3

1

4

3

6

5

79

8

9

7

2

VW4600G3-0002

Summary of Contents for VW4600G3

Page 1: ...these directions or have doubts about the safety of the installation contact Crimson AV Customer Service or call a qualified contractor Crimson AV is not liable for damage or injury caused by incorrec...

Page 2: ...m Llave 5mm Hammer si es necesario Bois peu 6mm 7 32 peu ma onnerie 11mm 7 16 13mm Cl douille Cl allen 5mm Marteau si n cessaire M4 M5 Spacer R 4 M6 M8 Spacer S 4 M8 x 40mm P 4 M8 x 16mm N 4 M8 x 20mm...

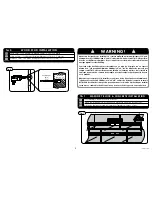
Page 3: ...te C to mark hole location on center line Use la placa de pared C para marcar la ubicaci n de los agujeros en la l nea cen tral Utilisez la plaque murale C pour marquer l emplacement des trous dans la...

Page 4: ...h meets ASTM C 90 specifica tions Do not drill into mortar joints Do not install to a concrete wall or cinder block that has any type drywall or other finishing Se monta est n dise ados para ser insta...

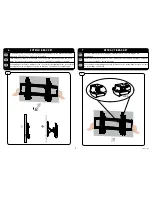
Page 5: ...is A et la rondelle U INSTALL WALL PLATE WOOD STUD 2b 2b 1b 3 Insert B into both holes Use a hammer to tap in if necessary Insertar B en ambos orificios Utilice un martillo para golpear en caso de nec...

Page 6: ...para elimi nar la holgura Si les vis touch le fond puis utiliser des rondelles non inclus afin d liminer mou ATTACH MOUNT BRACKETS 3 3 3 2 Spacer R or S Align mount bracket C to holes on back of TV Fa...

Page 7: ...support sur le support mural puis plus bas et l inclinaison vers le mur HANG TV 4 5 2 Remove key then push lock button This will engage the lock pin securing the bracket to the wall plate Quite la ll...

Page 8: ...appuyez sur la TV sur les bords simultan ment Les serrures de support vont se d sengager et pop la t l vision Tirez d plier compl tement 6 EXTEND BRACKET 7 To retract bracket push TV at edges simulta...

Page 9: ...la paroi et dans le sens antihoraire pour r gler l cran de la paroi 8 PLUMB ADJUSTMENT Only use 4V power drill or less for adjustment screws WARNING Using a 5mm allen key turn height adjustment screw...

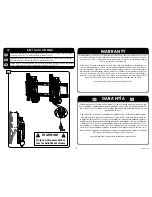
Page 10: ...AV LLC responde de los posibles defectos de material o fabricaci n con una garant a de 10 a os Crimson AV LLC no se hace responsable de modificaciones instalaciones inadecuadas o instalaciones que sup...

Page 11: ...utiliser des produits Crimson AV LLC Crimson AV LLC r fute galement toute responsabilit pour quelque dommage accessoire ou indirect Ceci s applique notamment aux frais de main d oeuvre pour la r para...

Page 12: ...tips www crimsonav com support crimsonav com Full motion Articulating Wall Mount VW4600 TM Monitor size diagonal Horizontal distance between wall plates Determine horizontal distance between wall plat...

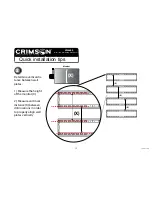
Page 13: ...ll motion Articulating Wall Mount VW4600 TM Determine vertical dis tance between wall plates 1 Measure the height of the monitor X 2 Measure and mark distance X between drill locations in order to pro...

Page 14: ...installation tips www crimsonav com support crimsonav com Full motion Articulating Wall Mount VW4600 TM Hang monitors starting at the bottom center location and build up 3 1 4 3 6 5 79 8 9 7 2 VW4600...

Reviews: