CROPICO LTD – DO7
Issue 7/2001
13
19.8
Set the calibration rig to 400m Ohm, +FS and wait for the reading to settle.
The reading should be 0.40 +/-1 digit. Note the actual reading in the Calibration Test
Results sheet.
19.9
Set the calibration rig to 40m Ohm, +FS and wait for the reading to settle.
The reading should be 0.04 +/-1 digit. Note the actual reading in the Calibration Test
Results sheet.
19.10
Repeat steps 5.2 thru' 5.6 for the remaining ranges.
19.11
Turn the DO7 power OFF and remove the test leads.
19.12
Affix a calibration seal label to the instrument.
19.13
Sign and date the Calibration Test Results sheet.
* * END OF NORMAL CALIBRATION PROCEDURE * *
20. USING DISCRETE RESISTANCE STANDARDS
20.1
Discrete, 4-terminal resistance standards may be used in place of the Cropico Calibration
Standard. The standards must have an uncertainty better than 0.01% if the full calibration
accuracy is to be achieved. Full consideration of the DO7 measuring current must also be
taken into account when selecting the standards. The DO7 can be calibrated to standards
between 1000 and 6000 digits for each range using the KYB entry. However, full accuracy
will only be achieved if standards of 4000 to 6000 digits are used. The following nominal
standards are recommended:
40, 4, 400m, 40m, 4m and 400u Ohm
20.2
In all measurements the P1 and P2 terminals are conventionally connected. Bear in mind
that thermal emfs may be present. The DO7 is particularly sensitive to these on the 600u
Ohm range.
20.3
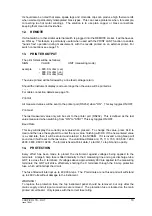
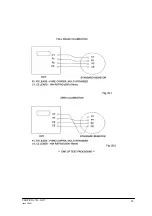
For FS measurements, connect the C1 and C2 leads in the conventional manner (see Fig
20.1).
20.4
For ZERO measurements, connect the C1 and C2 leads to the C2 terminal of the standard
(see Fig 20.2).
Summary of Contents for DO7
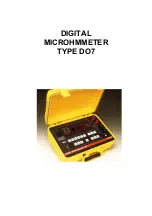
Page 1: ...DIGITAL MICROHMMETER TYPE DO7...
Page 15: ...CROPICO LTD DO7 Issue 7 2001 14...

