background image

CROPICO LTD – DO7

Issue 7/2001

4

6. BATTERY 

CHARGING

The DO7 has built-in rechargeable sealed lead acid batteries which are fully charged when
delivered.  To ensure good service life from the batteries, the DO7 incorporates a sophisticated
battery management system.  To indicate the state of charge, 8 LEDs indicate the remaining
battery capacity in % of full charge.  These LEDs are arranged in a gas gauge style.

The battery charger is built in and the instrument may be connected to 100/120/220 or 240 volts
supply.  The appropriate voltage setting must be selected on the inlet socket and the correct fuse
inserted.  The LINE LED will illuminate on the front panel to indicate when the mains supply is
connected.

Charging is automatically controlled with built-in protection circuits eliminating the possibility of
over-charging.  The display will blank when the battery voltage is too low to sustain
measurements, and the battery state indicators show the current state of charge.  The DO7 will
operate whilst charging on all ranges except the bottom two, and an additional error of
approximately 8 digits may be observed with mains supply connected. The lower ranges have a
larger measuring current than can be supplied by the charger, and therefore batteries must be fully
recharged before use.  The batteries will recharge in approximately six hours, and the DO7 lid
should be open to allow for maximum ventilation.

IMPORTANT   Always connect instrument to mains supply after use and top up battery.
Instruments should be stored with batteries fully charged, and when stored for long periods
the batteries should be recharged each month.

Should the batteries become deeply discharged due to either being stored with the
instrument switched on, or being left for long periods without charge, then it may appear
that no charging is taking place when first connected to the mains supply.  The Line LED
will light but fast charge LEDS will not.  The internal charger will automatically sense the
battery state and will trickle charge with a very low current to restore the batteries before
automatically switching to fast charge.  This low current charge may take up to 20 hours to
restore the batteries.  Continuous charging will not damage the batteries and will, in fact,
keep them in best condition.

BATTERIES

The internal batteries are a sealed lead acid type.  Care should be taken when disposing of them
and they may be returned to Cropico for safe disposal.

Any regulations and directions applying to the disposal of such material must be applied.

Do not dispose of battery in fire.

Do not short circuit.

Do not crush, puncture, open, dismantle or otherwise mechanically interfere with the battery.

NOTE:  If storing for long periods, the batteries should be fully recharged every six months.

Summary of Contents for DO7

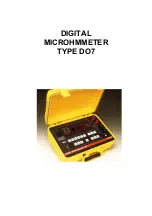
Page 1: ...DIGITAL MICROHMMETER TYPE DO7...

Page 2: ...T 5 7 TECHNICAL DATA 5 8 DESCRIPTION OF CONTROLS 6 Range Selection 7 Error Status Lamps 7 9 METHODS OF MEASUREMENT 7 10 POWER UP 9 11 MEASUREMENT 9 Over Range 9 12 REMOTE 10 13 PRINTER OUTPUT 10 14 PR...

Page 3: ...the apparatus make sure that it is set to the voltage of the power supply The mains plug shall only be inserted in a socket outlet provided with protective earth contact The protective action must no...

Page 4: ...bility is achieved by using our own manufactured internal resistance standards 4 CASE DESIGN The case is ruggedly constructed from an ABS polycarbonate alloy coloured safety yellow A strong internal s...

Page 5: ...use The batteries will recharge in approximately six hours and the DO7 lid should be open to allow for maximum ventilation IMPORTANT Always connect instrument to mains supply after use and top up batt...

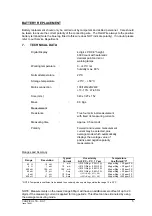
Page 6: ...ing currents Measuring time Approx 0 5 seconds Polarity Forward and reverse measurement current may be selected plus average mode which automatically displays the average value of positive and negativ...

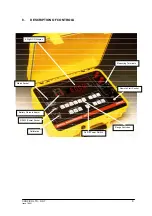
Page 7: ...DO7 Issue 7 2001 6 8 DESCRIPTION OF CONTROLS 4 Digit LCD Display Range Switches On Off Power Switch Calibration Measuring Terminals RS232 Printer Socket Battery Status Indicator Mains Socket Remote S...

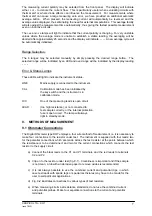
Page 8: ...supply is connected to the instrument CAL Calibration mode has been initialised by the key switch and the instrument is in calibration mode O C One of the measuring leads is open circuit LEAD too high...

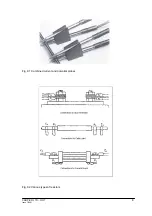
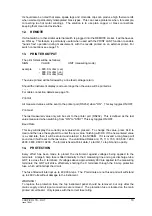
Page 9: ...CROPICO LTD DO7 Issue 7 2001 8 Fig 9 1 Combined current and potential probes Fig 9 2 Various types of resistors...

Page 10: ...NDBY state Should you wish to initialise a continuous reading then press the LOCK ON buttons The measurement will continue until the STANDBY button is pressed or the ON button pressed again An audible...

Page 11: ...he last value measured when switching from ON to STBY This key toggles ON OFF Baud Rate This key will display the currently set value when pressed To change the value press CLE to clear and then use t...

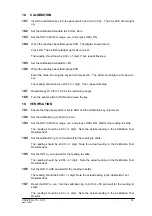
Page 12: ...ENT REQUIRED Cropico Calibration Standard Type MTS2 Set of 2 low thermal emf leads Set of 2 general purpose leads 10A rating Calibration key no 901 17 PREPARATION 17 1 Ensure all retaining screws are...

Page 13: ...FICATION 19 1 Ensure that the panel switch is set to RUN and the calibration key is removed 19 2 Set the calibration rig to 40 Ohm Zero 19 3 Set the DO7 to 60 Ohm range ve and press LOCK ON Wait for t...

Page 14: ...ay be used in place of the Cropico Calibration Standard The standards must have an uncertainty better than 0 01 if the full calibration accuracy is to be achieved Full consideration of the DO7 measuri...

Page 15: ...CROPICO LTD DO7 Issue 7 2001 14...

Page 16: ...has been detected This test is performed at power up and failure is indicated by the HELP message 21 2 Turn the DO7 power ON Wait for the display test to complete and the HELP message to appear 21 3...

Page 17: ...CROPICO LTD DO7 Issue 7 2001 16...

Page 18: ...e leads HSO2 RS Duplex Handspikes as HSO2 but with remote start button fitted LSO3 Large Kelvin clips with 3 metre leads accept cables and bars up to 38mm diameter LSO4 As LSO3 but with 3 metre leads...

Page 19: ...S THERMOCOUPLE REFERENCE JUNCTIONS THERMOCOUPLE SELECTOR SWITCHES PT100 SIMULATORS PRECISION WATTMETERS INSULATION TEST SETS UNIVERSAL CALIBRATORS POWER ANALYSERS HIPOT TESTERS ELECTRICAL SAFETY TESTE...

Reviews: