Measurement Polarity
The measuring current polarity may be selected from the front panel. The display will indicate
or - to denote the current fl ow. This is particularly useful when evaluating circuits with
thermal emf or where diode effects can infl uence the measurement. For measurements where
thermal emf can cause a large measuring zero error, we have provided an additional automatic
average button. When pressed, the measuring current will automatically be reversed and the
average value displayed, thus eliminating the need for external computations. This average
facility will also adjust the measurement time automatically, thus giving the fastest possible
measurement even on inductive circuits.
The +ve and -ve lamps will light to indicate that the current polarity is changing. For very
unstable values where the average mode is unable to establish a stable reading, the averaging
will be aborted after approximately 25 seconds and the display will indicate - - - - A new
average cycle will be automatically initialised.
Range Selection:
The 6 ranges may be selected manually by simply pressing the desired range button. The
selected range will be indicated by an LED and over-range will be indicated by the display
reading - - - -. An Auto range facility is also provided, pressing the AUTO key sets the DO7e in
to auto range mode.
Error & Status Lamps
These LEDs will light to indicate the instrument status.
LINE
:
Mains supply is connected to the instrument.
LOBAT
:
Indicates low remaining battery capacity
CHG
:
Indicates that the internal battery is charging
O/C
One of the measuring leads is open circuit
LEAD
:
(too high resistance), or not connected to
test sample correctly, or the internal protection
fuse is open circuit. The lamp will always
light in standby mode.
9.
METHODS OF MEASUREMENT
9.1 Ohmmeter Connections
The Digital Ohmmeter type DO7e employs a four wire method of measurement, ie. it is
necessary to make four connections to the resistor under test. The instrument is supplied with
four leads; two for the potential connections which are made across the test resistor at the
points between which the resistance is to be determined; and two for the current connections
which connects the test resistor to the supply circuit.
a)
Connect the black leads to the +I and +U terminals, and the red leads to terminals
-I and -U.
b)
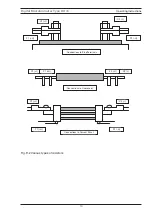
Clip on to the resistor under test (fi g. 9-1). Cleanliness is important and if the sample
is not clean, a rub with an abrasive paper to remove oxides is recommended.
Digital Microhmmeter Type DO7e
Operating Instructions
8


