16. EQUIPMENT
REQUIRED
Cropico Calibration Standard Type MTS2
Set of 2 low thermal emf leads
Set of 2 general purpose leads (10A rating)
17. PREPARATION
17.1
Ensure all retaining screws are fi tted.
Place unit in temperature controlled environment for a minimum of 4 hours. Ensure
batteries are fully charged.
17.2
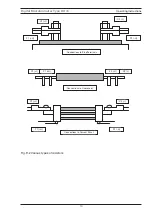
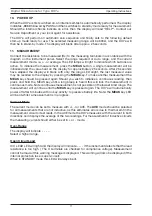
Connect each of the four DO7e terminals to the equivalent terminals on the calibration
Standard. It is essential that low thermal emf leads are used for the P1 and P2 leads (see
Fig.17.1 for the preferred setup).
P1, P2 LEADS - PURE COPPER, MULTI STRANDED
C1, C2 LEADS - 10A RATING (55/0.15MM)
17.3
An internal battery powers the DO7e and this should be fully charged before carrying out
the calibration. The mains charger can be left connected, if desired.
17.4
Set the calibration standard to 400 Ohm, Zero.
17.5
Turn the DO7e power ON whilst holding down the CAL key.
17.6
Leave for a few minutes to stabilise.
18. CALIBRATION
ENTERING A PASSCODE & CALIBRATION
1. Hold down CAL key, whilst powering up - the DO7E displays ‘CODE’.
2. Enter the 4-digit passcode (default is 9252) and press OK.
3.
If the code was incorrect, a long beep is emitted, and the user should start again from #2.
4. If correct, the DO7e displays zero (eg ‘0.0’), and is now in Calibration mode.
5.
At this point, a specifi c range can be chosen for calibration by pressing the relevant
range key. Otherwise, each range will be selected in turn automatically, starting with 600W.
6. With the display showing zero, select the correct resistor value and the ZERO setting
on the calibration box, and press OK. If there is an error, a long beep will be emitted,
and the user should check the settings, and repeat #6.
7. If the zero measurement is successful, a short beep is emitted, and the full-scale value
is displayed (eg 600.0).
Digital Microhmmeter Type DO7e
Operating Instructions
13
+I
+U
-U
-I
CALIBRATION STANDARD MTS2
+I
+U
-U
-I


