background image

English


Initial Setup 

Essential Setup 

1.  Place the unit on a flat and level surface. The selected location should be 

stable and free from vibration. 

2.  Remove the tie-wrap that is holding the tonearm.  
3.  Connect AC adaptor to the 

Power Jack

 of the unit. 

 
Note: Do not plug the AC power adaptor to power outlet before all the assembly is 
completed. Before turning the power on, make sure again all the connection settings 
are correct. Always turn off the power when connecting or disconnecting. 


Stereo System Connection 

RCA Jacks 

  The RCA Jacks output analog line-level signals and could be connected 

directly with a pair of active/powered speakers or the appropriate input of your 
stereo system.  

  The Red plug connects with the Right channel and the White plug connects 

with the Left channel. 

Note: The RCA Jacks are not designed to be connected directly to the passive/unpowered 
speakers. If connected to the passive speakers, the volume level will be very low.  


Aux Input Connection 

You can connect an audio device to this unit and play your music through its 
speakers. To do this, set the 

Function Knob

 to Bluetooth mode, connect the 3.5 

mm auxiliary cable between your audio device, and the 

Aux In Jack 

of this unit 

and start playing the music.  


Turntable Operation 

1.  Rotate the

 On/Off Volume Knob

 to turn on the power.


2.  Set the 

Function Switch

 to PHONO position. 

3.  Set the 

Speed Switch

 accordingly. 

4.  Place the record on the turntable. Use the 

45 RPM Adapter

 if necessary.  

5.  Remove the stylus protector from the stylus assembly. 

Note: To avoid stylus damage, make certain the included stylus guard is in place 
whenever the turntable is being moved or cleaned.  

6.  Release the tonearm 

Hold Down Clip

Note: When the turntable is not in use, remember to lock back hold down clip.


7.  Use the 

Tonearm Lever

 to lift up the tonearm. 

Summary of Contents for CR8017A

Page 1: ...CR8017A Voyager Turntable Instruction Manual Questions problems missing parts Before returning to the store call Customer Service 8 a m 6 p m EST Monday Friday 1 888 CROSLEY www crosleyradio com ...

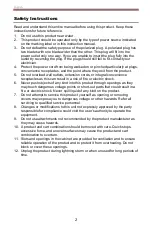
Page 2: ...ctric shock 6 Never push objects of any kind into this product through openings as they may touch dangerous voltage points or short out parts that could result in a fire or electric shock Never spill liquid of any kind on the product 7 Do not attempt to service this product yourself as opening or removing covers may expose you to dangerous voltage or other hazards Refer all servicing to qualified ...

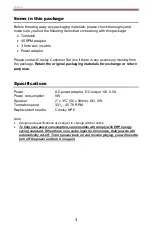
Page 3: ...ging materials for exchange or return purposes Specifications Power AC power adaptor DC output 12V 0 5A Power consumption 9W Speaker 2 x 3 50 x 90mm 8Ω 5W Turntable speed 331 3 45 78 RPM Replacement needle Crosley NP6 Note Design and specifications are subject to change without notice To help save power consumption some models will comply with ERP energy saving standard When there is no audio inpu...

Page 4: ...le Platter 2 Turntable Spindle 3 Tonearm Lever 4 Hold Down Clip 5 Auto stop Switch 6 Speed Switch 7 Tonearm 8 Function Switch 9 Pitch Control 10 On Off Volume Knob 11 Headphone Jack 12 Power Jack 13 RCA Jacks 14 Aux In Jack 15 45 RPM Adapter ...

Page 5: ...ks are not designed to be connected directly to the passive unpowered speakers If connected to the passive speakers the volume level will be very low Aux Input Connection You can connect an audio device to this unit and play your music through its speakers To do this set the Function Knob to Bluetooth mode connect the 3 5 mm auxiliary cable between your audio device and the Aux In Jack of this uni...

Page 6: ...en the record plays to the end In some rare occasion if the turntable stops playing before the end of the record set the switch to OFF position the turntable should overcome this issue Pitch Control The turntable speed can be increased or decreased by approximately 10 by rotating the Pitch Control Knob To increase the speed turn the Pitch Control Knob clockwise To decrease the speed turn the knob ...

Page 7: ... fingers Avoid bumping the stylus on the turntable mat or a record s edge 2 Clean the stylus frequently with a soft brush with a back to front motion only 3 Clean the records to get rid of dust or grease with a record cleaning brush and record cleaning solution 4 Clean the turntable lid and turntable cabinet with a slightly damped microfiber cloth Note Do not use cleanser that contains alcohol ben...

Page 8: ... B digital device pursuant to Part 15 of the FCC Rules These limits are designed to provide reasonable protection against harmful interference in a residential installation This equipment generates uses and can radiate radio frequency energy and if not installed and used in accordance with the instructions may cause harmful interference to radio communications However there is no guarantee that in...

Reviews: