INSTALLATION & OPERATION MANUAL 10100 REV 0 (04/21)
PAGE
7
OF16
G
as
P
ower
T
ilt
S
killets
O
PERATION
O
PERATION
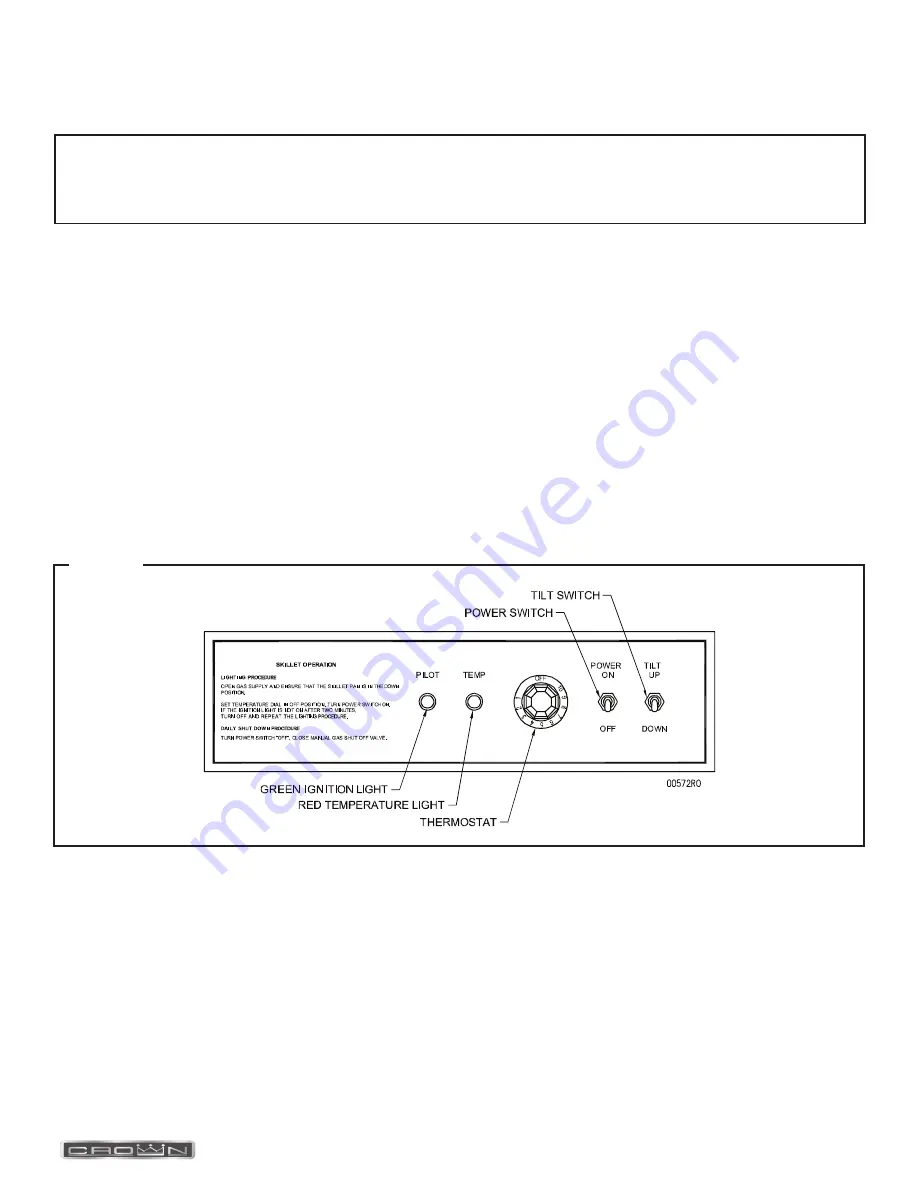
Figure 1
B
efore
F
irst
U
se
Using a non-corrosive, grease-dissolving commercial cleaner, clean the protective metal oils from all surface parts and the
interior of the tilting braising pan. Follow the cleaner manufacturer’s directions. Rinse thoroughly and drain the pan. Wipe
dry with a soft clean cloth.
C
ONTROLS
(figure 1)
Green Ignition Light
.............
Will light when ignition has occurred.
Red Temperature Light
........
Will light when burners are supplying heat to the tilting braising pan.
Thermostat
............................
When turned ON, will initiate electronic ignition system. Temperature settings range
from 1 to 10. (See COOKING GUIDELINES in this manual for temperature ranges for
settings 1-10.)
Tilt Switch
..............................
Push UP to raise tilting braising pan; push DOWN to lower tilting braising pan.
NOTICE
If this equipment is being installed at over 2,000 feet altitude and was not so specified on order, contact service
department. Failure to install with proper orifice sizing may void the warranty.
S
tart
-
up
P
rocedure
1. Open manual gas shutoff valve.
2. Ensure that the braising pan is in the DOWN position.
3. Turn on power switch.
4. Turn THERMOSTAT dial to desired setting. The red TEMPERATURE LIGHT will come on. This will turn on the
electronic ignition which will light the burners.
If the green IGNITION LIGHT does not come on after 30 seconds, turn THERMOSTAT OFF and then ON again for restart.
5. When braising pan has reached set temperature, the red TEMPERATURE LIGHT will go off and the burners will shut
off. The burners will cycle on and off thereafter to maintain set temperature. The red TEMPERATURE LIGHT will be
on when the burners are on and off when burners are off.


