TS 068 R02
Croydex, Central Way, Andover,
Hampshire, SP10 5AW, UK
+44 (0) 1264 365881
+44 (0) 1264 356437
info@croydex.co.uk
www.croydex.com
1
4
2
5
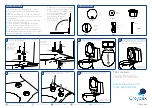
Loosely fit the brackets to the pan using either
the top or bottom fittings.
Fully tighten the brackets in position.
Attach the seat onto the brackets
and adjust to fit your toilet pan.
Hinge
Base
with
rubber
grip
Plastic
Cover
Plastic
Washer
Key
Bolt
Place the plastic covers over the brackets
and re-attach the toilet seat.
1. To retain the best quality finish, clean
product with a soft cloth and a mild soap
solution.
2. Do not use abrasive or chemical cleaners
as they may damage the surface of the toilet
seat or hinges.
3. Spray cleaning liquids onto the cloth and
not directly onto the product.
4. Take care when cleaning the toilet pan
with chemical cleaners. Avoid contact of
the chemical cleaners with the toilet seat or
hinges. Immediately rinse off any splashes to
avoid damage or discolouration to the surface
of the toilet seat and hinge parts.
SAFETY & CARE
FITTING PACK
A (x2)
B (x2)
E (x2)
F (x2)
5. Please do not open beyond 105
degrees before installation. If you
accidentally do this, please insert
one of the seat hinge pins
into the visible hole and
rotate the barrel back
round until the other
hole is visible.
1050
A
3
Once aligned, lift the seat upright whilst
ensuring the brackets do not move. Then
push and release the centre button and
lift the seat away from the hinges.
Image shown for reference only.
Image shown for
reference only.
6
D (x2)
Image shown for
reference only.
Attach the seat onto the brackets once they
have been fully tightened into position.
FOR CLEANING
Look to step 3 for instructions on how to
utilise the quick release function which
allows you to remove the seat for cleaning.
Use bottom
fixings on
standard pans.
D
F
E
B
PLEASE TURN OVER FOR
CHILD SEAT REMOVAL
C (x2)
Top Fix
Plug
C
B
J
Use top fixings
if you cannot
access the
underside of the
fixing holes on
the toilet pan.


