background image

2-4

520 Express Series

520 Express Series

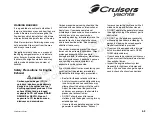
States Coast Guard issued a SAFETY 
ALERT on August 28, 2001 that covers 
some of the issues of improper use of the 
boarding platform. The SAFETY ALERT and 
portions of the accompanying information 
follow:

Every year tragic deaths occur from the 
negligence of unsafe boating and dangerous 
activities. Experts say, “many of these 
deaths may have been caused by an 
invisible hazard, carbon monoxide 
poisoning.” Taking the risk of swimming 
under a boarding platform when the engine 
is running, skiing within 20 feet (6.1 m), “teak 
surfing” or “dragging” behind a moving boat 
can be fatal. Cruisers Yachts is concerned 
for the safety of all boaters. Cruisers Yachts 
does not promote unsafe boating risks or 
jeopardizing the safety of any boaters.

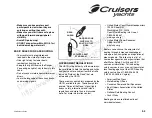
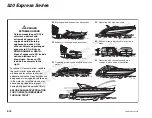
 WARNING

DO NOT use the swim platform for 
any other purpose than boarding 
the yacht or preparation of entering 
the water, and DO NOT use the 
boarding platform when the engine 
is running. 

Carbon monoxide poisoning should not be 
confused with seasickness, intoxication or 
heat stress. If someone complains of 
irritated eyes, headache, nausea, weakness 
or dizziness, or you suspect carbon 
monoxide poisoning, immediately move the 

person to fresh air, investigate the cause, 
and take corrective action. Seek medical 
attention if necessary.

SAFETY ALERT From August 28, 2001:

The USCG advised boaters not to “Teak 
Surf.” Some boating fatalities revealed 
carbon monoxide (CO) from a vessel’s 
exhaust resulted in CO poisoning and 
death. “Teak Surfing” places the individual 
in a position directly exposed to the CO in 
the engine’s exhaust. This may result in a 
loss of coherent responses and even 
death. In addition, “Teak Surfing” 
dangerously exposes the individual to a 
possible propeller injury, and since it is 
done without a life preserver (PFD), it 
significantly increases the probability of 
drowning. Therefore, the USCG stresses, 
“Teak/Drag Surfing” is a very dangerous 
activity and advises boaters not to 
participate in it. The USCG also stated 
that carbon monoxide is one of the most 
dangerous gases. It strikes before you 
know you are exposed and it impairs in a 
way that can and too often does lead to 
death. That is why it is important to the 
USCG that in every circumstance it 
should be avoided.

GENERAL WATER SPORT 
PRECAUTIONS 

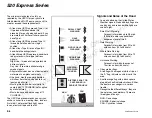
• DO NOT “Platform Drag.”
• DO NOT attempt water sports in 

shallow water, close to shore or in 
water where you are not familiar with 

the depth or what is beneath the 
surface.

• DO NOT attempt water sports at night 

or directly in front of other boats.

• DO NOT attempt water sports near 

swimming areas, beaches or personal 
watercraft.

• DO NOT follow directly behind another 

boat or skier without leaving an 
adequate safe distance.

• DO NOT jump from a boat that is 

moving at any speed, or enter or exit 
the water when the engine is running.

• DO NOT approach the yacht from the 

water if the engines are running.

• DO NOT “back up” to anyone in the 

water.

• DO NOT approach the rear of the yacht 

from the water while the engine is 
running.

• Make sure the engines are OFF before 

allowing anyone to approach the yacht 
from the water.

• Make sure the engines are OFF before 

any one enters or exits the yacht, swim 
platform or boarding ladder.

• Maintain a safe distance of at least 100 

ft (31 m) from all other objects, 
including other boats, piers, rafts, 
mooring and navigational buoys, 
pilings, abutments or any other items.

• Make sure the engines are OFF if you 

need to retrieve or pick up an article 
from the water.

Downloaded 

from 

Cruisers 

Owners 

Forum 

http://www.CruisersOwnersForum.com

Summary of Contents for 520 Express Series

Page 1: ...ress Series Model Specific Information 3 1 4 General Controls and Indicators 4 1 5 Basic Operation of Systems 5 1 6 General Accessory Items 6 1 7 Getting Underway 7 1 8 General Maintenance 8 1 9 Stora...

Page 2: ...ii 520 Express Series Downloaded from Cruisers Owners Forum http www CruisersOwnersForum com...

Page 3: ...KIPPER S KIT 1 2 Owner s Manual 1 2 Owner s Manuals for Onboard Systems and Components 1 3 WARRANTY INFORMATION 1 4 Dealership Responsibilities 1 4 Your Responsibilities 1 4 Warranty Service 1 4 Downl...

Page 4: ...achts Owner s Manual The 520 Express Series owner s manual contains information concerning the operation and care of your yacht The descriptions contained within the manual will introduce you to the f...

Page 5: ...and Components Spend some time becoming familiar with all the information contained in the Skipper s Kit Besides containing separate warranty information the kit also contains literature which provid...

Page 6: ...dealer and go over all warranties Fill in the Cruisers Yachts Limited Warranty Registration card which is located inside the Skipper s Kit Keep a record of the hull number for future reference 2 Insp...

Page 7: ...ting Rules and Regulations 2 3 Signals and Rules of the Road 2 6 Emergency Considerations 2 7 Hazardous Conditions 2 8 Safety Precautions for Engine Exhaust 2 9 Safety Label Location Layout 2 11 Sampl...

Page 8: ...ms Regularly check all safety equipment such as fire extinguishers life preservers flares and horn They should be in good condition readily visible and easily accessed Keep up to date navigational cha...

Page 9: ...the California Air Resources Board CARB The engines have a special environmental tag and the yacht has this label affixed to it The tag and the label are required by the California Air Resources Board...

Page 10: ...eak Surfing dangerously exposes the individual to a possible propeller injury and since it is done without a life preserver PFD it significantly increases the probability of drowning Therefore the USC...

Page 11: ...es of the Road signal lights buoys safety international and inland regulations and more than is discussed here For more information contact United States Coast Guard Headquarters 1300 E Street NW Wash...

Page 12: ...ine mooring lines fenders first aid kit waterproof flashlight spare fuses electrical tape and tool kit Signals and Rules of the Road Learn and observe the United States Weather signals Red and black f...

Page 13: ...USCG requires the owner or operator of a boat involved in an accident to report the incident to the proper marine law enforcement agency for the State in which the accident occurred Immediate notifica...

Page 14: ...ther stations the USCG or Weather service broadcasts 162 55 or 162 40 Megahertz for the latest conditions It is recommended that you check the weather not only before but periodically while you are bo...

Page 15: ...ardous Direct prolonged exposure will cause brain damage or death Incoherence drowsiness loss of consciousness headaches nausea and vomiting are some symptoms of exposure to carbon monoxide If you thi...

Page 16: ...s All engines and fuel burning appliances produce CO as exhaust Direct and prolonged exposure to CO will cause BRAIN DAMAGE or DEATH Signs of exposure to CO include nausea dizziness and drowsiness Sou...

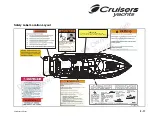
Page 17: ...Safety Label Location Layout 500 LABEL LOC CAUTION TO PREVENT EXHAUST FUMES FROM ENTERING CABIN KEEP CLOSED WHEN ENGINE OR GENERATOR ARE RUNNING DANGER Downloaded from Cruisers Owners Forum http www...

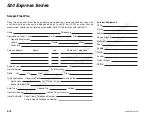
Page 18: ...on Number Length Name Make Other Info Persons Aboard Name Age Address Telephone Engine Type HP No of Engines Fuel Capacity Radio Yes No Type Freq Trip Expectations Departure Time Leaving From Destinat...

Page 19: ...T 3 8 INTERIOR ELECTRICAL PLAN LAYOUT 3 10 A C PLAN VIEW 3 12 STARBOARD A C VIEW 3 13 PORT A C VIEW 3 14 COCKPIT A C VIEW 3 15 PLUMBING HARDWARE 3 16 A C PLUMBING VIEW 3 18 DIESEL ENGINE GENERAL LAYOU...

Page 20: ...3 2 520 Express Series 520 Express Series Downloaded from Cruisers Owners Forum http www CruisersOwnersForum com...

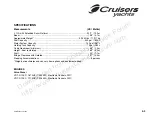
Page 21: ...pacity 75 gal 284 L Cabin Headroom minimum 6 6 2 0 m Height Keel to Hardtop 16 5 5 0 m Draft 44 1 1 m Bridge Clearance with Hardtop 13 1 4 0 m Sleeping Accommodations 6 persons Weights are estimates a...

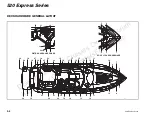
Page 22: ...OUT 29 28 18 10 27 26 18 25 23 22 10 11 10 12 18 10 18 20 21 24 25 10 18 28 13 14 6 8 19 10 17 17 16 15 13 12 10 11 32 24 33 10 9 7 6 31 30 4 3 1 2 5 ROPE LOCKER HARDWARE WETBAR AREA HARDWARE 9 1 Down...

Page 23: ...13 Wiper Motor 14 Dual Air Horn 15 Water Deck Plate 16 Waste Deck Plate 17 Diesel Fuel Fill Deck Plate 18 Cup Holder 19 Drink Holder 20 Cockpit Cup Holder 21 Cockpit Starboard Hand Rail 22 Refrigerato...

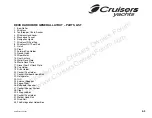
Page 24: ...OR GENERAL LAYOUT 2 3 3 3 3 3 4 5 6 7 9 9 8 9 MSR ENTERTAINMENT CENTER SALON ENTERTAINMENT CENTER FSR ENTERTAINMENT CENTER 10 11 12 13 14 23 22 21 15 18 19 20 16 17 17 17 1 1 1 Downloaded from Cruiser...

Page 25: ...9 Stereo System 10 Refrigerator Freezer 11 Electric Stove 12 Conventional Oven Microwave 13 Dishwasher 14 Coffee Maker 15 Combo Washer Dryer 16 Vacuum 17 Carbon Monoxide Detector 18 MSR Head Unit 19...

Page 26: ...ries 520 Express Series COCKPIT LIGHT PLAN LAYOUT INTERIOR LIGHT PLAN LAYOUT 2 3 4 5 6 7 8 8 8 9 10 IN BOTTLE STORAGE 1 1 1 1 1 1 1 1 1 1 1 1 1 5 1 Downloaded from Cruisers Owners Forum http www Cruis...

Page 27: ...tesy Light 2 Switch Box 3 Receptacle Box 4 Dual Receptacle Box 5 Overhead Light 6 Reading Light 7 Light Rope Kit 6 ft 8 Light Rope Kit 24 in 9 Light Rope Kit 14 ft 10 Light Rope Kit 12 in Downloaded f...

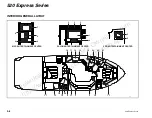
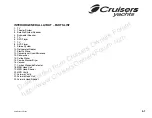
Page 28: ...eries 520 Express Series INTERIOR ELECTRICAL PLAN LAYOUT 2 3 4 5 6 7 8 9 10 11 12 13 14 15 16 17 18 19 20 1 22 23 24 25 26 27 28 29 30 31 32 21 5 5 Downloaded from Cruisers Owners Forum http www Cruis...

Page 29: ...x 13 Light Switch 14 Dual Receptacle Box 15 Dual Receptacle Box 16 Light Switch 17 Dual Receptacle Box 18 Light Switch 19 Dual Receptacle Box 20 Dual Receptacle Box 21 Dual Receptacle Box 22 Light Swi...

Page 30: ...lenum Box 4 A C Unit to Galley Plenum 5 Galley Plenum to Galley 6 Galley Plenum to Forward Head 7 Galley Plenum to FSR 8 Salon A C Plenum Box 9 A C Unit to Salon Plenum 10 Salon Plenum to Salon 11 Sal...

Page 31: ...D A C VIEW 2 8 9 11 12 14 16 6A 2 A C Unit 8 Salon A C Plenum Box 9 A C Unit to Salon Plenum 11 Salon Plenum to ASR 12 Salon Plenum to Aft Head 14 A C Head Vent Downloaded from Cruisers Owners Forum h...

Page 32: ...7 13 14 15 1 16 6B 1 A C Unit 3 Galley A C Plenum Box 4 A C Unit to Galley Plenum 6 Galley Plenum to Forward Head 7 Salon Plenum to Aft Head 13 A C Return Vent 14 A C Head Vent 15 FSR A C Vent Downlo...

Page 33: ...Cockpit A C Unit 2 Cockpit A C Plenum 3 Dash A C Plenum 4 Starboard A C Plenum Vents 5 A C Unit to Starboard Deck Plenum 6 A C Unit to Dash Plenum 7 A C Unit to Companion Seat 8 Dash Plenum to Dash 9...

Page 34: ...4 6 6 7 8 8 9 9 10 12 13 14 15 16 17 18 18 11 19 20 1 22 22 23 23 24 24 24 24 24 24 25 25 25 23 26 23 13 28 34 28 27 28 28 29 29 30 31 32 32 33 33 35 36 37 38 39 39 43 42 37 38 40 42 43 41 21 18 2 Dow...

Page 35: ...Water Receptacle 17 Refrigerator 18 Shower Kit 19 Hot Water Heater 20 Dishwasher 21 Fresh Water Pump 22 Head Solenoid 23 Adapter 24 Adapter 25 Adapter 26 Garden Hose Adapter 27 Icemaker Shutoff Tee 28...

Page 36: ...520 Express Series 520 Express Series A C PLUMBING VIEW 2 2 3 3 4 5 5 6 6 4 7 7 8 9 10 11 12 12 13 14 15 16 17 18 19 20 1 1 21 16 8 Downloaded from Cruisers Owners Forum http www CruisersOwnersForum...

Page 37: ...Intake Hose 6 Aft A C Outlet Hose 7 Aft A C Condensation Hose 8 A C Unit 9 A C Unit 10 Intake Strainer 11 Ball Type Seacock 12 90 Elbow 13 Strainer 14 Adaptor 15 A C Raw Water Pump 16 Female Tee 17 S...

Page 38: ...3 20 520 Express Series 520 Express Series DIESEL ENGINE GENERAL LAYOUT 2 3 4 5 6 7 8 9 12 16 17 19 1 23 24 25 28 29 21 7 11 12 Downloaded from Cruisers Owners Forum http www CruisersOwnersForum com...

Page 39: ...Crossover to Port Engine Fuel Filter 16 Crossover to Starboard Engine Fuel Filter 17 Starboard Fuel Filter to Starboard Engine 19 Port Engine Return to Crossover 21 Starboard Engine Return to Crossove...

Page 40: ...3 22 520 Express Series 520 Express Series DIESEL ENGINE GENERAL LAYOUT CON T 10 11 13 14 15 18 20 22 23 25 26 27 30 31 7 13 14 Downloaded from Cruisers Owners Forum http www CruisersOwnersForum com...

Page 41: ...X to Crossover 18 Crossover to Port Tank Return 20 Crossover to Starboard Tank Return 22 Generator Feed to Genset Algae X 23 Genset Algae X to Genset Fuel Filter 25 Generator Return to Port Fuel Tank...

Page 42: ...7 8 9 10 1 7 1 1 Port Fuel Tank 2 Starboard Fuel Tank 3 Engine Bulkhead Filter 4 Seafoam Trim 5 Seafoam Trim 6 Neoprene Gasket 7 Neoprene Gasket 8 1 Mylar Sound Foam 9 1 Mylar Sound Foam 10 Seafoam T...

Page 43: ...FITTINGS CON T 7 3 2 2 3 3 4 4 5 6 1 1 Fuel Tank Shut Off Valve 2 3 8 x 3 8 Male Adaptor 3 3 4 Closed Nipple 4 Valve Ball 5 5 8 x 3 4 Male Adaptor 6 Hot Water Reducer Downloaded from Cruisers Owners F...

Page 44: ...s 520 Express Series FUEL TANK AND FITTINGS CON T 2 2 3 3 4 5 5 6 6 1 7 9 1 Engine Fuel Filter 2 Elbow 3 Adaptor 4 Genset Fuel Filter 5 Elbow 6 Adaptor Downloaded from Cruisers Owners Forum http www C...

Page 45: ...SSOVER ASSEMBLY 2 2 3 3 3 4 5 6 1 7 5 1 T Shape 6 Port Fuel Valve 2 5 8 x 3 4 Male Adaptor 3 3 8 x 3 8 Male Adaptor 4 5 8 Flarex 1 2 MPT Adaptor 5 Elbow 6 Elbow Downloaded from Cruisers Owners Forum h...

Page 46: ...6 7 8 1 1 7 7 1 Fuel Crossover Assembly 2 Fuel Conditioner Algae X 3 Fuel Conditioner Algae X 4 Bulkhead Mount Crossover Panel 5 Fuel X Over Board Assembly 6 5 8 CE Fuel Hose 7 3 8 CE Fuel Hose 8 1 4...

Page 47: ...FORWARD ENGINE ROOM BULKHEAD 9 16 1 Flood Light 2 Wire Retainer 3 Fuel Crossover Assembly 4 Oil Cooler 5 Battery Switch 6 Oil Changer 7 Battery Charger Downloaded from Cruisers Owners Forum http www...

Page 48: ...es 520 Express Series FRESH WATER LAYOUT 18 1 2 1 3 4 5 6 1 Cockpit Sink 2 Cockpit Ice Maker 3 Aft Shower 4 Washer Dryer 5 Dishwasher 6 Forward Shower Downloaded from Cruisers Owners Forum http www Cr...

Page 49: ...cock 7 Elbow 8 Waste Deck Plate 9 Electric Head Fwd 10 Electric Head Aft 11 Waste Tank Pump out Hose 12 Waste Tank Vent Hose 13 Forward Head Waste Hose 14 Forward Head Fresh Water Hose 15 Aft Head Was...

Page 50: ...te 6 Aft Head Waste Hose 7 Electric Head Aft 8 Forward Head Waste Hose 9 Electric Head Fwd 10 Macerator Pump out Hose 11 Macerator Pump 12 Elbow 13 Seacock 14 Thru Hull 15 Elbow 16 Waste Tank Vent Hos...

Page 51: ...eld Washer 4 3 Fireboy Alarm 4 3 High Water Alarm 4 3 Port Ignition 4 4 Starboard Ignition 4 4 12 Volt Accessory 4 4 Accessory Depth 4 4 Battery Parallel 4 4 Throttle Controls 4 4 Trim Tab Controls 4...

Page 52: ...elm station There are stereo remotes located throughout your yacht to make stereo control easier 7 SEAKEY EMERGENCY PANEL See the SeaKey owner s manual that is included in the Skipper s Kit for a deta...

Page 53: ...he high speed mode Pressing it a third time will turn the wiper OFF and park the wiper The LEDs indicate if the wiper is ON and the speed mode of the wiper 15 WINDSHIELD DEFOG This switch is a toggle...

Page 54: ...or depth finder power will turn OFF 23 BATTERY PARALLEL This is a momentary function that controls the battery parallel solenoid When this button is pressed the battery parallel solenoid is energized...

Page 55: ...3 9 1 Compass 2 Rudder Angle Indicator 3 Fuel Gauges Port Starboard 4 Depth Finder 5 Air Conditioner Heater Ducts 6 Stereo Remote 7 SeaKey Emergency Panel 8 Volvo Display Screen 9 Dash Stereo Download...

Page 56: ...13 Port Wiper 14 Starboard Wiper 15 Windshield Defog 16 Windshield Washer 17 Fire Suppression Display Unit 18 High Water Alarm 19 Port Ignition 20 Starboard Ignition 21 12 Volt Accessory 22 Accessory...

Page 57: ...When the switch is pressed the fans will turn ON When the opposite end is pressed the fans will turn OFF 5 WINDLASS This switch is a toggle action switch that controls the windlass Pressing the UP or...

Page 58: ...ILGE PMP FWD BILGE PMP BOARDING LIGHTS SPREADER LIGHTS ENGINE RM FANS WINDLASS CSR500 002 1 Dimmer 2 NAV Anchor Lights 3 Engine Room Lights 4 Engine Room Fans 5 Windlass 6 Horn 7 Cockpit Lights 8 Boar...

Page 59: ...er Panel 5 8 DC Panel Circuit Breaker Functions 5 10 DC Panel 5 12 AC Electrical System 5 13 AC Master Panel 5 13 AC Panel Circuit Breaker Functions 5 15 US Stds 5 17 Intl Stds 2 30 Amp 220 Volts 5 18...

Page 60: ...xceeds specified limits Engine oil pressure drops below specified limits Transmission oil temperature exceeds specified limits Ignition switches are ON engines are OFF To test the alarm system turn th...

Page 61: ...e time out period if no engine rotation occurs The engine ignition circuits that are ON at this time will automatically be turned OFF Transmission Through a series of gears the transmission transmits...

Page 62: ...cutlass bearing is water lubricated Running the propeller out of the water could result in bearing failure and damage to the shaft The propeller shaft is supported on the outside of the hull by a str...

Page 63: ...ith a smaller pitch will increase RPMs If RPMs are high a propeller with an increased pitch will lower RPMs Second ensure that the propeller rotation is consistent with engine and gear box rotation Yo...

Page 64: ...ely if you suspect a problem Operating the yacht with a malfunction steering system could cause injury or death Your yacht is equipped with hydraulic steering The rotation of the steering wheel result...

Page 65: ...AL SYSTEM Your yacht is equipped with two electrical systems a battery powered direct current DC system and a generator or shore powered alternating current AC system Both systems are controlled from...

Page 66: ...ds in identifying wire functions for troubleshooting Battery cables are identified by labels on both ends of each cable A bonding wire is extended through a 6 green wire from the bonding strip to a te...

Page 67: ...llowing page s to familiarize yourself with the DC systems on your yacht DANGER A glowing red polarity light indicates a reversed polarity electrical shock hazard exists and damage to appliances will...

Page 68: ...the ON position to send power to the toilets and waste tank indicators Put the breaker switch in the OFF position to remove power from these devices The toilets will not flush when their respective ci...

Page 69: ...antenna The TV antenna will not work unless the circuit breaker is ON COCKPIT STEREO Put the breaker switch in the ON position to send power to the cockpit stereo located above the starboard cockpit...

Page 70: ...0A 15A MACERATOR FRESH WTR PUMP AFT HEAD PUMP FWD HEAD PUMP LTS STBD HEAD LTS PORT HEAD LTS MSR LTS FSR OFF OFF OFF OFF OFF OFF OFF OFF 12 8 DC VOLTS 18 16 24 SHOWER SUMPS GALLEY SHORE RETRACT REFRIG...

Page 71: ...For dockside power move the slide protector over the generator breaker and turn on the dockside breaker For generator power move the slide protector over the dockside breaker and turn on the generato...

Page 72: ...UTION DO NOT turn the DOCKSIDE 240 120V AC breaker on if the REVERSED POLARITY light is ON Severe damage to the electrical system could result Disconnect the cable and have the fault corrected by a qu...

Page 73: ...he unit Refer to owner s manual for operating instructions CENTRAL VACUUM To operate the central vacuum place the circuit breaker in the ON position Move the breaker to the OFF position to turn the ce...

Page 74: ...ker ON when running any AC HEATER BATTERY CHARGER To operate the battery charger place the circuit breaker in the ON position The battery chargers provide automatic battery charging They generate 24V...

Page 75: ...15A DOCKSIDE 240 120 VAC GENERATOR 240 120 VAC 15A 15A 15A 15A 15A ELECTRICAL SHOCK HAZARD EXISTS AND DAMAGE TO APPLIANCES DISCONNECT THE SHORE CORD AND HAVE THE SHORE OUTLET WILL OCCUR DO NOT USE SHO...

Page 76: ...50 DOCKSIDE 220 VAC POWER SOURCE AVAILABLE GENERATOR 220 VAC 10A 15A 20A 20A POLARITY A GLOWING RED POLARITY LIGHT INDICATES REVERSED POLARITY SERVICED BY A QUALIFIED ELECTRICIAN BEFORE USING WILL OCC...

Page 77: ...actuate circuit breakers GALVANIC ISOLATORS The Galvanic Isolator s installed in Cruisers Yachts comply with the ABYC A 28 standard Section A 28 13 requires status monitoring of the galvanic isolator...

Page 78: ...ll the fresh water tank approximately halfway of potable water 2 Turn the FRESHWATER PUMP breaker ON 3 Open the cold water galley faucet to allow air to escape Close the faucet when a steady flow of w...

Page 79: ...Waste Holding Tank Waste is pumped from the head through a sanitary waste hose to the top portion of the holding tanks A 1 1 2 sanitary waste hose is attached to the bottom of each tank and runs to th...

Page 80: ...d and aft waste tanks In this configuration all waste is flushed from the head to the holding tank You are able to use either the pumpout feature by using the deckplate or the macerator to pump waste...

Page 81: ...R DIVERTER VALVE CORRECT HOOKUP FOR SECOND TOILET TANKWATCH LEVEL INDICATOR HOLDING TANK SEALAND VENT FILTER DOCKSIDE PUMPOUT T SERIES DISCHARGE PUMP SEACOCK VENT FITTINGS CSR173 57 Downloaded from Cr...

Page 82: ...of the bilge to make sure the pumps are operating properly is a necessity The pumps can be operated manually or left in the automatic mode CAUTION DO NOT allow pump to run after all the water has bee...

Page 83: ...hdown 6 2 Courtesy Lights 6 3 Covers 6 3 Refrigerator Freezer 6 3 Wet Bar 6 3 Stove 6 3 Trim Tabs 6 3 Windlass System 6 4 Function of Clutch 6 4 Lowering the Anchor Under Power 6 4 Raising the Anchor...

Page 84: ...C panel is switched ON To turn ON the battery chargers put the BATTERY CHARGER and the optional BOW THRUSTER BAT CHARGER circuit breakers at the AC DC panel in the ON position For further information...

Page 85: ...generator operation To operate the ice maker the fresh water system must contain water and the FR WATER PUMP circuit breaker on the DC Master Panel and the ICE MKR circuit breaker on the AC Master Pa...

Page 86: ...rranty CSR173 43 TRIM TAB TRIM TAB ZINC PLATE WARNING When the Isolator Switch is ON the system can be activated at either the remote or the foot switches When system is not being used ensure that the...

Page 87: ...ne inlet plug located on the starboard transom Telephone jacks are conveniently located throughout the yacht Oil Change System SYSTEM START UP PROCEDURES When starting the system for the first time ai...

Page 88: ...tor control switch to the OFF position when crankcase is empty and place the fail safe switch in the OFF position Draining the Starboard Engine 1 Repeat each of the steps outlined in Draining the Port...

Page 89: ...position 3 Once the transmission is emptied return the pump motor control switch to OFF position and place the fail safe switch in the OFF position Return the externally mounted valve handle to OFF po...

Page 90: ...and direct the arrow shaped tip to PORT ENGINE 4 Flip the pump motor control switch on the system to the FILL position The pump will start immediately and you will observe the oil moving through the c...

Page 91: ...tained Secondary Filter It is important that this filter be kept clean to obtain maximum power from your system Filter can be cleaned using a mild detergent and allowed to air dry before replacing Thi...

Page 92: ...g CSR173 51 Dusting Brush Use it for doing all of your dusting This tool has a replaceable brush Hose The hose is lightweight flexible and crush proof It springs back to original shape DO NOT store in...

Page 93: ...ations for the U S and other countries Switching the Area Change Outside U S New Setting While pressing the BAND button press the LEFT button then Outside U S will be selected Inside U S Standard Init...

Page 94: ...6 12 520 Express Series 520 Express Series Downloaded from Cruisers Owners Forum http www CruisersOwnersForum com...

Page 95: ...UCTIONS 7 2 Pre Start Checklist 7 2 Starting Diesel Engines 7 2 Stopping Diesel Engines 7 3 Fueling 7 4 Suggested Maneuvering Techniques 7 5 Dropping and Weighing Anchor 7 8 Towing the Yacht 7 9 Downl...

Page 96: ...ly Check all electrical components such as the horn lights and bilge pump to be sure they are in proper working order Move shift control levers is to the NEUTRAL position Operate the bilge blowers for...

Page 97: ...nd engine IMPORTANT The second engine may be difficult to hear when it starts due to the noise of the first engine Observe the tachometer of the second engine When the RPMs jump up release the key swi...

Page 98: ...e stations Approved venues have safeguards in place to lessen the likelihood of static discharge Read and follow ALL warnings on the pump or in the vicinity of the pump Maintain contact between the fu...

Page 99: ...forces to your advantage when maneuvering do not fight them Proceed Slowly Give yourself time to think react and maneuver Have the Crew Standing By Make sure the crew is ready with fenders boat hook...

Page 100: ...and moving shift levers between FORWARD and NEUTRAL STARBOARD TURN SLOWER PROP PORT TURN SLOWER PROP CSR 159 17A SHARP AND CLOSE QUARTERS TURNS A sharp turn can be achieved by putting one shift lever...

Page 101: ...ull throttle should get the yacht over the hump and into a planing attitude Once you are over the hump and at a comfortable plane move the throttle control back to 2 3 to 3 4 throttle a more fuel effi...

Page 102: ...it should be done neatly and each coil put around or on top of the previous coil so the line can be fed out smoothly when anchoring To weigh pull in anchor it is recommended to have the engines runnin...

Page 103: ...TO 7 TIMES DEPTH OF WATER Use a double braided nylon rope Some synthetic fiber ropes stretch too much Make a bridle for each craft towing and towed by putting a rope completely around the hull If you...

Page 104: ...7 10 520 Express Series 520 Express Series Downloaded from Cruisers Owners Forum http www CruisersOwnersForum com...

Page 105: ...urs 8 5 Every 100 Hours 8 7 Monthly 8 7 Quarterly 8 8 Annually 8 9 Additional Pre Launch Checklist 8 10 GENERAL MAINTENANCE 8 12 Power Train 8 12 DC Electrical System 8 13 Fresh Water System 8 13 Bilg...

Page 106: ...ulation of debris 2 Check exhaust system for leaks 3 Check seacocks for leaks 4 Check propeller shaft logs for water entry 5 Check fuel system lines and connections for leaks 6 Check battery charge Ev...

Page 107: ...is buildup which can clog the strainer and cause a system failure If strainer needs to be cleaned do the following a Close appropriate seacock STRAINER COVER STRAINER CONTAINER HOSE CONNECTION POINT C...

Page 108: ...ge is apparent take your yacht to a Cruisers Yachts Dealer for immediate service CHECK PROPELLER SHAFT LOG FOR WATER ENTRY 1 Operate yacht at cruising speed 2 Inspect propeller shaft at shaft log This...

Page 109: ...ting to service filter 1 Grab filter housing at bottom and unscrew from cover 2 Remove screen from housing and flush with clean water Use a brush to remove any sediment 3 Return screen to housing bott...

Page 110: ...FOR LOOSENESS CHECK FOR LOOSENESS CHECK FOR LOOSENESS CYLINDER CONNECTING ARM CONNECTING ARM SET SCREW HYDRAULIC LINES SET SCREW CHECK FOR LOOSENESS TIE BAR COTTER PIN COTTER PIN CSR173 41 RUDDER ANGL...

Page 111: ...ystem and replace defective hoses tubes and clamps See your Cruisers Yachts Dealer for parts and service CLEAN BILGE Refer to BILGE in this section Monthly LUBRICATE AIR HORN COMPRESSOR 1 The compress...

Page 112: ...or more frequently if needed Always change zinc anode when approximately 40 of the anode is gone DO NOT paint or apply any type of sealant on the anode Quarterly CHECK HYDRAULIC STEERING SYSTEM OIL LE...

Page 113: ...ow replenish the oil by removing plastic cover by unscrewing center screw Remove plug from fill tube and use a funnel with a tube to add lubricating oil Fill only until oil reaches the full line indic...

Page 114: ...e and propeller shaft alignment done as soon as possible Additional Pre Launch Checklist OUT OF THE WATER Inspect and lubricate seacocks Hoses andhoseclampsshouldbeinspectedand replaced as necessary R...

Page 115: ...blockage If stored with full fuel tanks we recommend adding Stabil or some type of Isopropyl additive to reduce moisture in gasoline powered boats IN THE WATER Check the engine shaft and rudder stuffi...

Page 116: ...e any small burrs on tapered end of propeller shaft using a honing stone 2 Apply a thin layer of Prussian Blue blueing compound on the tapered section of the shaft 3 Slide the propeller on the shaft a...

Page 117: ...the engine compartment DC Electrical System CHARGE BATTERIES The standard batteries furnished by Cruisers Yachts are MAINTENANCE FREE Follow the battery manufacturer s recommendations for proper maint...

Page 118: ...occurs and causes a film or sheen on or discoloration of the surface of the water or causes an emulsion or sludge beneath the surface of the water the violators are subject to a penalty of 5 000 Noti...

Page 119: ...paint must be allowed to escape completely to get good adhesion between the new and old paint Also allow sufficient drying time before launching your yacht follow paint manufacturer s suggestions Gene...

Page 120: ...e ultimate marine fabric Haartz engineers have expertly waterproofed Sunbrella the premier woven acrylic fabric by combining it with a textured marine grade vinyl This design offers the best of both w...

Page 121: ...n deteriorate sewing threads This method of cleaning may remove part of the water repellency and the fabric should receive an application of an air curing water repellent treatment such as Barpellent...

Page 122: ...8 18 520 Express Series 520 Express Series Downloaded from Cruisers Owners Forum http www CruisersOwnersForum com...

Page 123: ...Storage and Extended Lay Up STORAGE FOR EXTENDED LAY UP 9 2 Lifting and Storing Your Yacht 9 2 Transporting 9 3 Winterization 9 3 Fitting Out After Storage 9 6 Downloaded from Cruisers Owners Forum h...

Page 124: ...x inches and a capacity rating high enough to support the yacht Spreader bars reduce the side pressure at the yacht s sheer line and prevent distortion or damage to the deck or gunwale molding Put sli...

Page 125: ...your yacht Arrange for any permits and escorts as required Disconnect and remove batteries to prevent accidental sparks and spilled electrolyte Empty fuel tanks to prevent fuel fumes spilling and pos...

Page 126: ...antifreeze c If equipped with macerator discharge and the yacht is removed from the water operate macerator pump just long enough so antifreeze runs through pump and lines 9 Air Conditioning System a...

Page 127: ...and seacock drain plugs to prevent damage from freezing 16 Batteries a Be sure the master battery switch is in the OFF position Remove batteries from the yacht and store in a nonfreezing area b Put b...

Page 128: ...ioration Replace defective parts immediately 6 Batteries a Make sure battery or batteries are fully charged and the electrolyte level is approximately 1 2 inch 12 mm above the internal plates b Clean...

Page 129: ...nching the yacht This will allow time to check hull for any leaks and correct the problem before the yacht is swamped 14 After yacht has been launched check engine to shaft alignment Refer to POWER TR...

Page 130: ...9 8 520 Express Series 520 Express Series Downloaded from Cruisers Owners Forum http www CruisersOwnersForum com...

Page 131: ...Section 10 Troubleshooting TROUBLESHOOTING 10 2 Engine and Power Train 10 2 Electrical 10 5 Electrical Troubleshooting General Notes 10 6 Plumbing 10 6 Downloaded from Cruisers Owners Forum http www...

Page 132: ...n burns and or severe loss of blood resulting in serious injury or death Keep all machinery guards in place when machinery is operating PROBLEM POSSIBLE CAUSE SOLUTION Engine will not start Fuel valve...

Page 133: ...ve vibration Note Some vibration is normal due to engine and propeller action Foreign objects obstructing the propeller Bent propeller or shaft Engine and shaft are misaligned Engine or transmission c...

Page 134: ...ller Damaged or using wrong propeller Yacht hull has marine growth on it or hull is damaged Excessive water in bilge Engine is misaligned Reduce overload or distribute load evenly Trimming the yacht w...

Page 135: ...tripped correct the problem and reset otherwise turn circuit breaker ON Charge battery Connect or repair wire as necessary Install plug in outlet Lights do not come on or are dim Circuit breaker in t...

Page 136: ...the Customer Service Department at Cruiser Yachts if electrical documentation is needed Plumbing NOTE For any troubleshooting information other than given here refer to the individual components owner...

Page 137: ...utomatic switch is defective If the breaker is tripped correct the problem and reset otherwise turn circuit breaker to ON Remove obstruction or straighten line Service pump See Cruisers Yachts Dealer...

Page 138: ...10 8 520 Express Series 520 Express Series Downloaded from Cruisers Owners Forum http www CruisersOwnersForum com...

Page 139: ...ubjected to improper operation trailering maintenance or storage commercial use or use for purposes other than those for which the boat was designed 3 Defects or damages caused by a force or impact wh...

Page 140: ...Downloaded from Cruisers Owners Forum http www CruisersOwnersForum com...

Reviews: