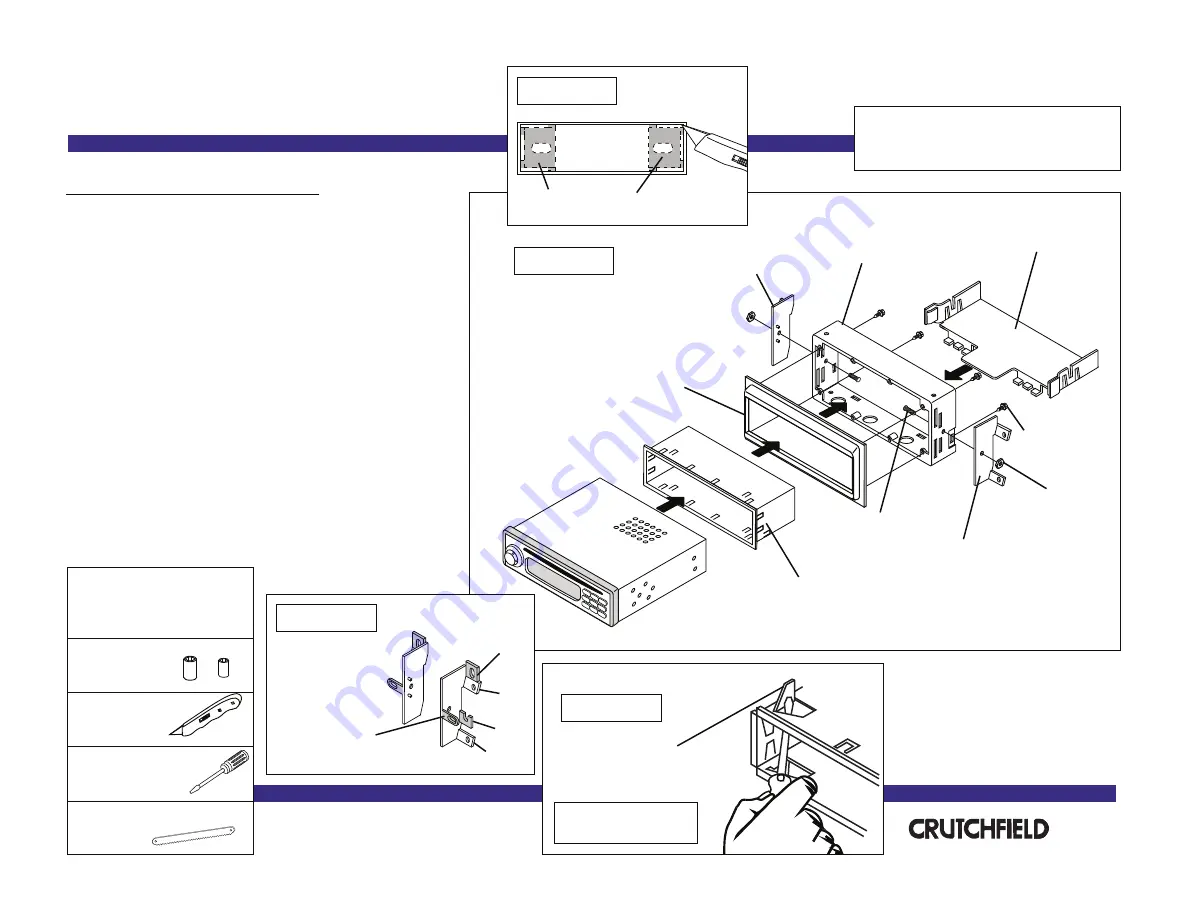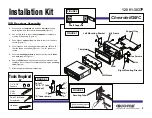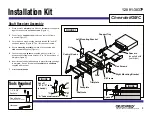
FIGURE 2
Shaft Supports
Installation Kit
120 91-3037P
1.
Press posts on
trimplate
into holes on
kit frame
to snap
parts together and secure with
hex screws
(Figure 1).
2.
Use a utility knife to cut out
shaft supports
in trimplate to
create a DIN opening (Figure 2).
3.
Push clips on
support tray
into slots on rear of kit frame to
secure (Figure 1).
4.
Cut off tabs on both mounting brackets labeled
“B”
and
“C”
that are shown as shaded (Figure 3). The
“A”
tabs must
remain.
5.
Secure
mounting brackets
to sides of kit frame with
studs
and
nuts
supplied (Figure 1).
6.
Remove
DIN sleeve
from receiver and slide into opening in
trimplate. Secure sleeve to trimplate by bending the
securing
tabs
(Figure 4).
7.
Slide receiver into sleeve/kit assembly.
DIN Receiver Assembly
2
®
Copyright 2003 Crutchfield Corporation
Securing Tabs
DIN Sleeve
Bend tabs after sleeve
is inside assembly.
FIGURE 1
Trimplate
Kit Frame
Support Tray
Left Mounting Bracket
Stud
Nut
Right Mounting Bracket
FIGURE 4
Hex Screws
Tools Required
Utility
Knife
▲
Small Flat Blade
Screwdriver
1/4” & 3/8”
Sockets
Hacksaw
Chevrolet/GMC
FIGURE 3
Cut off
“B” & “C” tabs
(shaded)
“C”
“B”
“B”
“A” tabs remain
“A”
“A”


